# Analytics and Reports
Visit analytics, 5651 logs, audit logs and reports
# Visit Analytics
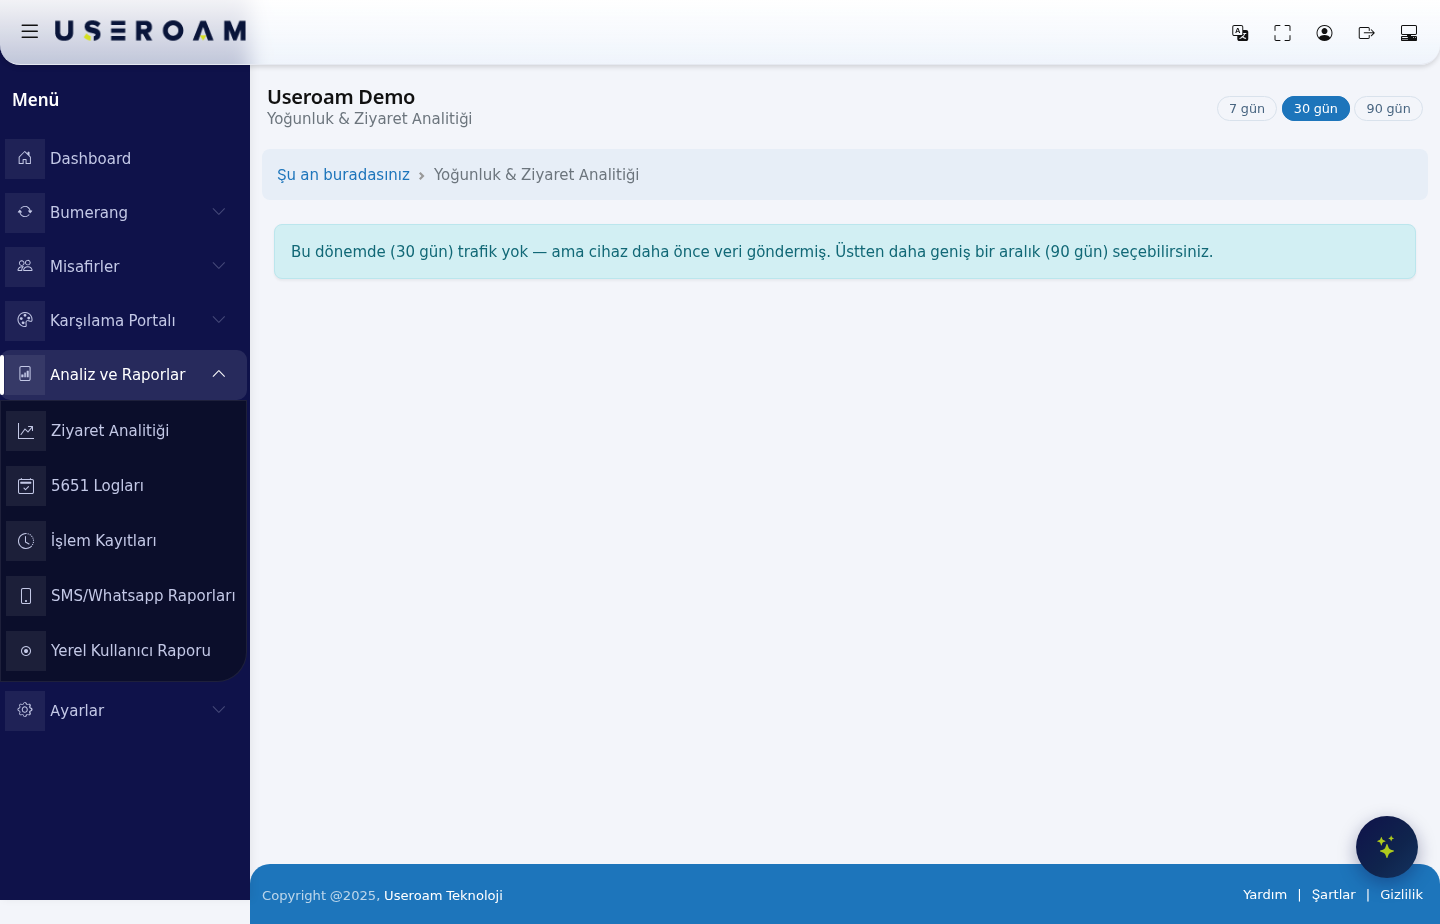
Traffic & Visit Analytics shows how your guest traffic moves over time: which days and hours are busy, how many unique visitors arrive, and how many of them return. It is the page you use for staff planning and for choosing when to send campaigns.
> **How do I open this screen?** From the left menu, go to **Analytics and Reports → Visit Analytics**.
>
> **Note:** this screen's labels are still shown in Turkish; the on-screen text is given in brackets.
---
## Choosing the period
Three period buttons sit at the top of the page: **7 days** (*7 gün*), **30 days** (*30 gün*) and **90 days** (*90 gün*). The range you pick refreshes every chart on the page together. The default is 30 days.
- **7 days:** to see the weekly rhythm — which day is busy, how different the weekend is.
- **30 days:** for the general trend and the effect of campaigns.
- **90 days:** to see seasonal movement and longer-term growth.
---
## What you see when there is no data
If there was no traffic in the selected period, the page says so explicitly:
> *"There was no traffic in this period (30 days) — but the device has sent data before. You can select a wider range (90 days) above."*
This message lets you tell two situations apart: **the device has never sent data** (an installation or log-flow problem) versus **the device has sent data but there was no traffic in this period** (a genuinely quiet stretch). In the second case, simply widen the range.
**If no data arrives at all:** check the *5651 live log stream* card on the Dashboard. If it reads "Log data could not be retrieved", the syslog configuration on your firewall may be broken — verify the syslog steps in the **Installation Guides**.
---
## The analyses on this page
- **Visit trend:** the daily movement of unique visitors and sessions in the selected period.
- **New / returning guests:** how much of your traffic is first-time versus returning — the most direct measure of your loyalty work.
- **Hour × day heatmap:** a heat map crossing days of the week with hours, showing your busiest slot.
> **How to use it:** find your busiest slot and schedule campaign sends one to two hours before it. You can fill the quiet hours with off-peak offers.
---
> **Related pages:** **Dashboard** (summary figures), **Bumerang → Summary**, **Bumerang → Guest 360°**.
# 5651 Logs
The 5651 Logs page lists and lets you download your **time-stamped and signed** internet access records, kept under Turkish Law No. 5651. These are the files you hand over in the event of an audit or a judicial request.
> **How do I open this screen?** From the left menu, go to **Analytics and Reports → 5651 Logs**.
>
> **Note:** the filters and column headers on this screen are still shown in Turkish; the on-screen text is given in brackets.
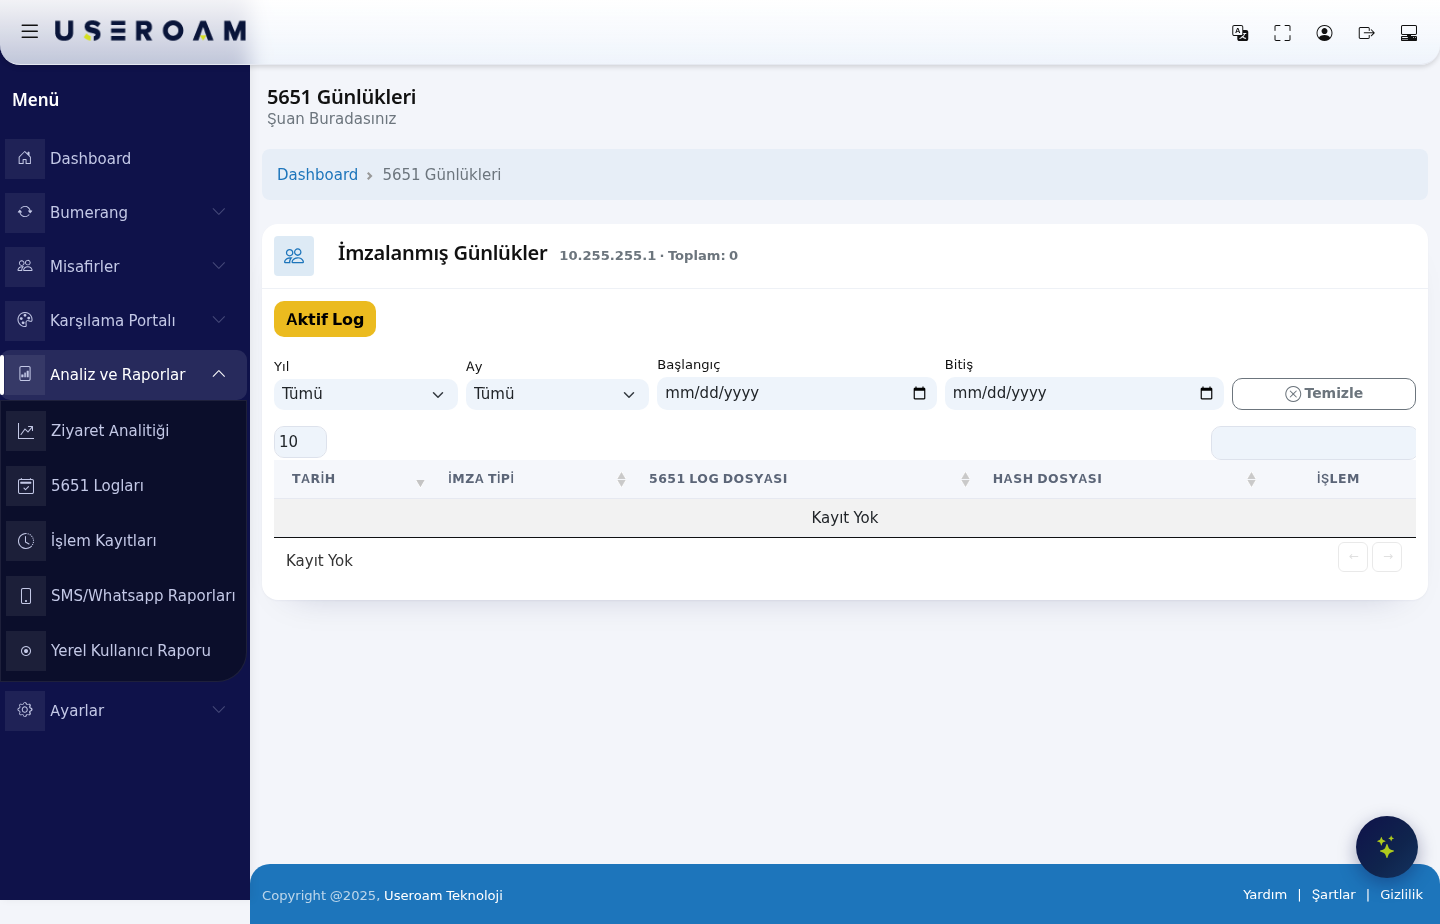
The top of the page shows which device's logs you are viewing and the total record count (for example `10.255.255.1 · Total: 0`).
---
## Filters
- **Active Log** (*Aktif Log*)**:** shows the current, not-yet-signed log file as it accumulates. Use it to check that records are still flowing before the next signing run.
- **Year** (*Yıl*)**:** filters records by year (*Tümü* = all years).
- **Month** (*Ay*)**:** select a month from January to December (*Tümü* = all months).
- **Start** / **End** (*Başlangıç* / *Bitiş*)**:** pick a date range from the calendar. Judicial requests usually name a specific day or a short range, so these two fields see the most use.
- **Clear** (*Temizle*)**:** resets all filters.
---
## Table columns
- **DATE:** the date the log file covers.
- **SIGNATURE TYPE:** the method used to sign the record (time-stamp type).
- **5651 LOG FILE:** the file containing the access records, with its download link.
- **HASH FILE:** the signature file carrying the log file's digest. **The log file alone is not sufficient** — this file proves the record has not been altered, which is why the two are always submitted together.
- **ACTION:** download and related action buttons.
When there are no records, the table shows *"No Record"*.
---
## Navigating the list
The **10 / 25 / 50 / 100 / All** selector at the top left sets records per page, the **search box** at the top right filters instantly, and the arrows below the table move between pages.
---
**Compliance warning:** logs have no legal standing until they are signed. Because the signing process can stop silently, keep the *5651 signing* and *90% capacity* notifications enabled under **Settings → Notifications**. The *5651 signing* card on the Dashboard shows the pending/signed volume and the next signing time.
---
> **Related pages:** **Settings → Notifications**, **Settings → Device Settings** (the 5651 Logging switch), **Installation Guides** (syslog forwarding steps).
# Audit Log
The Audit Log shows **who did what, and when** in the panel. Use it to trace the source of a settings change, review coupon usage, or investigate a suspected unauthorised access.
> **How do I open this screen?** From the left menu, go to **Analytics and Reports → Audit Log**.
>
> **Note:** the filters and column headers on this screen are still shown in Turkish; the on-screen text is given in brackets.
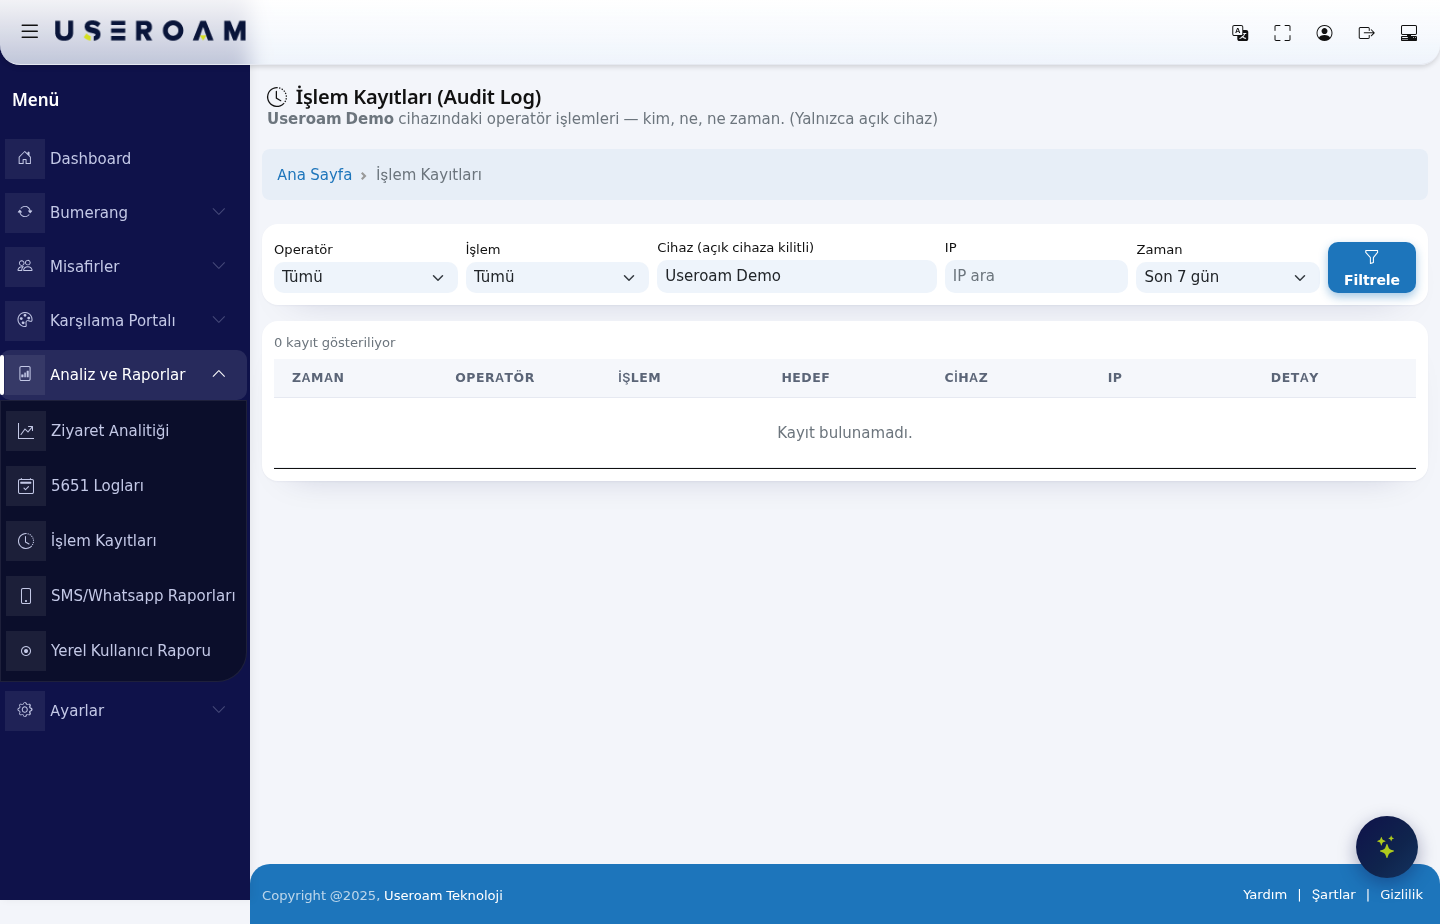
**Scope:** this page shows the actions of the **currently selected device only**. To view another location's records, switch to that device from the **Device Selection** screen first.
---
## Filters
- **Operator** (*Operatör*)**:** the panel user who performed the action. Choose *Tümü* (all) or one of the listed email addresses.
- **Action** (*İşlem*)**:** filters by action type. Recorded types include:
- `captive_portal_update` — captive portal settings updated
- `coupon_check` — coupon looked up
- `coupon_redeem` — coupon marked as redeemed
- `device_create` — a new device added
- `list_logs` — the 5651 log list viewed
- `menu_report`, `otel_report`, `retail_report` — module reports retrieved
- **Device** (*Cihaz*)**:** locked to the open device and cannot be changed.
- **IP:** filters actions coming from a specific IP address — useful when you suspect a sign-in from an unexpected location.
- **Time** (*Zaman*)**:** *last 1 day*, *last 7 days*, *last 30 days*, *last 90 days* or *last year*.
Once you have made your selection, press **Filter** (*Filtrele*). The result count appears above the table as "*0 records shown*".
---
## Table columns
- **TIME:** the date and time of the action.
- **OPERATOR:** the user who performed it.
- **ACTION:** the type of action.
- **TARGET:** the record it was applied to (for example a coupon code or a portal setting).
- **DEVICE:** the device the action was performed on.
- **IP:** the originating IP address.
- **DETAIL:** additional information about the action.
If nothing matches the filter, the page shows *"No records found."*
---
> **In practice:** to answer "why did the portal design change?", set Action to `captive_portal_update` and Time to *last 7 days* — the operator and the timestamp appear straight away.
---
> **Related pages:** **Settings → Administrators** (last login and IP), **Settings → Administrator Profiles** (narrowing permissions).
# SMS / WhatsApp Reports
SMS/WhatsApp Reports give you the list of **guests who registered through the captive portal by SMS or WhatsApp**. Use it to see who registered when, to locate a record when a data-protection request arrives, and to export your guest list.
> **How do I open this screen?** From the left menu, go to **Analytics and Reports → SMS/WhatsApp Reports**.
---
## Choosing the period
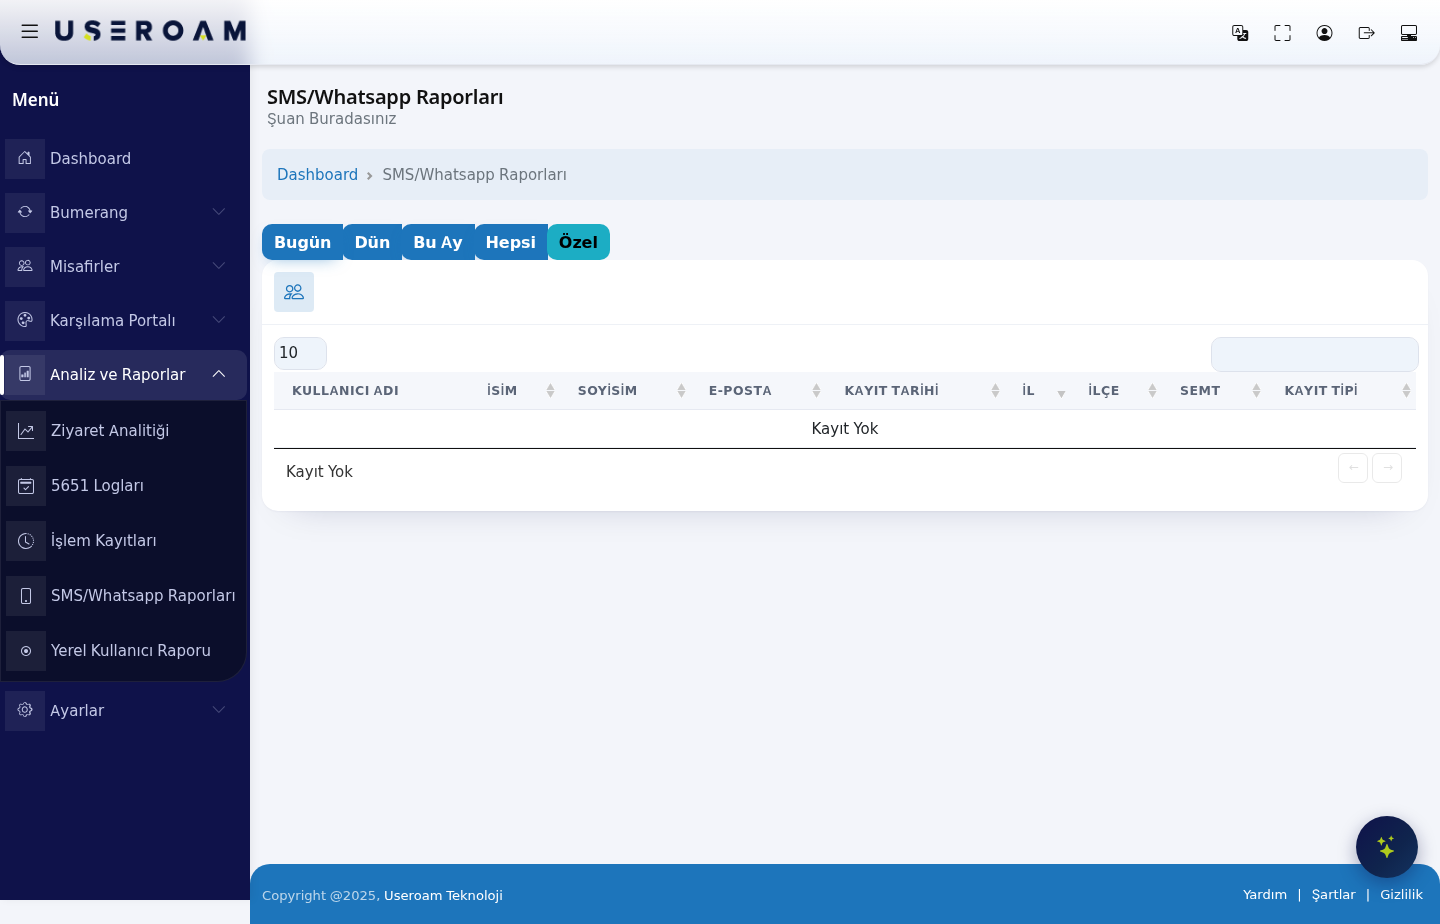
Preset period buttons sit at the top of the page: **Today**, **Yesterday**, **This Month**, **All** and **Custom**.
Selecting **Custom** opens the *Custom Report* section:
- **Start Date** and **End Date:** pick the range from the calendar.
- **Filter Type:** determines what the range applies to — *Registration Date* (when the guest first signed up) or *Last Login* (when they last connected). Use *Registration Date* to measure new-guest acquisition and *Last Login* to find guests who are currently active.
- The **Save** button generates the report.
---
## Table columns
- **USERNAME:** the guest's username in the system (usually their phone number).
- **FIRST NAME** / **LAST NAME:** populated if the name field is enabled on the portal.
- **E-MAIL:** populated if the email field is enabled on the portal.
- **REGISTRATION DATE:** the date and time the guest first registered.
- **PROVINCE** / **DISTRICT** / **NEIGHBORHOOD:** populated if *province/district/neighbourhood selection* is enabled on the portal.
- **REGISTRATION TYPE** (*KAYIT TİPİ*)**:** the channel the guest registered through (SMS or WhatsApp).
> **If columns come back empty:** the corresponding field is set to *Hide* in the portal settings. Set it to *Show* or *Show and require* under **Captive Portal → SMS Portal Settings** (or **WhatsApp Portal**); the data starts filling in for guests who register after the change.
---
## Navigating the list
The **10 / 25 / 50 / 100 / All** selector sets records per page and the **search box** filters instantly across all columns. When there is nothing to show, the table reads *"No Record"*.
---
> **Related pages:** **Guests → SMS / WhatsApp Users**, **Settings → SMS Settings**, **Settings → WhatsApp Settings**.
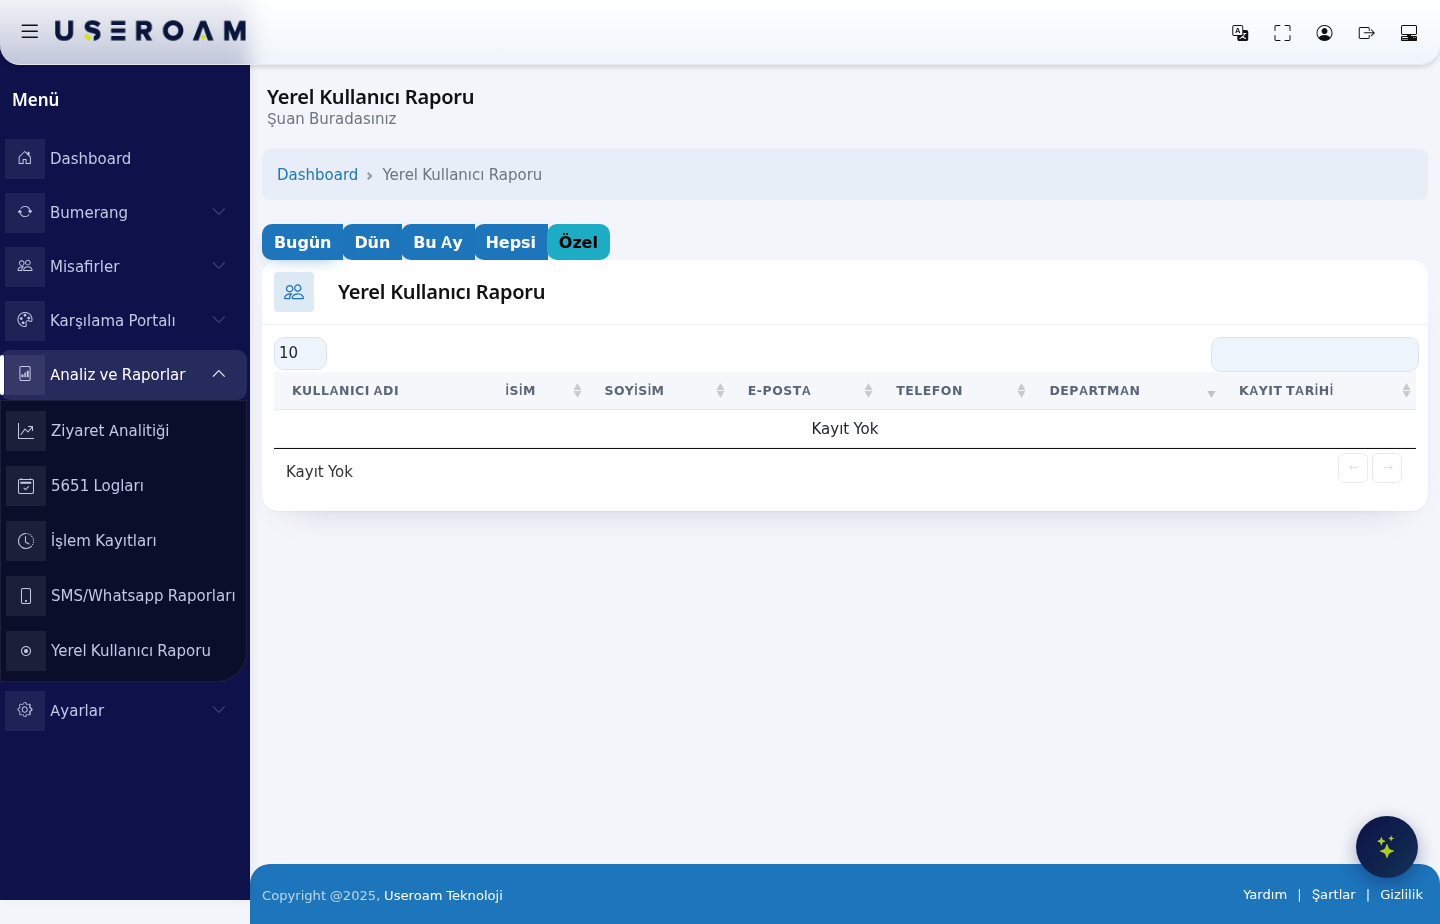
# Local User Report
The Local User Report lists the **local users you create manually in the panel** — not the guests who register through the portal. Accounts opened for staff, employees and long-stay guests appear in this report.
> **How do I open this screen?** From the left menu, go to **Analytics and Reports → Local User Report**.
---
## Choosing the period
Preset period buttons: **Today**, **Yesterday**, **This Month**, **All** and **Custom**.
Selecting **Custom** opens the *Custom Report* section:
- **Start Date** / **End Date:** pick the range from the calendar.
- **Filter Type:** *Registration Date* (when the account was created) or *Last Login* (when the user last connected).
- **Save:** generates the report.
> **Tip:** to clean up dormant accounts, choose a wide range with the *Last Login* type — that is how you spot users who have not signed in for a long time.
---
## Table columns
- **USERNAME:** the account's login name.
- **FIRST NAME** / **LAST NAME:** the user's name.
- **E-MAIL:** the email address on the account.
- **PHONE:** the user's phone number.
- **DEPARTMENT:** the unit the user belongs to. In corporate deployments, use it to break the report down by department.
- **REGISTRATION DATE:** the date the account was created.
When there are no records, the table reads *"No Record"*.
---
## Navigating the list
Use the **10 / 25 / 50 / 100 / All** selector to set records per page, and the **search box** to filter instantly across all columns.
---
> **Related pages:** **Guests → Local Users** (managing accounts), **Guests → New User**, **Guests → Bulk Users**, **Guests → Groups**.
# Hotspot QR Code
The Hotspot QR Poster builds the QR poster you place on tables, walls or menus so guests can join your Wi-Fi in **a single tap**. Scanning the code connects the device to the network and opens the captive portal.
> **How do I open this screen?** From the left menu, go to **Analytics and Reports → Hotspot QR Code**.
>
> **Note:** the field labels on this screen are still shown in Turkish; the on-screen text is given in brackets.
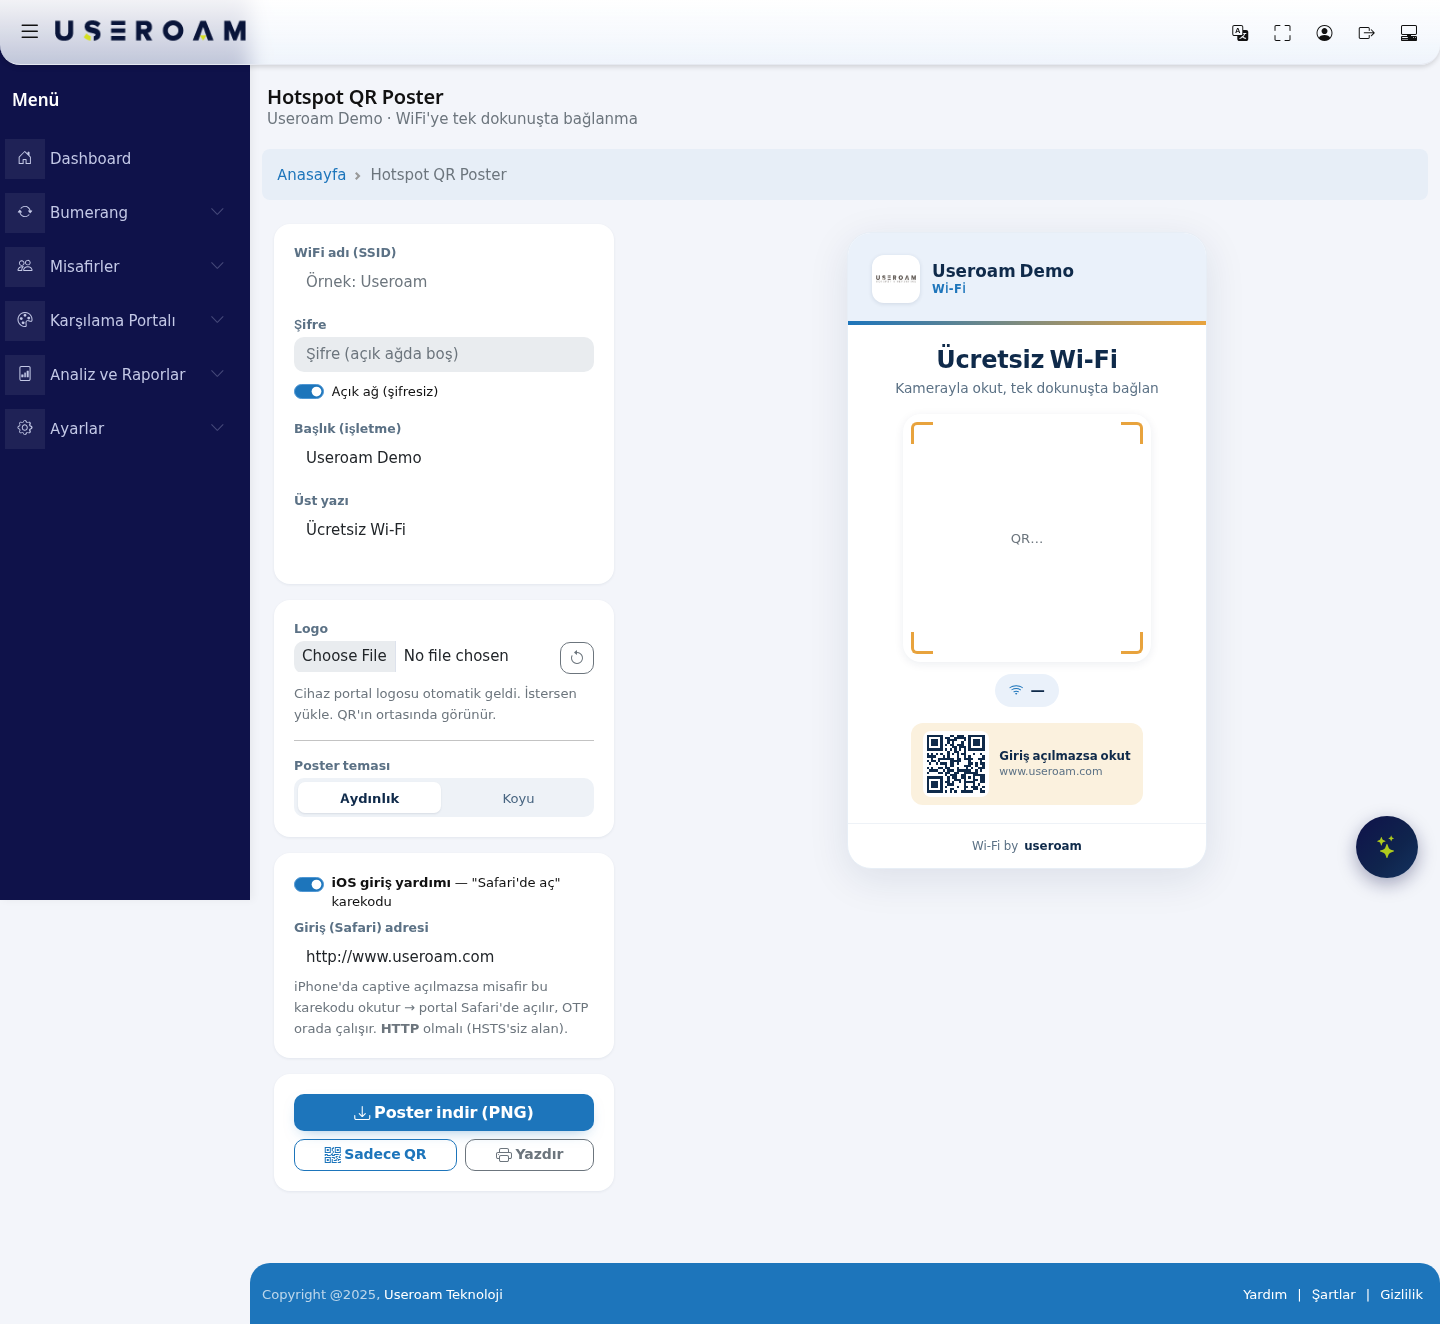
The page has two halves: the **settings** on the left and a **live poster preview** on the right. Every change appears in the preview instantly.
---
## 1. Network details
- **Wi-Fi name (SSID)** (*WiFi adı (SSID)*)**:** the name of your guest network. The QR code is generated from this name — **if it is wrong, the connection will not work**.
- **Password** (*Şifre*)**:** your network password.
- **Open network (no password)** (*Açık ağ (şifresiz)*)**:** tick this if your network has no password; the password field is then disabled.
---
## 2. Poster content
- **Title (business)** (*Başlık (işletme)*)**:** your business name, shown in large type on the poster.
- **Top line** (*Üst yazı*)**:** the short text above the title (for example *"Free Wi-Fi"*).
- **Logo:** the device's portal logo is pulled in automatically; you can upload a different image if you prefer. The logo appears **in the centre of the QR code**.
- **Poster theme:** **Light** (*Aydınlık*) or **Dark** (*Koyu*). Choose according to where the poster will hang — dark works better in dim spaces, light prints better.
---
## 3. iOS login helper
The **iOS login helper — "open in Safari" QR code** option adds a second QR code for the cases where the captive screen does not open on iPhones.
- **Login (Safari) address:** when the guest scans this code, the portal opens directly in Safari and the one-time code (OTP) works there.
**Important:** this address **must be HTTP** (a domain without HSTS). If you enter an HTTPS address, the iOS redirect will not work.
---
## 4. Output
- **Download poster (PNG):** downloads the whole design as an image, ready for print or a digital screen.
- **QR only:** downloads just the QR code, for placing into your own menu or poster design.
- **Print:** sends the poster straight to the printer.
> **Embedding Wi-Fi in QR codes:** if you want menu and hotel QR codes to connect the device automatically when scanned, enable *Embed Wi-Fi in QR codes* on the **Captive Portal → Portal Settings** page.
---
> **Related pages:** **Captive Portal → Portal Settings** (SSID/password and QR embedding), **Restaurant Solution → Online Menu**.