
Store & QR Registration
Store & QR Registration manages your retail store's digital customer registration page and the QR points inside the store. A customer scans the code in the window, the fitting room or at the till, fills in a short form, and is added to your customer list.
How do I open this screen? From the left menu, go to Bumerang → Retail → Store & QR Registration.
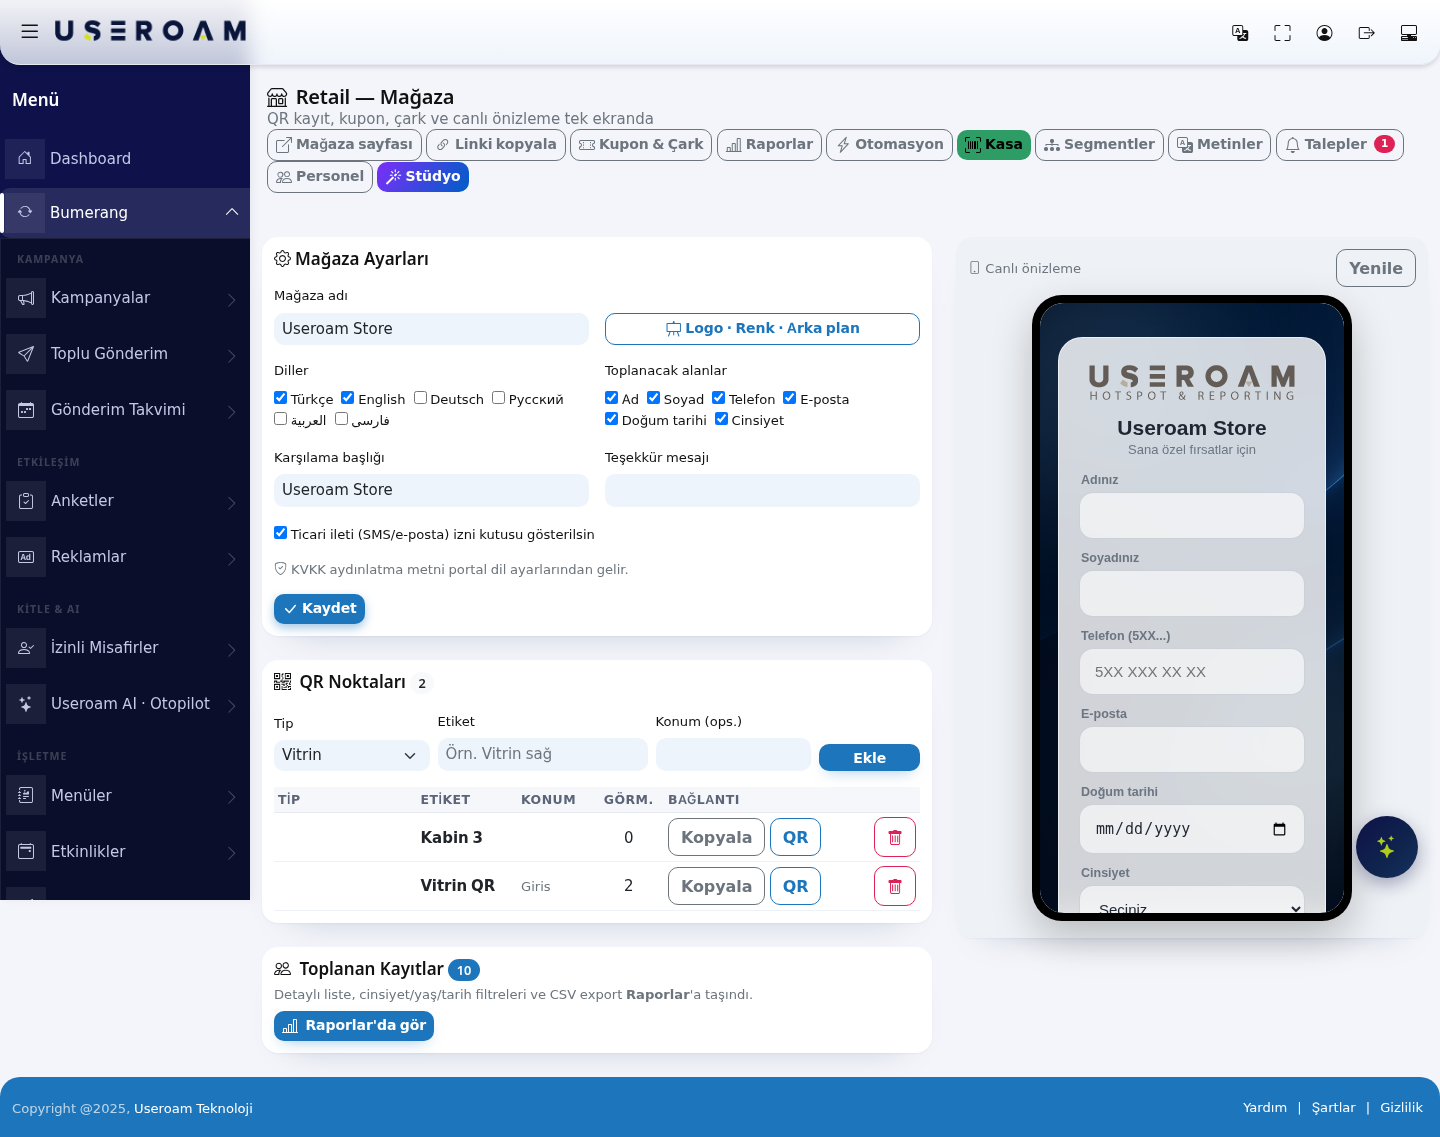
The top bar links to every screen in the module: Store page, Copy link, Coupons & Wheel, Reports, Automation, Till, Segments, Texts, Requests, Staff and Studio.
1. Store Settings
- Store name: the name shown on the page the customer sees.
- Logo · Colour · Background: edits the visual identity (takes you to the Studio).
- Languages: the languages the page is offered in — Türkçe, English, Deutsch, Русский, العربية, فارسی.
- Fields to collect: choose what the form asks for: First name, Last name, Phone, Email, Date of birth, Gender.
The more fields you add, the lower the completion rate. Phone plus first name is usually enough; only ask for date of birth if you actually plan to run a birthday campaign.
- Welcome heading: the heading above the form.
- Thank-you message: the text shown after the form is submitted.
- Show the commercial-message (SMS/email) consent box: when enabled, the customer is asked for marketing consent. This consent is required before you can send campaigns.
Data-protection text: the disclosure text comes from Portal Language Settings; it is not written again on this screen.
Confirm your changes with Save.
2. QR Points
You can define several QR codes inside the store and measure each one's performance separately. To add a point:
- Type: Window, Entrance, Fitting Room, Aisle / Shelf, Till or General.
- Label: a name to tell it apart (for example "Cabin 3").
- Location (optional): where it sits in the store.
- Add saves it.
Table columns: TYPE, LABEL, LOCATION, VIEWS (how many times the code was opened) and LINK. Each row carries Copy (puts the link on the clipboard) and QR (downloads the code) buttons.
Why separate points? The view counts show which location actually works. If the window QR is never scanned, you need to move it or make it bigger.
3. Collected Records
Shows the total number of records and how many of them gave commercial-message consent. The detailed list, the gender/age/date filters and CSV export have moved to the Reports screen — use the See in Reports link to get there.
4. Live preview
The page as the customer will see it is shown live on the right. Use Refresh to update it.
Related pages: Retail → Coupons & Wheel, Segments, Reports, Store Texts, Retail Studio.