
Portal Settings
Portal Settings
The Captive Portal is the welcome screen your guests see before connecting to Wi-Fi. On this page you set its appearance, which details are required to log in, and the legal texts.
How do I open this screen? From the left menu, go to Captive Portal → Portal Settings.
The page has three tabs: General Settings, Theme Settings, and Ads. The Preview on the right shows every change instantly — you see how it looks without saving. Use the phone / tablet / desktop icons to check how it appears on different devices.
1. General Settings
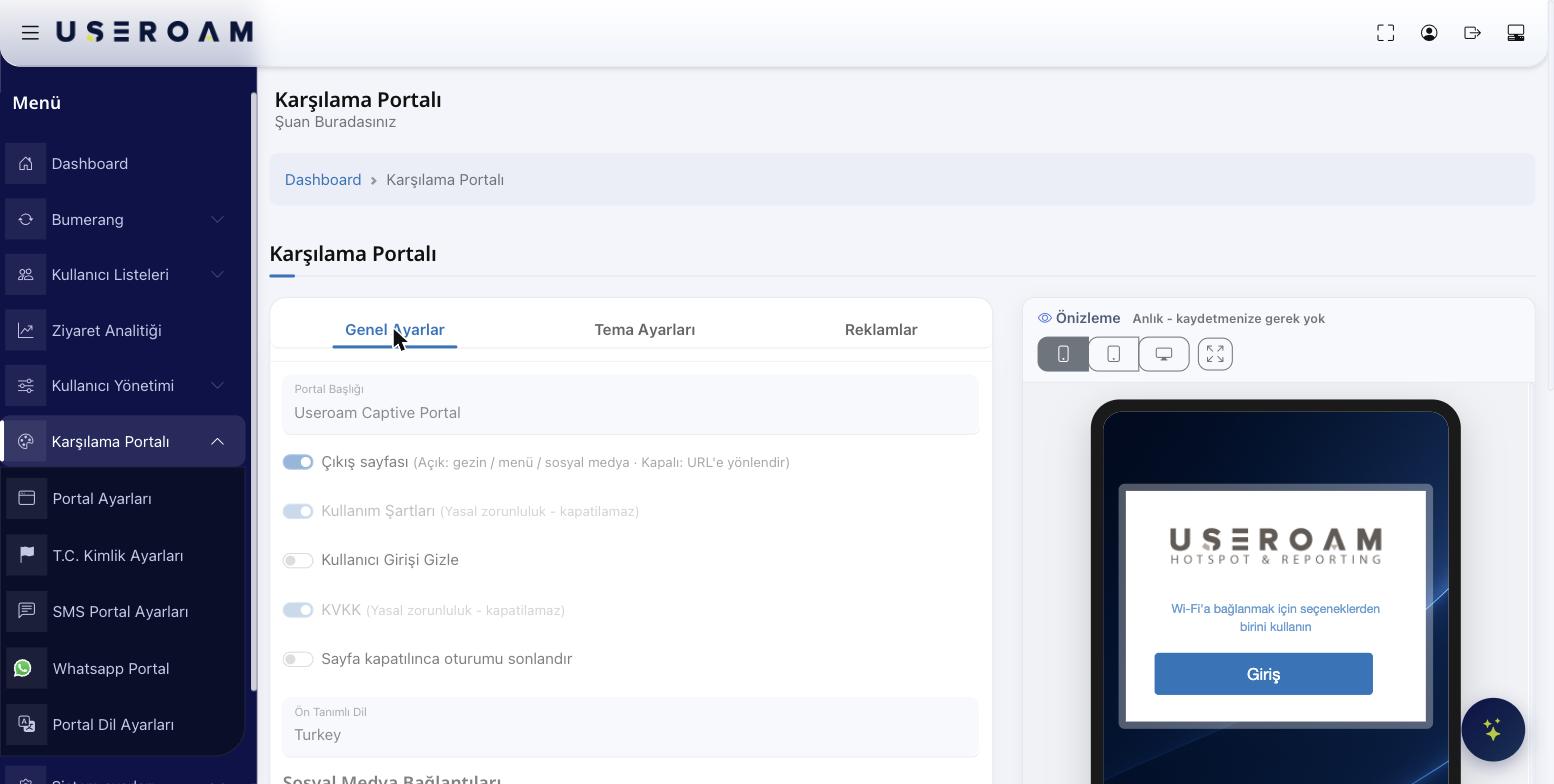
Here you define the portal's basic behaviour.
- Portal Title: The text shown at the top of the welcome screen, e.g. your business name.
- Exit page: When on, the guest sees your menu / social media after logging in. When off, they are redirected straight to a web address you choose.
- Terms of Use: The usage text the guest must accept at login. Legally required, cannot be turned off.
- Hide User Login: Turn on to hide the login form (for special scenarios).
- KVKK (Data Protection): The personal-data consent text. Legally required, cannot be turned off.
- End session when page is closed: Turn on if you want the guest disconnected when they close the page.
- Default Language: The language the portal opens in.
Wi-Fi Connection (for QR): Enter your Wi-Fi network name (SSID) and password (if any) so guests can connect with one tap by scanning a QR code. If you enable "Embed Wi-Fi into QR codes", guests connect automatically when they scan a menu or hotel QR code.
After making changes, don't forget to press the Save button at the bottom.
2. Theme Settings
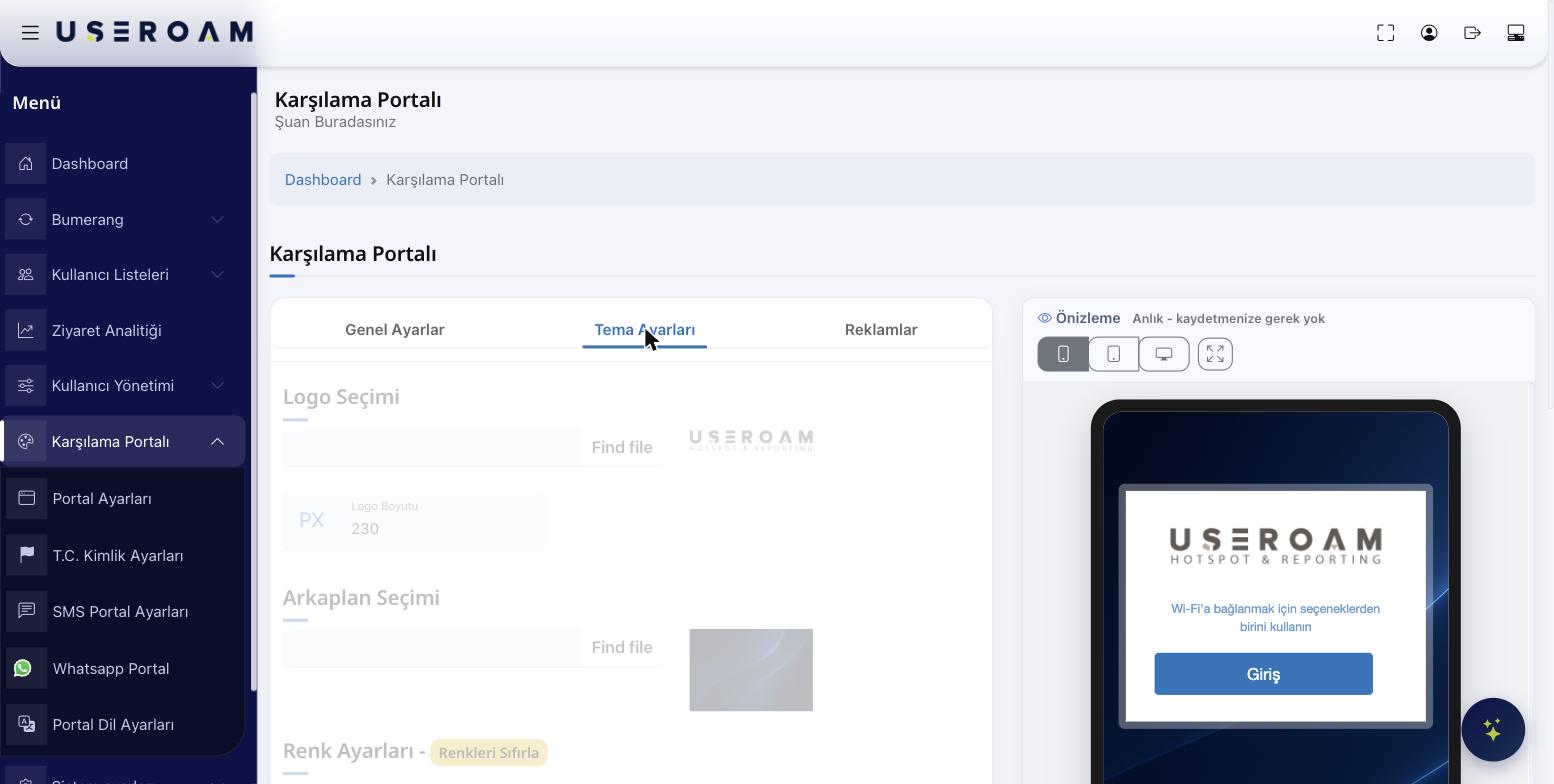
Here you match the portal's look to your brand.
- Logo Selection: Upload the logo shown on the welcome screen (Find file to choose a file).
- Logo Size: Set the logo size in pixels (PX).
- Background Selection: Upload the background image.
- Color Settings: Choose the colors below to match your brand. Use Reset Colors to return to defaults.
- Login Box Color
- Button Hover Color
- Button Color
- Button Text Color
- Link Color
- Text Color
Use the Preview on the right to see the colors instantly. Press Save when you're happy.
3. Ads
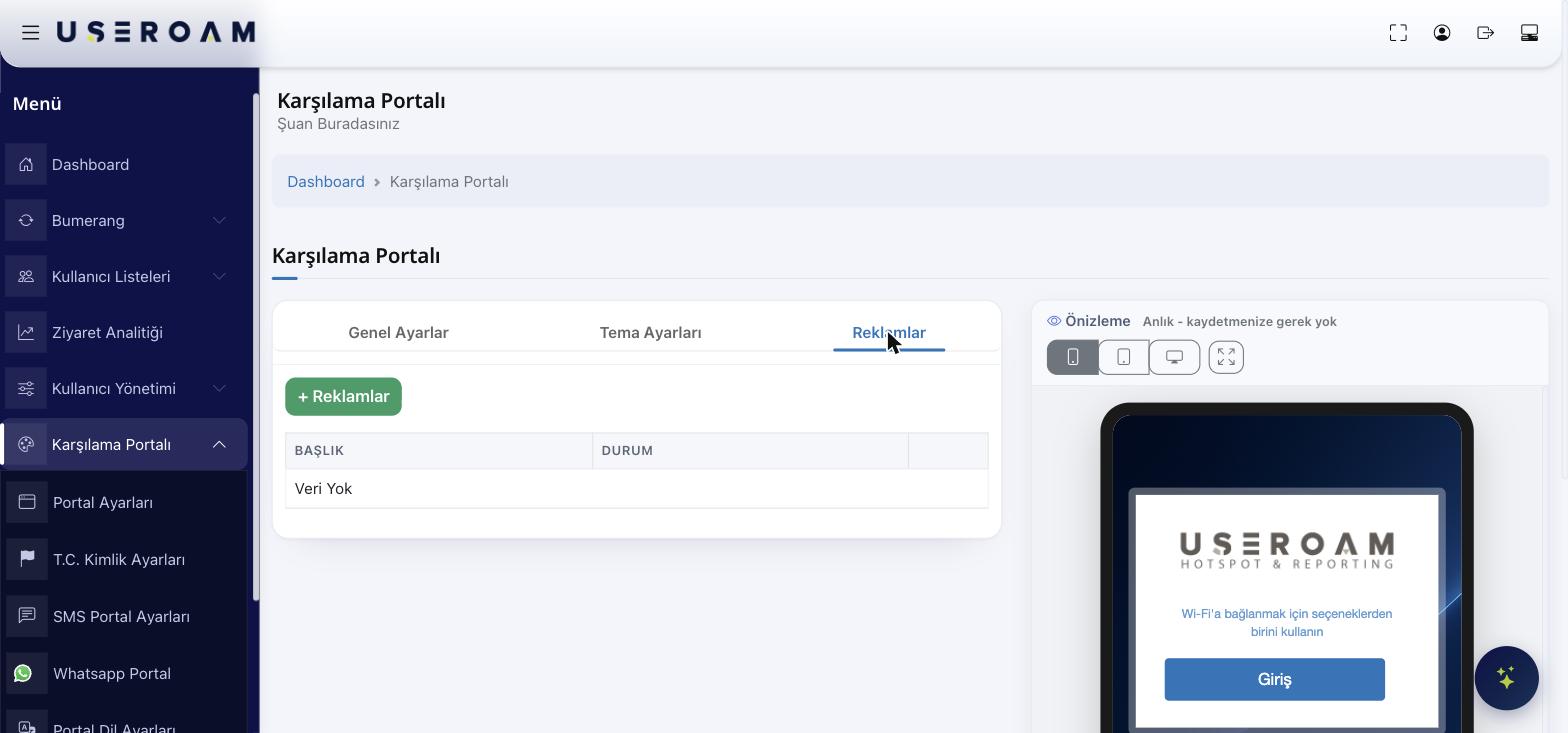
You can add promotional/announcement images shown to guests on the welcome screen.
- Press + Ads to add a new item.
- Added ads appear in the list with Title and Status.
- If there are none yet, it shows "No Data".
Tips
- The preview works without saving — feel free to experiment.
- If you leave a social media box empty, that icon won't appear at all.
- After uploading the logo and background, always check the mobile view with the phone icon — most guests connect via phone.
Frequently Asked Questions
I made a change but it doesn't show on the guest screen. Make sure you pressed the Save button. The preview needs no saving, but the live portal requires it.
Can I turn off KVKK or Terms of Use? No. Both are legally required and cannot be disabled.
I want guests redirected to my menu after login. Set General Settings → Exit page to on.