Portal Settings
Portal Settings
The Captive Portal is the welcomelogin screen your guests see before connectingthey connect to Wi-Fi. On this page you setmanage its appearance, which details are required to log in, and the legal texts, and the advertisement slots.
How do I open this screen? From the left menu, go to Captive Portal → Portal Settings.
Note: the panel interface is only partly translated. Where a control still appears in Turkish on screen, the Turkish label is given in brackets so you can find it.
The page has three tabs: General Settings, Theme Settings, and AdsAdvertisements. The Preview on the right showsreflects every change instantly — you see howthe it looksresult without saving.
1. General Settings
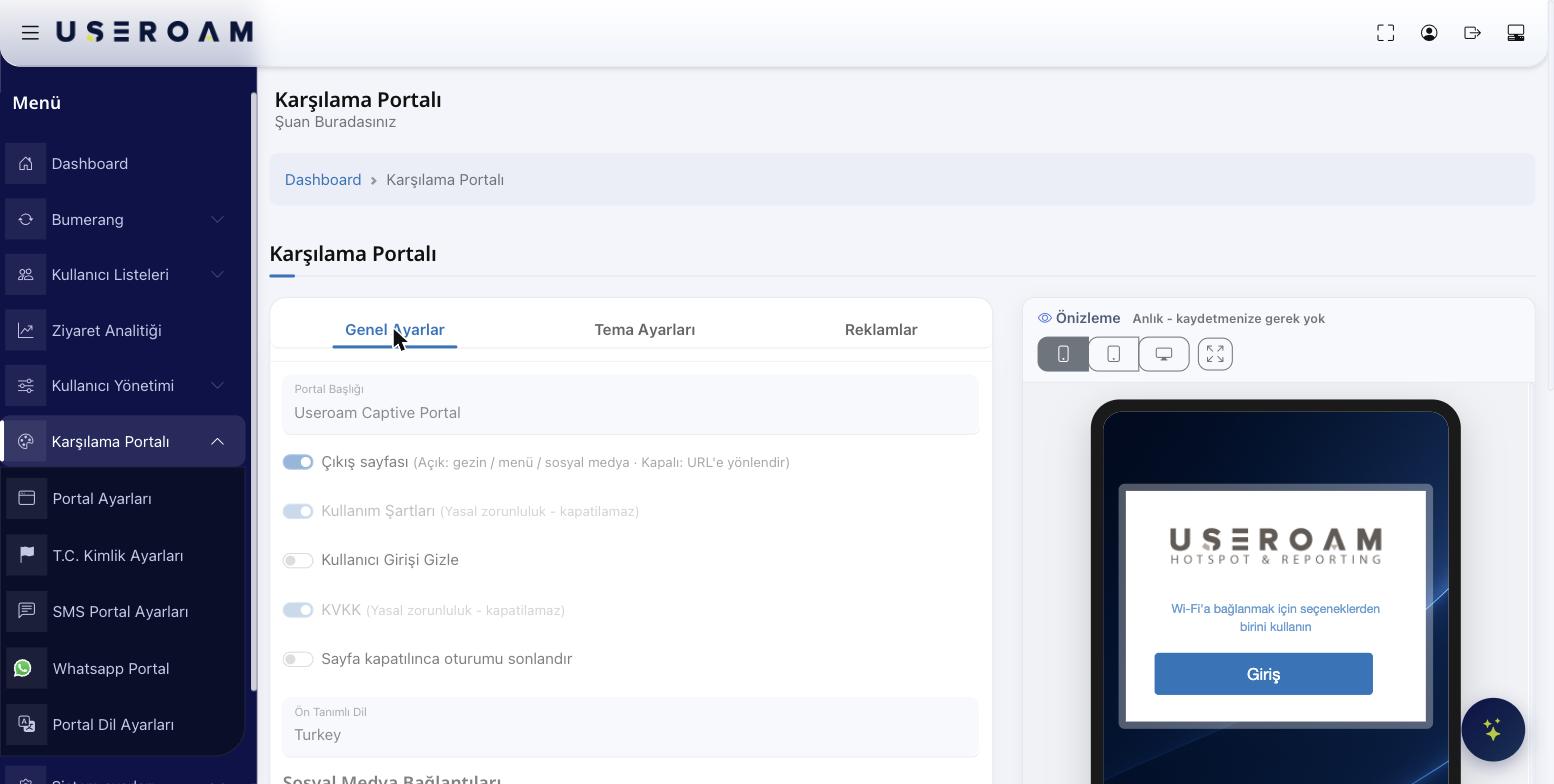
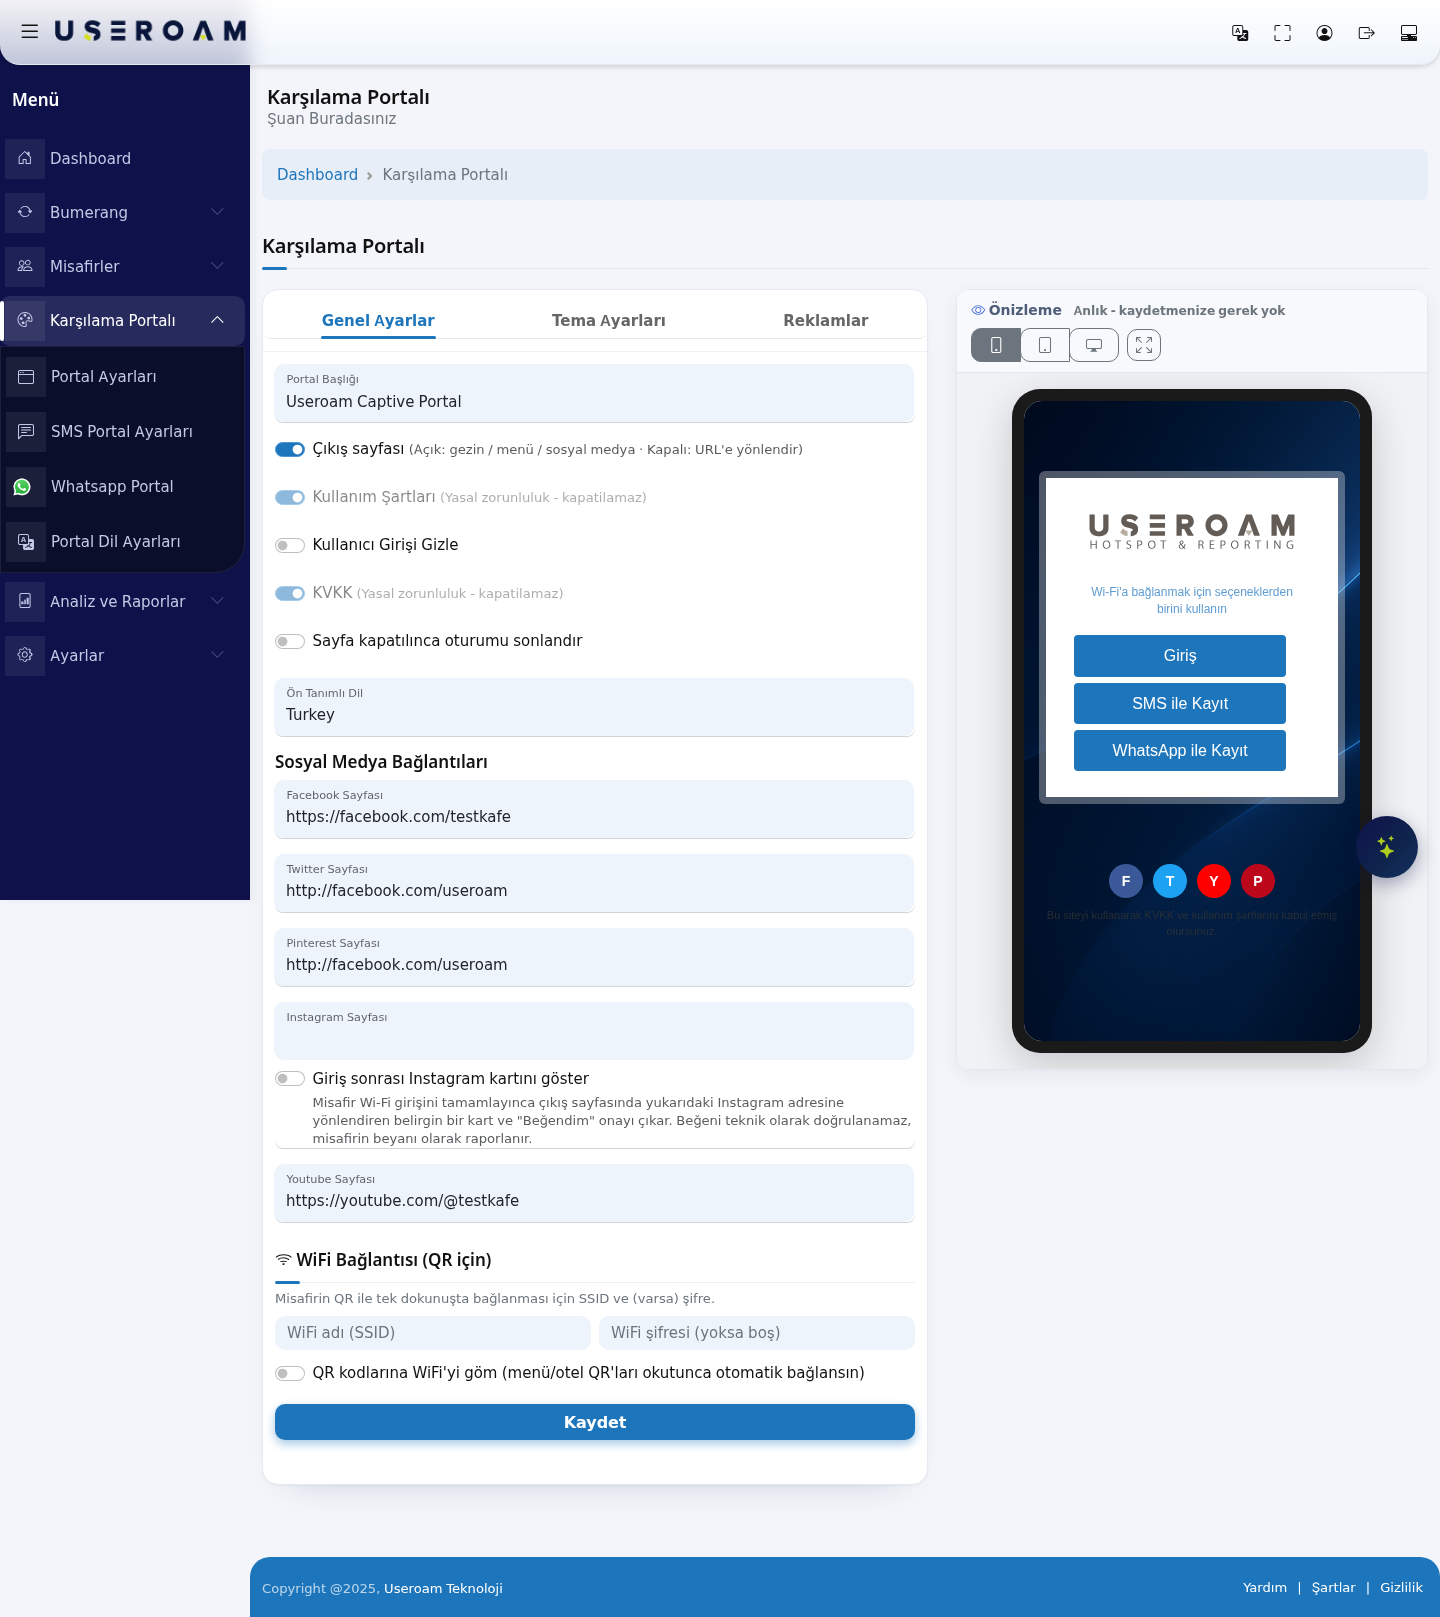
Heretab you definedefines the portal's basic behaviour.behaviour of the portal.
- Portal Title:
Thethe text shown at the top of the welcomescreen,screene.g.— usually your business name. - Exit
page:pageWhen(on screen: Çıkış sayfası): when on, the guest sees the exit page after logging in (yourmenumenu,/your social mediaafter logging in.links). When off, they are redirected straight toathe web address youchoose.enter in the Page Redirect field that appears underneath. - Page Redirect (on screen: Sayfa Yönlendirme): only visible while "Exit page" is off. Enter the address to open after login (for example your corporate website).
- Terms of Use:
Thethe usage text the guest must accept at login. Legallyrequired,required — cannot beturnedswitched off. - Hide User
Login:LoginTurn(on screen: Kullanıcı Girişi Gizle): turn ontoforhidespecial scenarios where the login form(forshouldspecialbescenarios).hidden on the portal. - KVKK (
DatadataProtection)protection):Thethe personal-data disclosure/consent text. Legallyrequired,required — cannot beturnedswitched off. EndTerminate the session when the page is closed:Turnturn on if you want theguestguest'sdisconnectedsession to end when they close the portal page.- Default Language:
Thethe language the portal opens in. The list comes from the Portal Language Settings page (Azerbaijan, Bulgaria, China, France, Georgia, Greece, Israel, Italy, Kazakhstan, Netherlands, Poland, Romania, Serbia, South Korea, Spain, Turkey).
Enter the addresses of your Facebook, Twitter, Pinterest, Instagram and YouTube pages. These icons appear on the welcome screen so guests can reach you in one tap. Any field leftyou leave empty hides its icon.
- Show Instagram card after login: after the guest completes Wi-Fi login, the exit page shows a prominent card linking to the Instagram address above, plus an "I liked it" confirmation. The like cannot be verified technically; it is reported as the guest's own statement.
Wi-Fi Connection (for QR):
Enter your Wi-Fi network name (SSID) and password (if any)details so guests can connectjoin within onea single tap by scanningfrom a QR code.
- Wi-Fi
enablename (SSID) (on screen: WiFi adı (SSID))": the name of your guest network. - Wi-Fi password (on screen: WiFi şifresi): your network password. Leave empty for open networks.
- Embed Wi-Fi
intoin QRcodes"codes,guests(onconnectscreen:automaticallyQR kodlarına WiFi'yi göm): whentheyenabled,scanscanning a menu or hotel QRcode.codeconnects
Afterthemaking changes, don't forgetdevice topressthetheWi-Fi network automatically.
Confirm your changes with Save button at the bottom..
2. Theme Settings
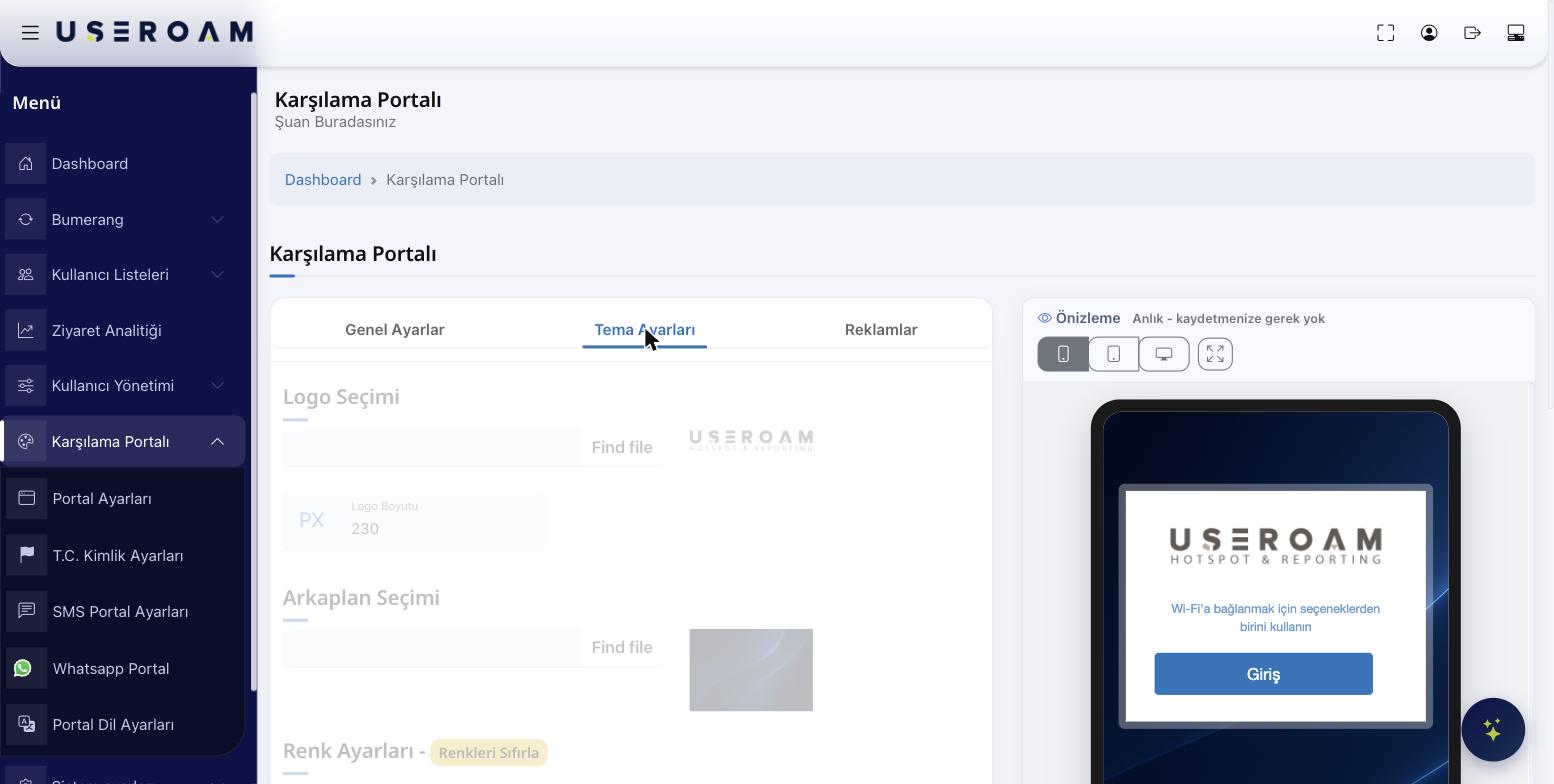
Heretab is where you matchset the portal'svisual lookidentity toof yourthe brand.portal.
- Logo Selection:
Uploadupload your logo with Choose file. Use Logo Size to adjust how large it appears on screen. - Background Selection: upload the
logoportal background image. It may be cropped on mobile screens, so choose an image whose key elements sit in the centre. - Colour Settings: six separate colours are defined — Login Box Colour, Button Hover Colour, Button Colour, Button Text Colour, Link Colour and Text Colour. Each is set with a colour picker.
- Reset Colours: returns every colour to its default value.
- Footer text: free text shown at the bottom of the portal, written in the rich-text editor.
Tip: the Captive Portal Preview panel on the right updates instantly, so you can try colours out without saving.
3. Advertisements
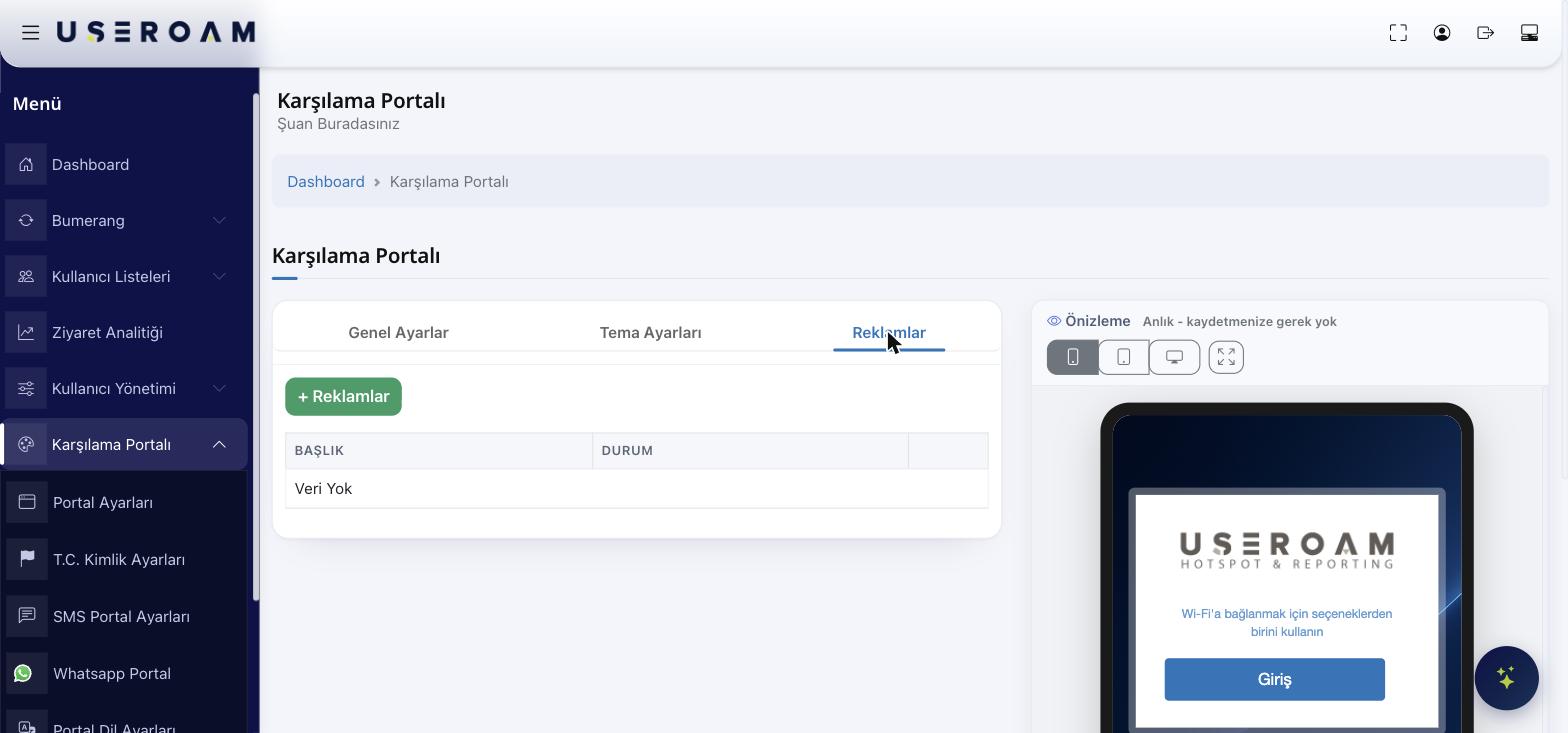
This tab manages the advertisement and announcement content shown on the welcome screenscreen. (The list has FindTitle fileand Status columns.
Use the + Advertisements button to chooseadd a file)new record:
- Title: the name of the advert (used to identify it in the admin view).
Logo Size:Type:SetBefore login or After login — determines at which stage thelogoguestsizeseesinthepixels (PX).advert.Background Selection:Duration:Uploadhow many seconds thebackgroundadvertimage.stays on screen.Color Settings:Content:Choosethecolorsrich-textbeloweditortoletsmatchyouyouraddbrand.images,UsetextResetandColorsto return to defaults.Login Box ColorButton Hover ColorButton ColorButton Text ColorLink ColorText Color
Use the PreviewStatus column to switch an advert off without deleting it.
Related pages: see Portal Language Settings for which languages appear on the
right to see the colors instantly. Pressportal,SaveSMS Portal Settingswhenforyou'reSMShappy.
3. Ads
You can add promotional/announcement images shown to guests on the welcome screen.
Press+ Adsto add a new item.Added ads appear in the list withTitleregistration, andStatus.IfPortalthere are none yet, it shows "No Data".
Tips
The preview works without saving — feel free to experiment.If you leave a social media box empty, that icon won't appear at all.After uploading the logo and background, always check the mobile view with the phone icon — most guests connect via phone.
Frequently Asked Questions
I made a change but it doesn't show on the guest screen.SettingsMakeforsureWhatsAppyou pressed theSavebutton. The preview needs no saving, but the live portal requires it.registration.
Can I turn off KVKK or Terms of Use?No. Both are legally required and cannot be disabled.
I want guests redirected to my menu after login.SetGeneral Settings → Exit pagetoon.