
Device Settings
Device Settings manage the record of the firewall / gateway that Useroam talks to. The RADIUS secret, 5651 logging, the firewall API connection and the captive portal HTML template that must be uploaded to the device all live on this page. It is the panel-side centre of the installation.
How do I open this screen? From the left menu, go to Settings → Device Settings.
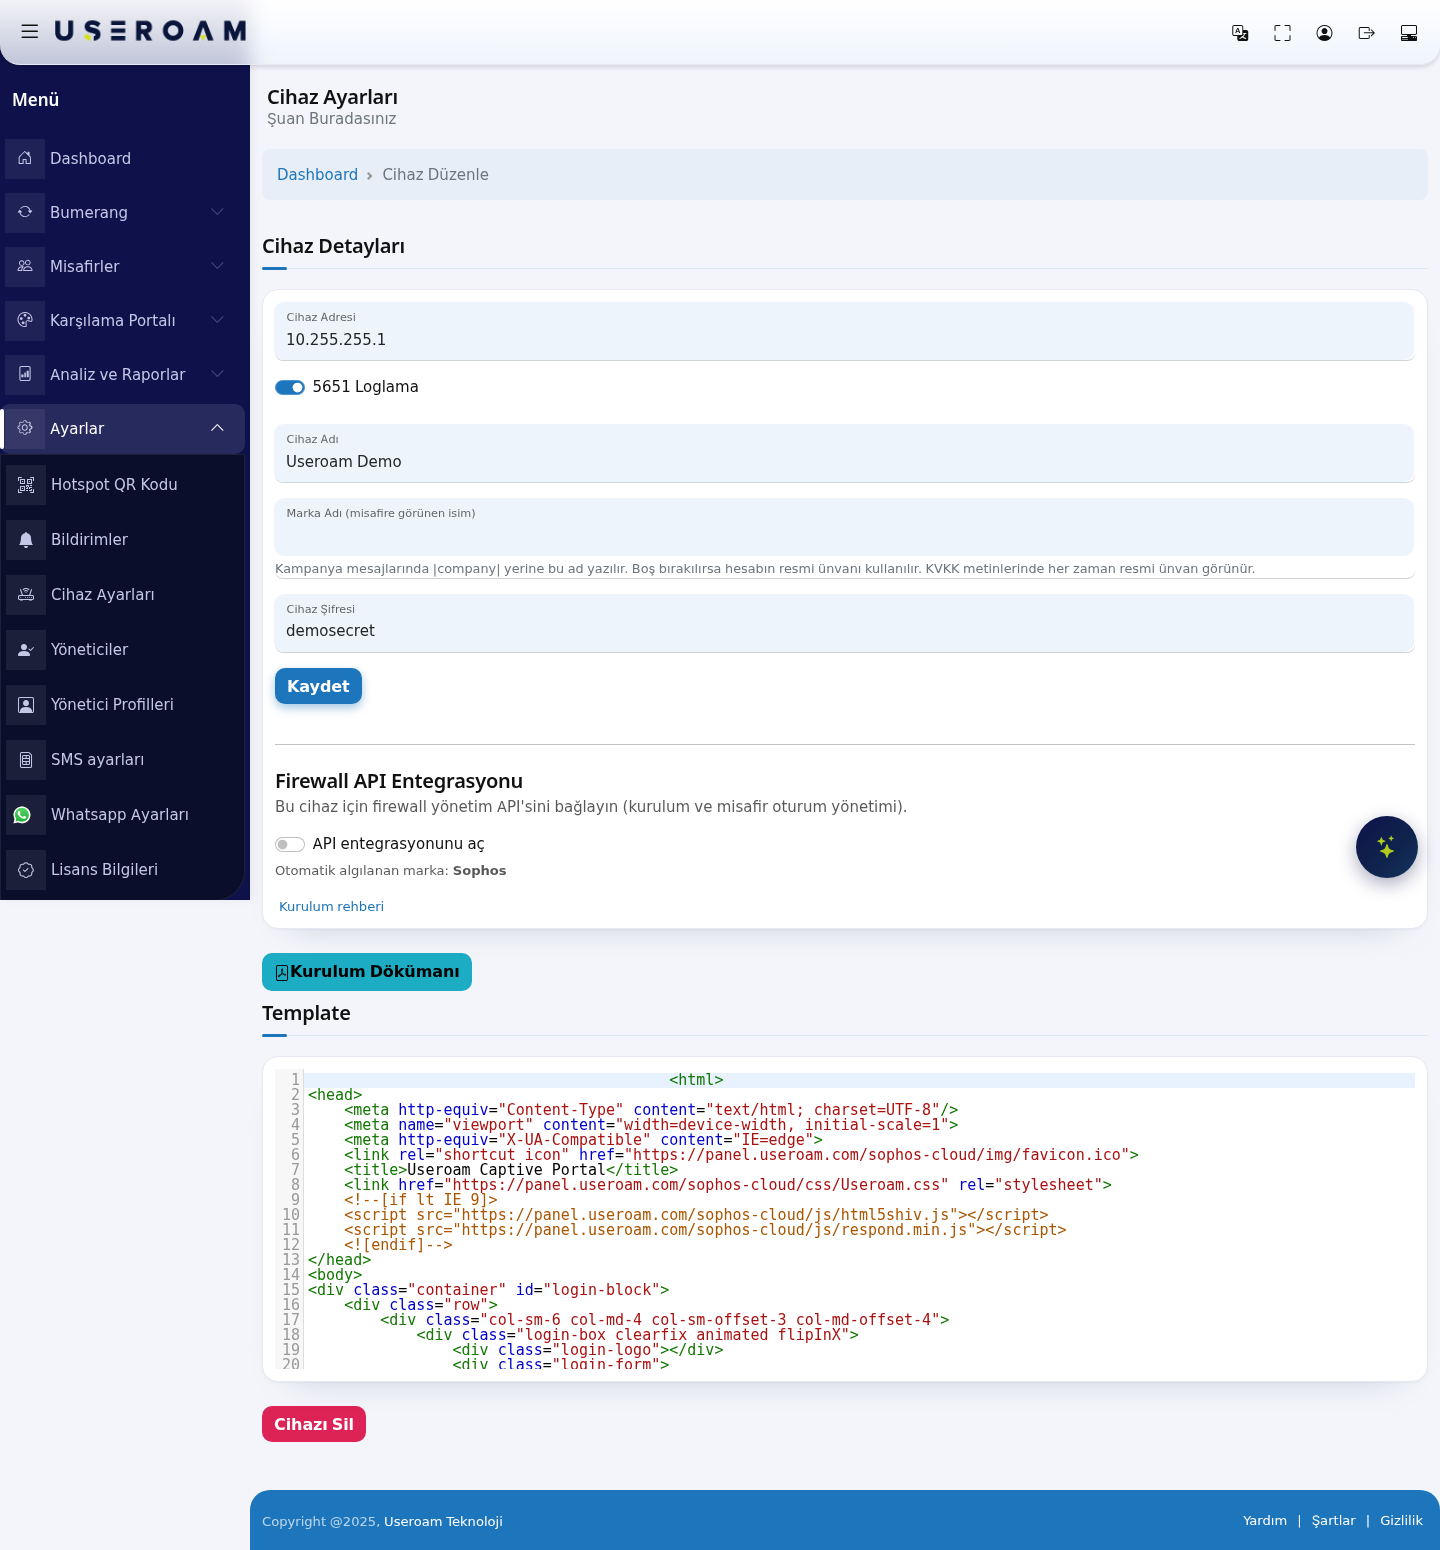
1. Device Details
- Device Address: the WAN / external IP address the firewall uses to communicate with Useroam. If you have several WAN interfaces the device usually sends from the first one; to use a different interface, define an SNAT rule on the firewall. If this address changes and you do not update it here, the integration stops.
- 5651 Logging (on screen: 5651 Loglama): enables signing and retention of the device's logs under Turkish Law No. 5651. Keep it on if you rely on legal logging.
- Device Name: the device's name inside the panel. Use something distinctive if you run several locations.
- Brand Name (shown to guests): this name replaces
|company|in campaign messages. If left empty, the account's registered legal name is used. GDPR/KVKK texts always show the legal name — this field does not change the legal text. - Device Password: the RADIUS shared secret. You copy this value into the firewall when defining the RADIUS server (Shared Secret on Sophos, Secret on FortiGate and Palo Alto).
Confirm your changes with the Save button below this section.
2. Firewall API Integration
This section connects the firewall management API for setup and guest session control. The panel auto-detects the device brand (for example Auto-detected brand: Sophos) and shows the matching Setup guide link.
- Enable API integration: switching this on reveals the fields below.
- Management address (https): the address of the firewall management interface.
- Port: the port of the management interface.
- Mode: one of two options:
- Setup only — credentials are not stored; the API is used during initial configuration only.
- Permanently connected — credentials are stored encrypted; operations such as signing sessions in and out run over the API continuously.
If you use Sophos: the API user and its permissions must also be created on the firewall. See Installation Guides → Sophos API Connection for the steps.
3. Template
This code block, starting with <html>, is the captive portal template that gets uploaded to the device. Theme changes you make in Portal Settings are reflected in it.
Copy the entire block and paste it into the matching field on your device:
- Sophos: Authentication → Web Authentication → Captive portal appearance → Custom HTML
- FortiGate: System → Replacement Messages → Login Page
- Palo Alto: save it as
captive.htmlfirst, then upload it via Device → Response Pages → Captive Portal Comfort Page
Other actions
- Setup Document: opens the installation guide for your device brand.
- Delete Device: removes the device record. The deleted device's RADIUS secret becomes invalid and guest logins stop — use it only when you are genuinely retiring the hardware.
Related pages: Installation Guides (brand-specific steps), Analytics and Reports → 5651 Logs, Settings → License Information.