
Device Settings
What is it for?
Device Settings is where you manage the record of the firewall (device) connected to Useroam: its name, address, 5651 recording, device password, the setup code to paste into the device, the firewall API connection, the hotel PMS connector (Cloud Connector) and backup internet lines.
How do I open it? In the left menu, click Settings → Device Settings. The screen always shows the currently selected device; to edit another device, first switch to it on the Device Selection screen.
When do I use it?
- Your internet line changed and the device's public IP (Device Address) changed.
- You want to change the business name guests see in campaign messages (Brand Name).
- You are installing the device for the first time and need the code or setup guide (Setup tab).
- The device has a second internet line and guest logins should continue when the main line fails (Backup WAN IPs).
- You want to sync the guest list from your hotel PMS to Useroam (Cloud Connector).
- You no longer use the device and want to delete it completely (Delete Device).
Screen layout
Under the title it says You are here and the path line reads Dashboard › Edit Device. At the top you see the device name, type (e.g. Sophos), address and status badges. Below are three tabs: General, Setup and Integrations.
| Badge | Meaning |
|---|---|
| 5651 on (green) / 5651 off (grey) | Whether 5651 log recording is on for this device. |
| Connector | A Cloud Connector key has been generated for this device. |
| Firewall API | A firewall API integration is saved and on. |
| Backup WAN: 2 | Number of backup internet lines defined for the device. |
Step by step: changing device details (General tab)
In the left menu, click Settings → Device Settings. The name and badges are at the top and the General tab opens.
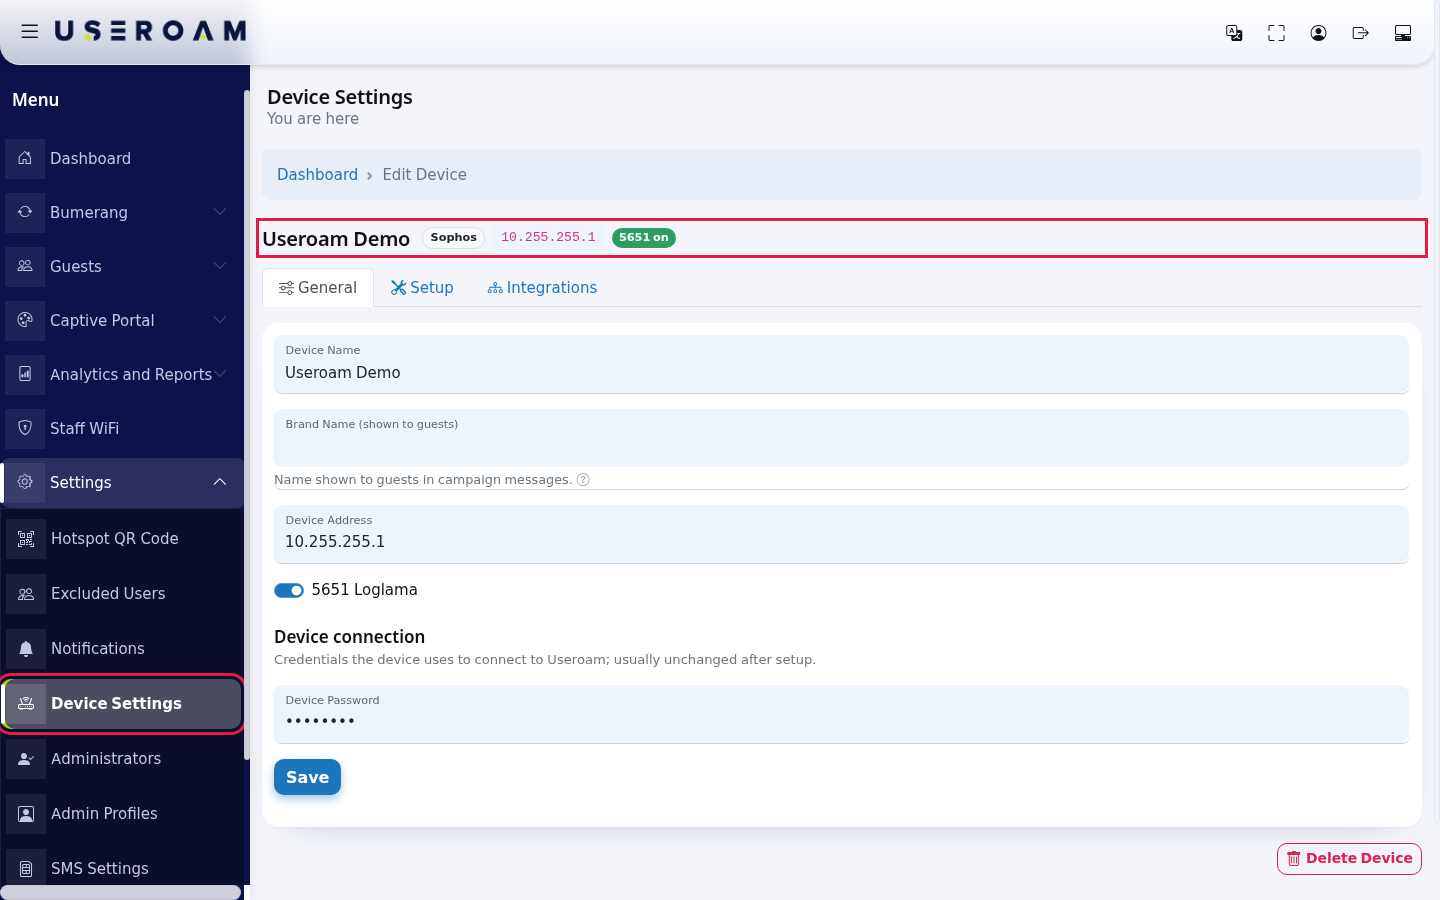
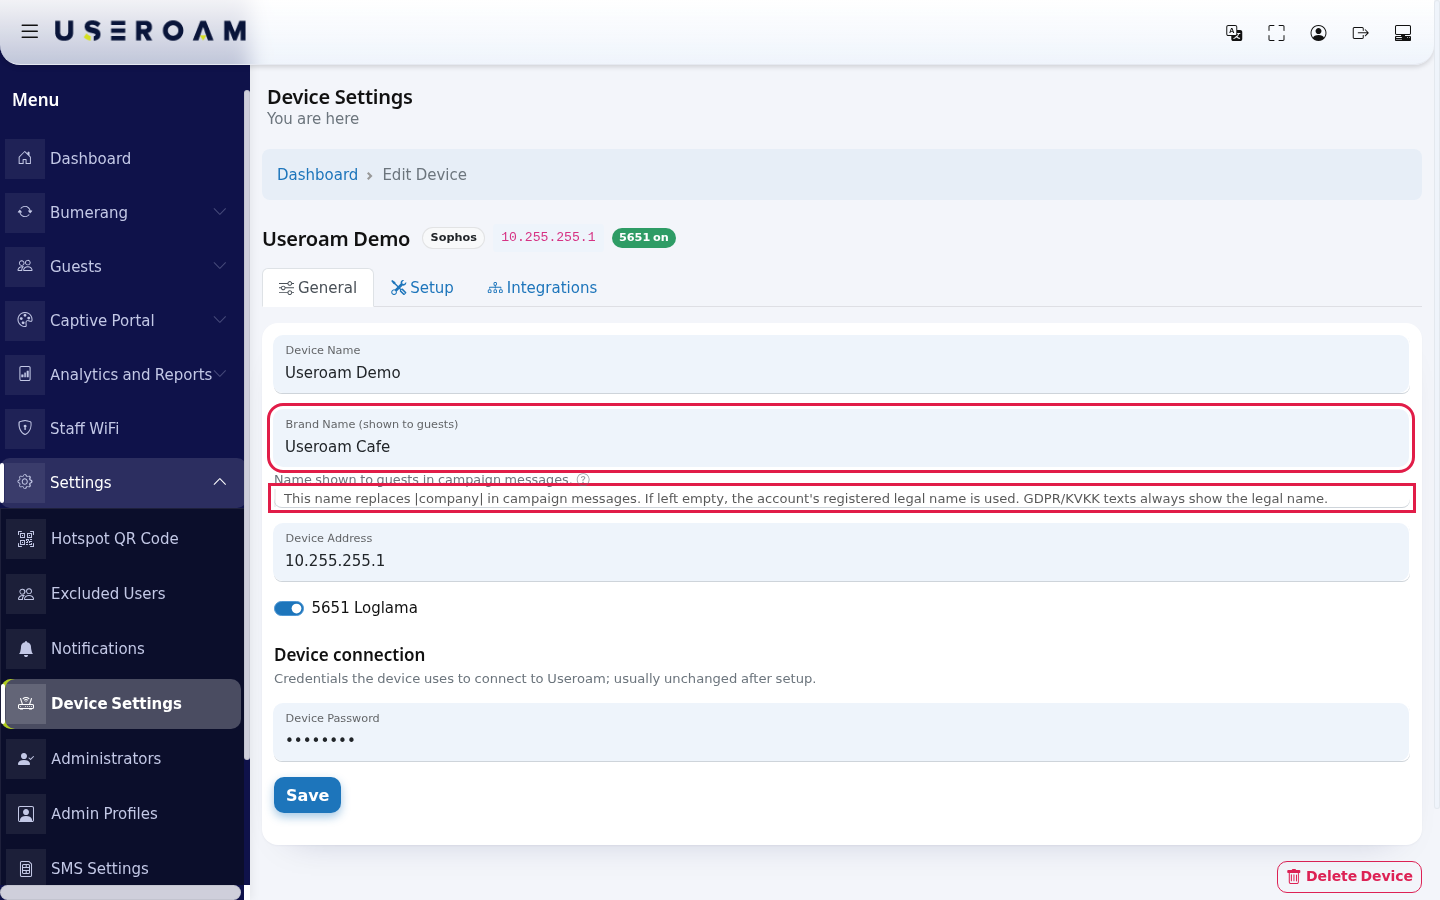
If needed, change Device Name (e.g. Head Office). This name is only shown in the panel. Type the name guests see in Brand Name (shown to guests) (e.g. Useroam Cafe). Below the field it says Name shown to guests in campaign messages.; click the question mark next to it (Details) to open the explanation.
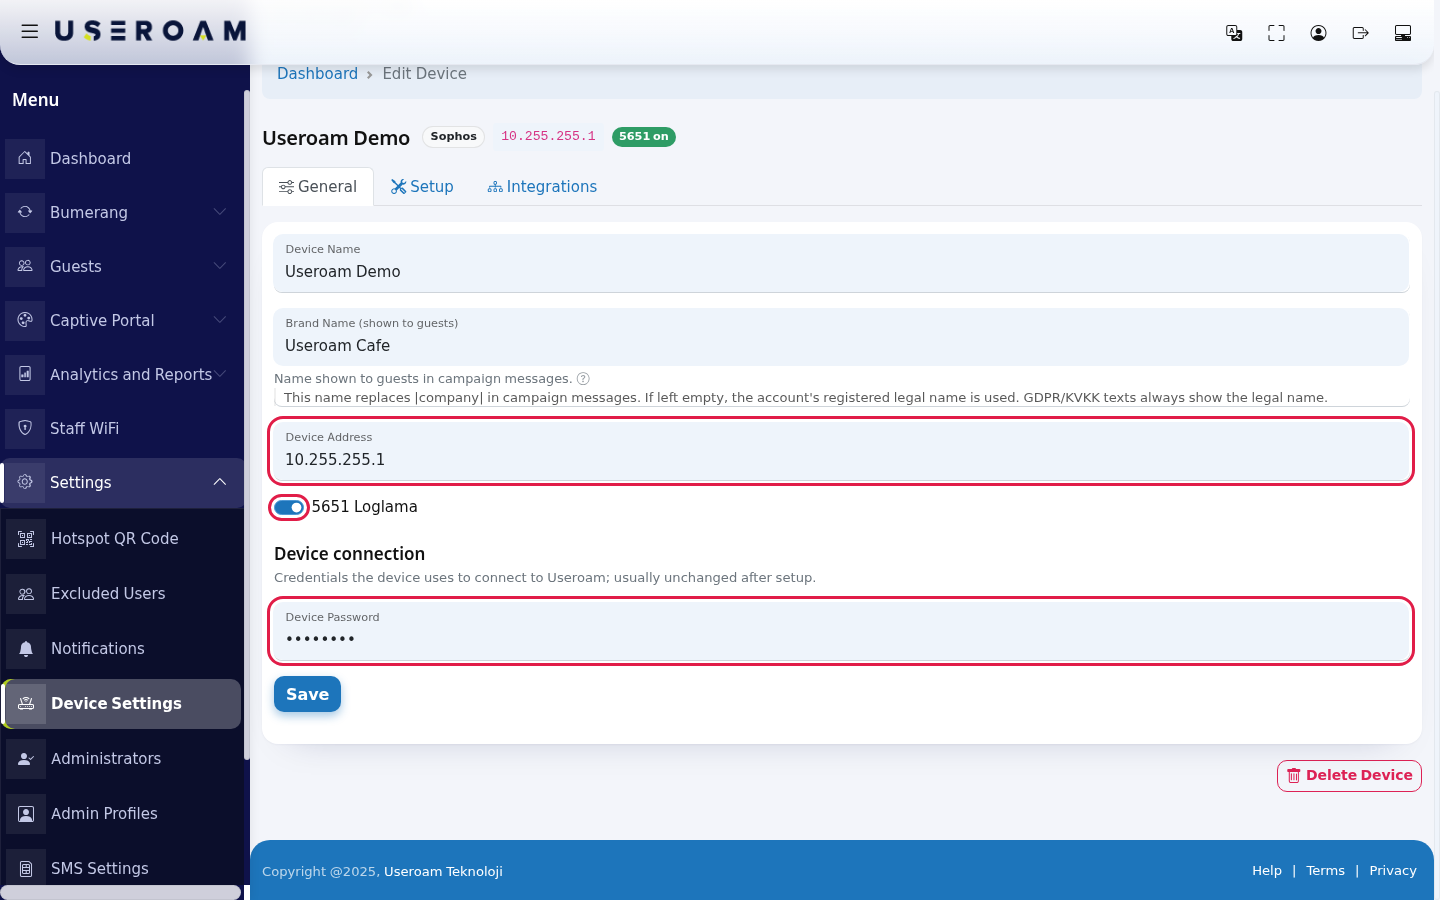
Enter the device's public IPv4 address in Device Address. Keep the 5651 Loglama (5651 logging) switch on for legal log recording. Under the Device connection heading it says Credentials the device uses to connect to Useroam; usually unchanged after setup. Device Password is the shared password the device uses to connect to Useroam; it must match the RADIUS setting on the device and is usually not changed after setup.
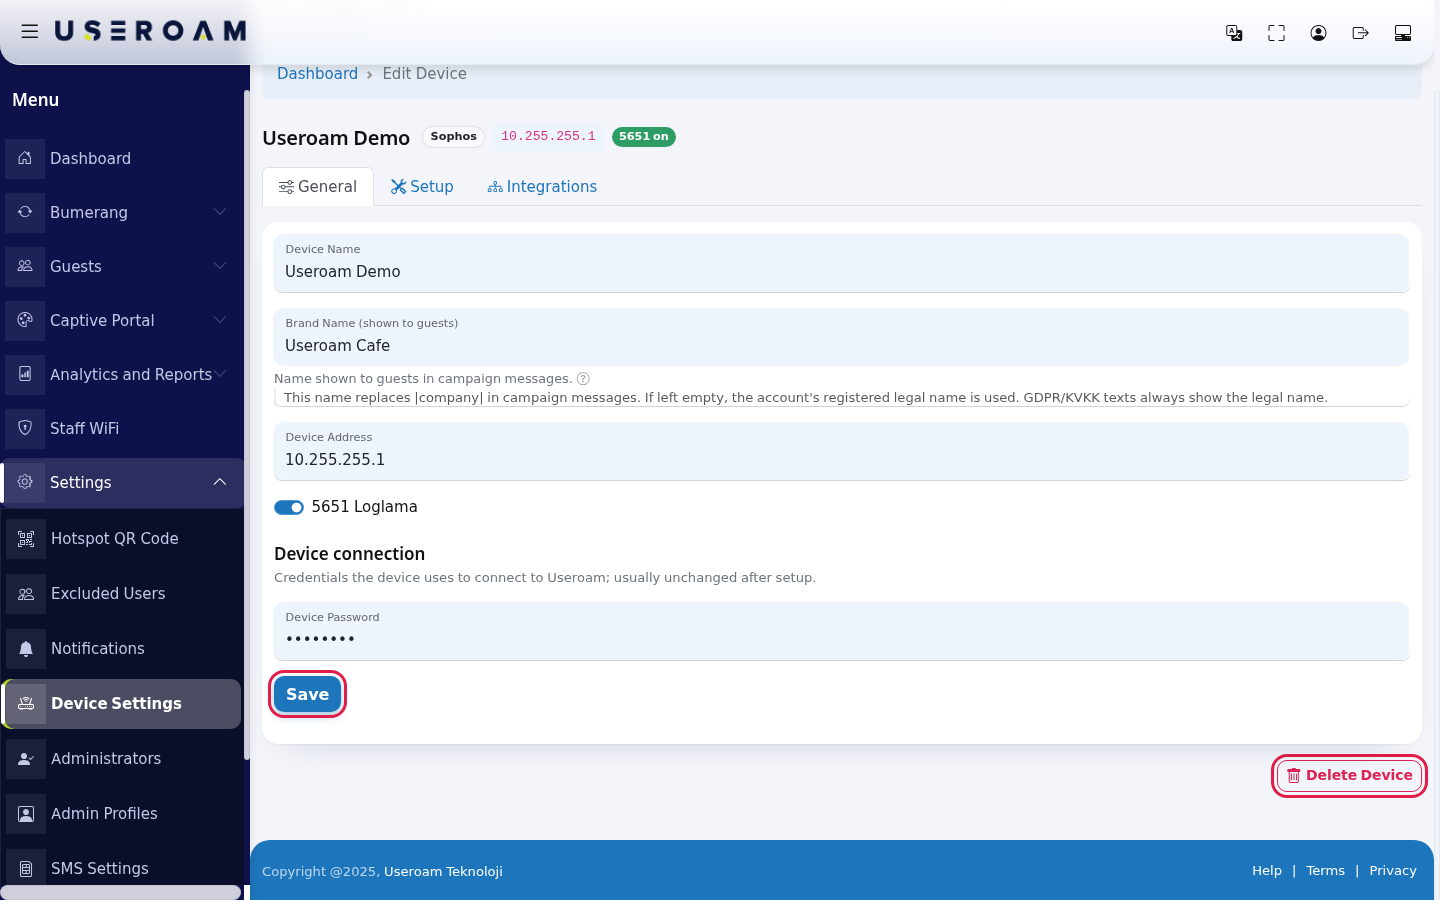
Click Save. The screen reloads and shows the values you saved; no separate confirmation message appears. If you turn 5651 Loglama off and save, the device's 5651 log configuration is removed; turning it on and saving writes it again.
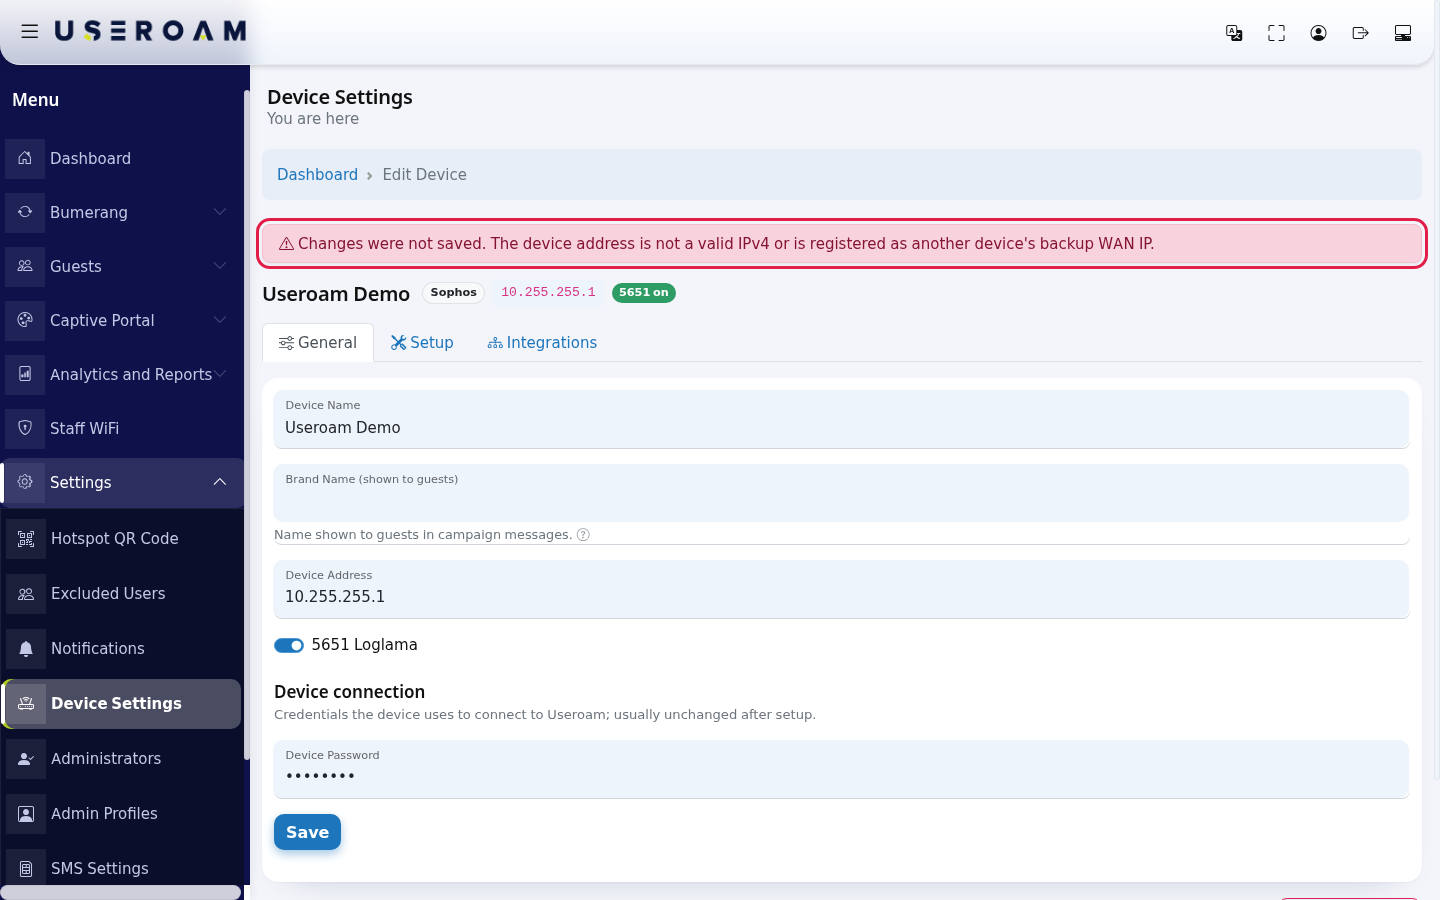
If the save fails, a red box appears:
| Message | What to do |
|---|---|
| Changes were not saved. The device address is not a valid IPv4 or is registered as another device's backup WAN IP. | Type the address as a four-part IP such as 85.100.64.10. If it is in another device's Backup WAN IPs list, delete it there first. |
Extra fields by device type
Some device types show extra fields on the General tab. Fill them in if you see them:
- Device Serial Number: the device's serial number.
- SSL Port: the port the panel uses to reach the device (MikroTik).
- Username and Password: the device's admin credentials (on device types that need them).
- Guest network address (IP:port): Coslat devices only; subtitle Coslat guest network (address of the portal page on the device). Field help: Address of the Coslat device on the guest network, including the port. Example: 10.0.1.250:8000, if you leave it empty the address is detected from the guest's browser.
Step by step: deleting the device
Click Delete Device at the bottom of the General tab. The window asks Do you want to delete the device? and warns The device and all records belonging to it (groups, users, settings, etc.) will be deleted. Are you sure? Click No if you are not sure, Yes, delete if you are.
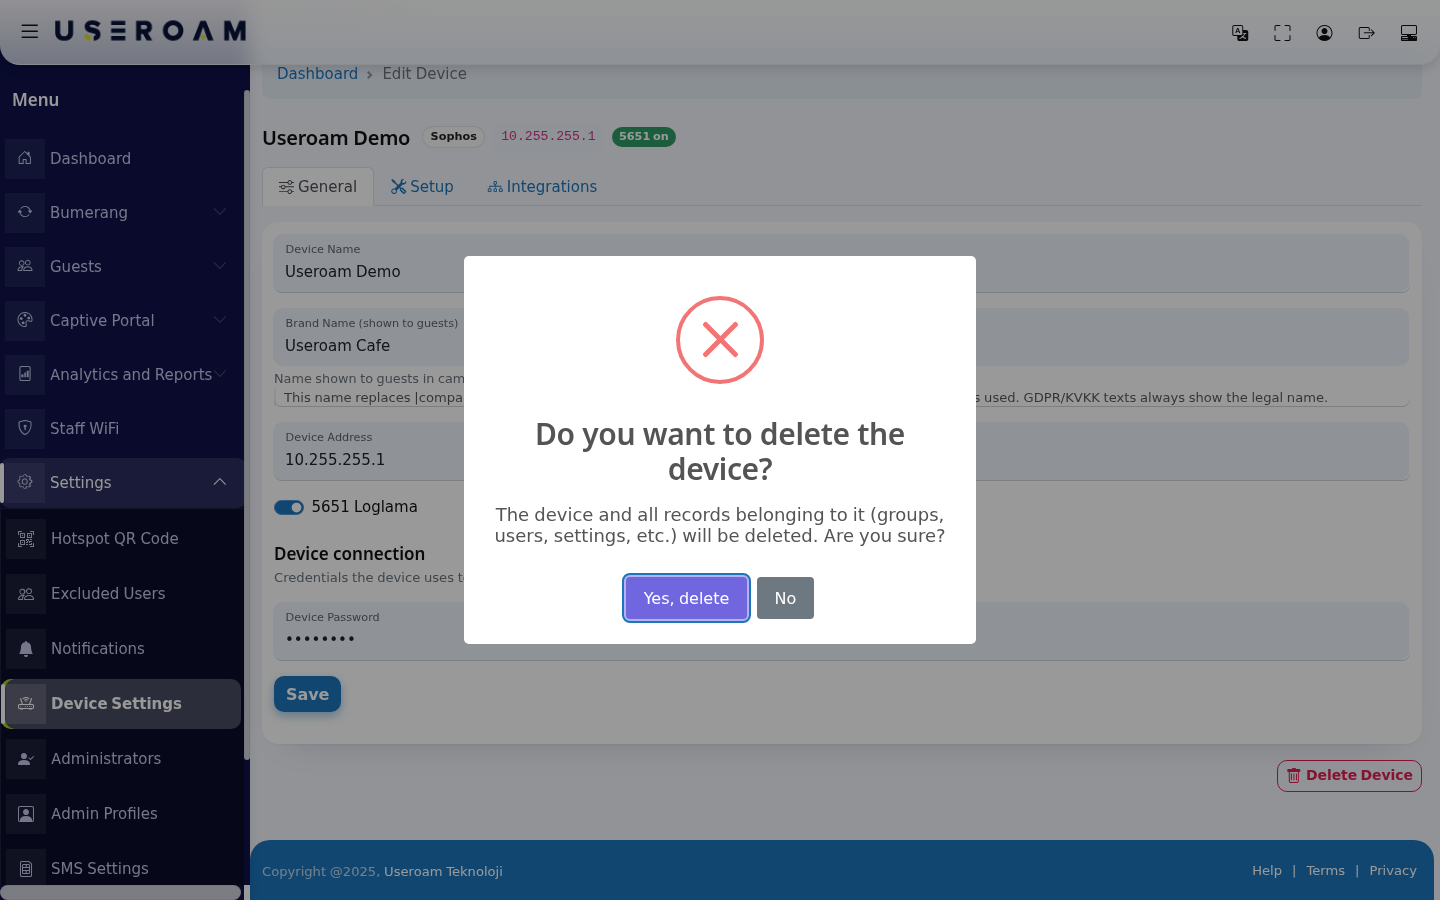
Caution: Deleting cannot be undone. The device's portal settings, language texts, groups, guest users, firewall API record and 5651 log configuration are deleted with it.
Setup tab
The top of the tab says Guide, code and steps to connect the device to Useroam. Setup is done once.
Click the Setup tab. The Setup Document button opens the setup guide for your device type in a new tab. The code in the Template box is the login page guests see on your device. Copy the whole box and paste it where the setup guide tells you. The code contains an ID unique to your device; never use another device's code.
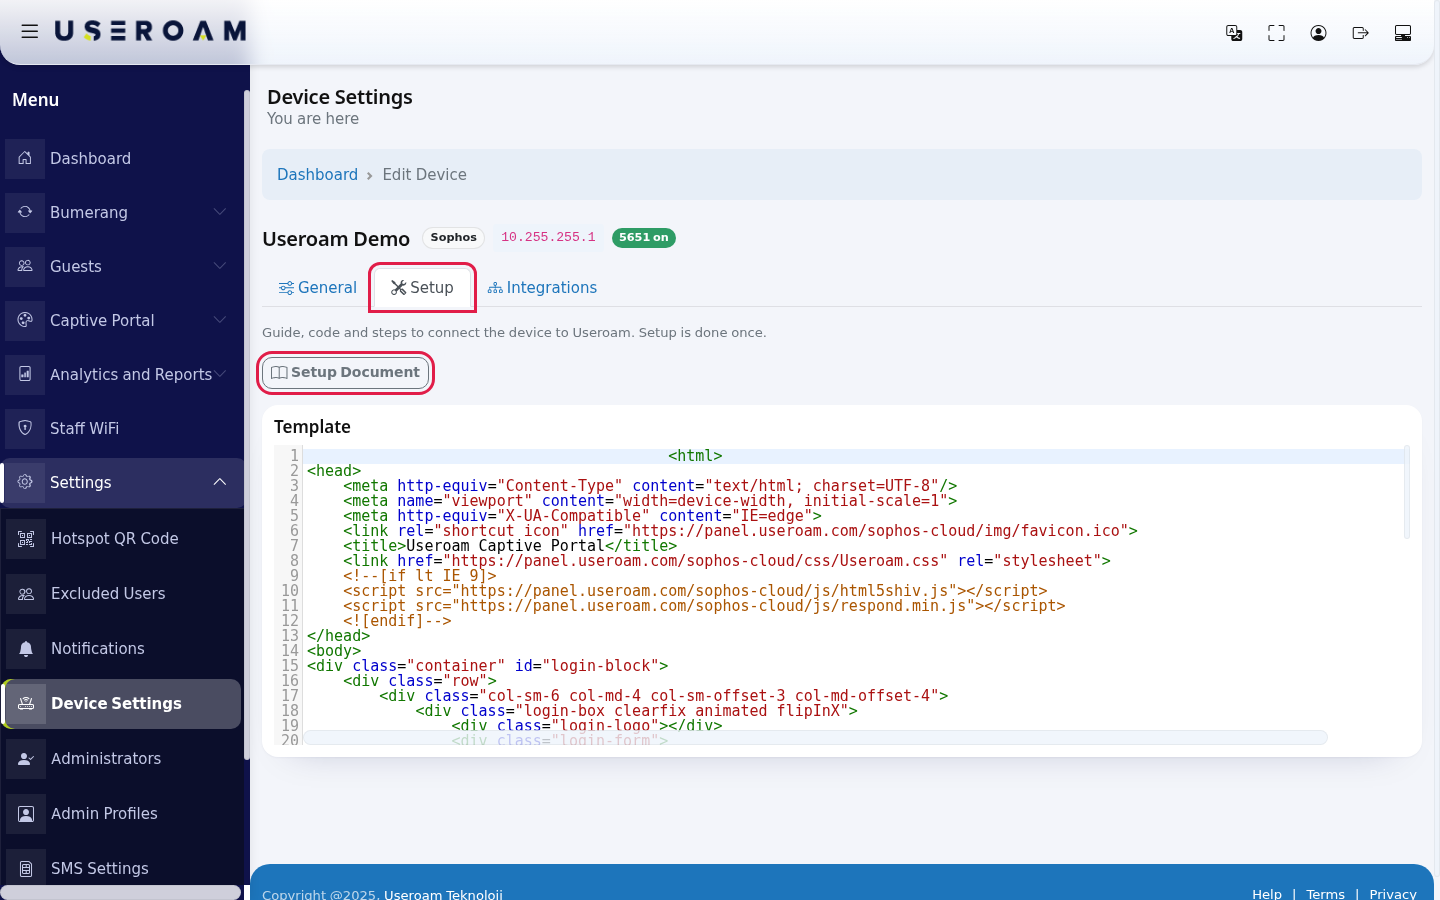
Depending on the device type, this tab shows different boxes:
- SonicWALL: Login Authentication, User Login Message and Policy Login Redirect & Logged Out.
- WatchGuard: External Guest Authentication Hotspot with the Shared Secret and authentication addresses.
- MikroTik: a two-step setup card (below).
Setup card on MikroTik devices
- Step 1: Connect the device to the panel. The card says: Paste a single line into the device terminal and Useroam does the rest. This step does not change your existing configuration. The script does not touch your hotspot, bridge, DHCP or existing firewall rules; it only adds a certificate, an API user that can log in from the Useroam panel address only, and a single firewall accept rule.
- Check Access port. Field help: The port the panel will use to reach the device. Leave 443 if the device faces the internet directly. If it sits behind another modem or firewall, enter the external port you forwarded there (the forward must target MikroTik's port 443).
- Click Generate setup code.
- Connect to the device with Winbox or SSH and open a New Terminal.
- Paste the line below exactly as it is and press Enter: you can copy it with Copy (the button changes to Copied). Below the code you see Code valid until.
- Refresh this page: the status should read Connected.
- Step 2: Guest network setup. Once connected, the card says The connection is up and the panel can now read the device. The setup screen shows the interfaces found on the device and what is missing; from there you generate the guest network, DHCP, hotspot, RADIUS, captive portal and 5651 logging setup. Click Open the setup screen below it. See MikroTik Setup Wizard.
| Status on the card | Meaning, what to do |
|---|---|
| No setup code has been generated yet. | Click Generate setup code. |
| Code is ready, waiting for the device to connect. | Paste the line into the device terminal. |
| The device downloaded the setup file, waiting for its confirmation. | Wait a while and refresh. If a Last error line appears, read it. |
| Connected. | Done; go to Step 2. |
| The device connected from a different address. Correct the device address in the panel and generate a new code. | On the General tab set Device Address to the device's real public IP, then click Generate a new code. |
If MikroTik management is enabled for your panel, the tab also shows a MikroTik Management button. For older devices a Legacy setup method (archive) section remains: This method was replaced by the two-step setup above. It is kept here for older devices that were set up by uploading the files by hand. Its Download hotspot files button prepares the files (Your Files Are Ready, Place the downloaded files into the hotspot folder., Download). If the device cannot be reached you see Device connection failed.; if the files cannot be prepared, Files could not be created.
Integrations tab
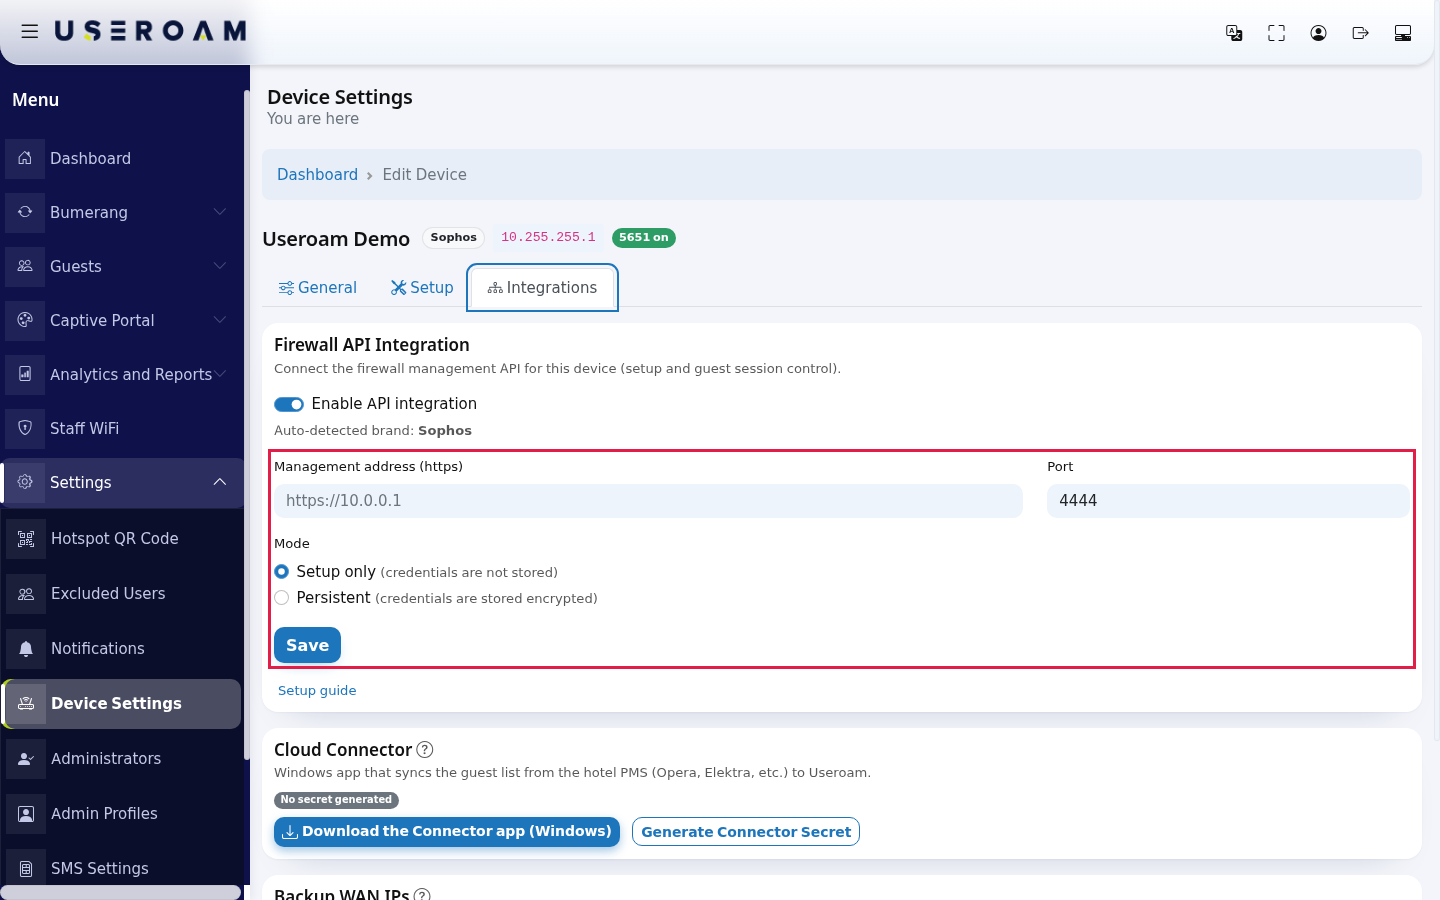
Firewall API Integration
The card says: Connect the firewall management API for this device (setup and guest session control). The panel detects the brand itself: Auto-detected brand. If the brand is not supported, it says Firewall API integration is not yet supported for this device brand.
Click the Integrations tab and turn on Enable API integration.
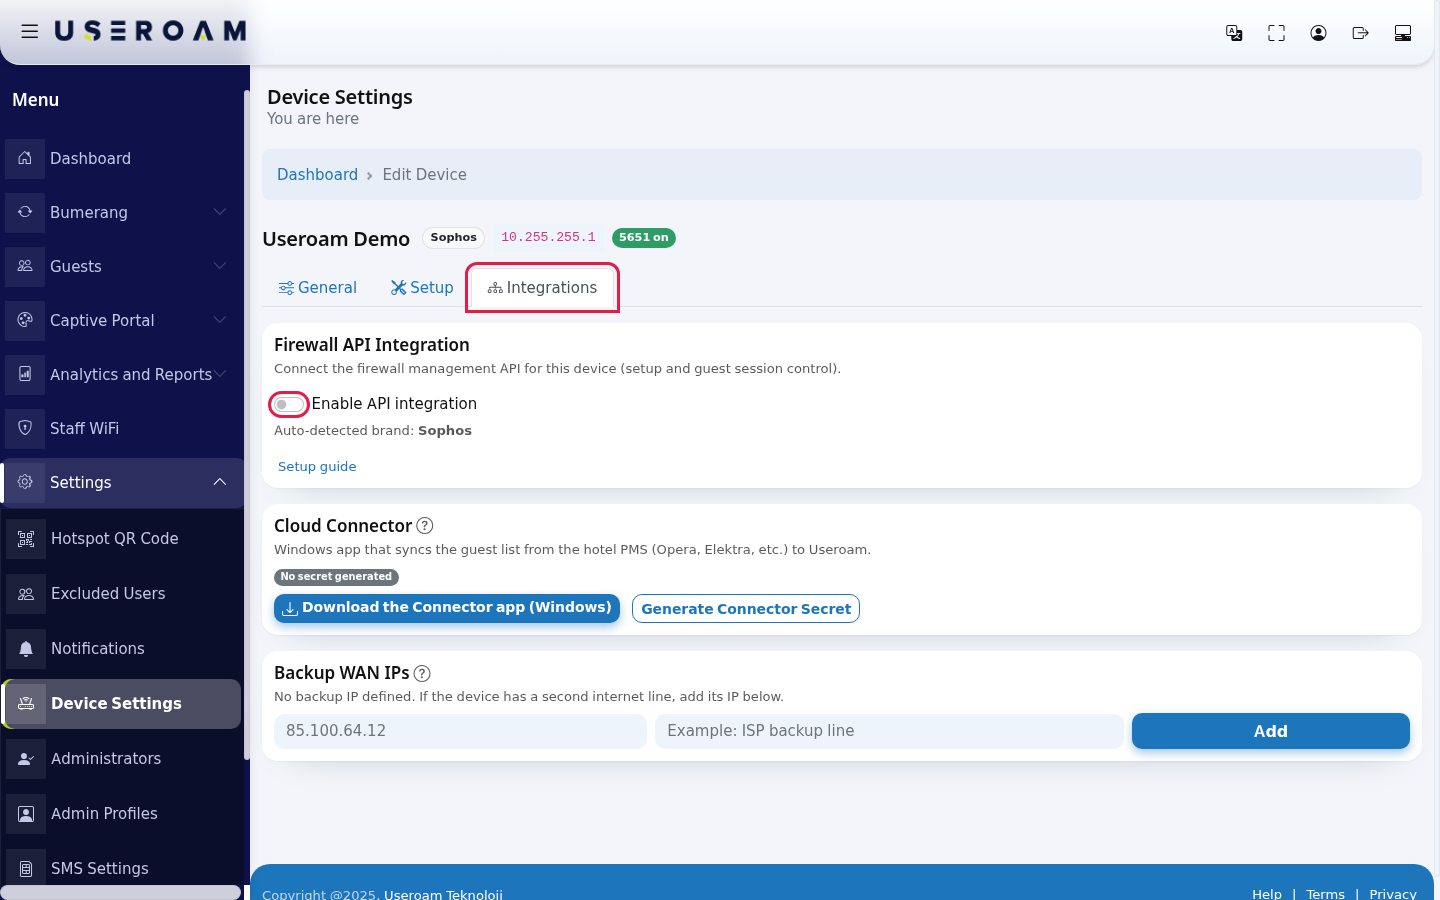
Enter the device's management address in Management address (https) (e.g. https://85.100.64.10) and the management port in Port (usually 4444 for Sophos). Choose a Mode:
- Setup only (credentials are not stored): the API is used for setup only.
- Persistent (credentials are stored encrypted): a permanent connection to see and manage guest sessions.
Click Save. The Setup guide link below explains how to enable API access on the device.
After saving, the card shows a Mode, Address and Status summary. If you chose Persistent, the Credentials (stored encrypted) form opens: API token / key, Username (Basic/keygen), Password (Basic/keygen). Fill in the fields your device uses and click Save Credentials. Then test the connection with Verify connection. The Active Sessions button opens the list of guests currently connected.
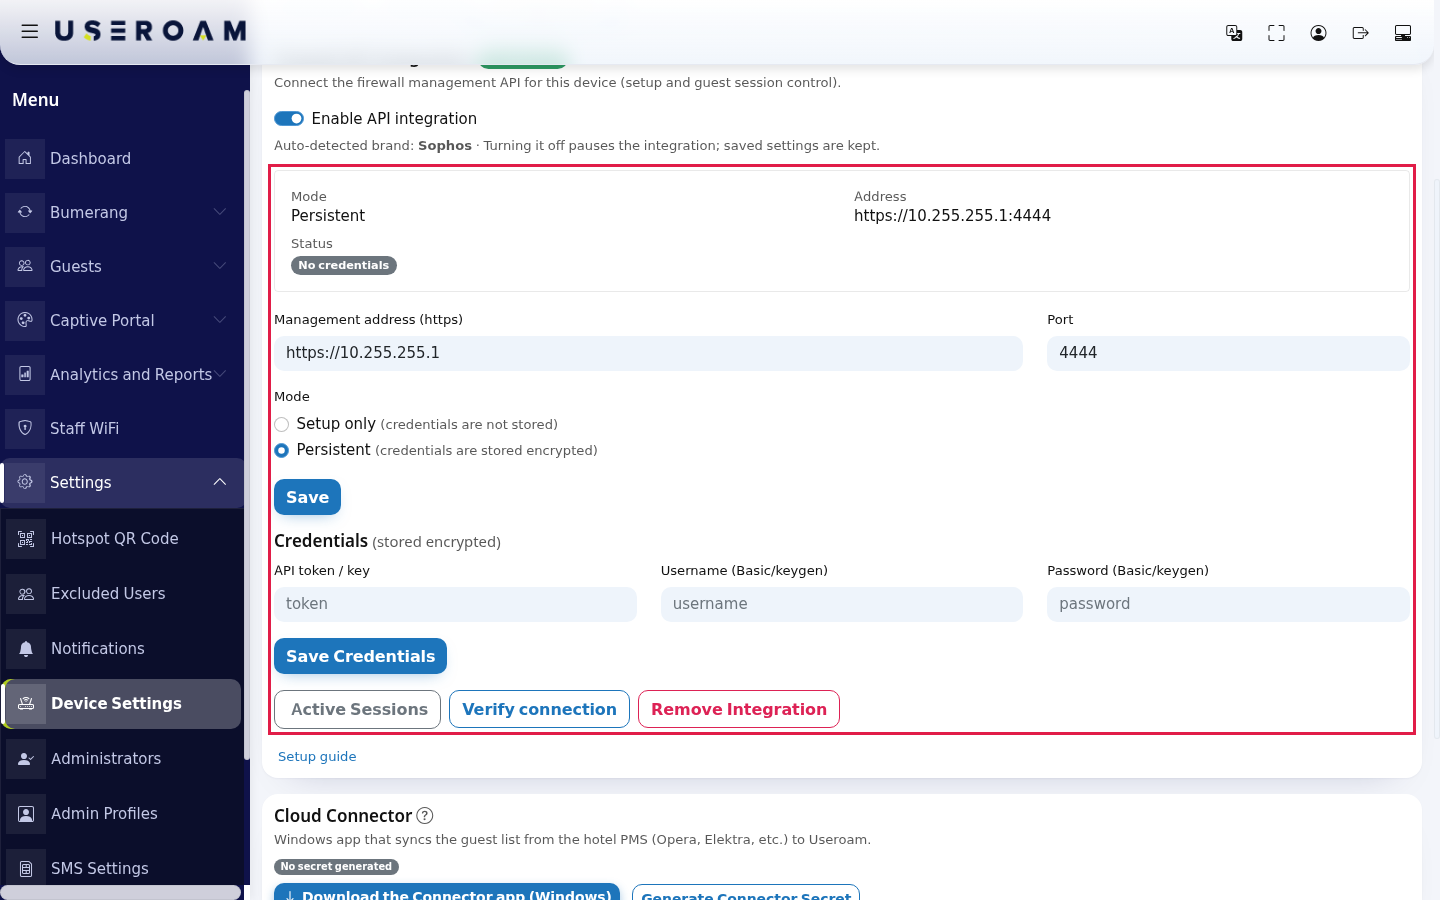
| Status badge | Meaning |
|---|---|
| Credentials stored / No credentials | Whether API credentials are stored. |
| Certificate pinned | The device's security certificate was saved. If the certificate changes, the connection is refused. |
| Firewall API (green) / Paused (grey) | The integration is on or paused. |
On a saved integration the switch shows Turning it off pauses the integration; saved settings are kept. Turn it back on to resume. To remove it completely, click Remove Integration and confirm Are you sure you want to remove the integration? Stored credentials will be deleted.
| Message | What to do |
|---|---|
| Configuration saved. | Address, port and mode were saved. |
| Credentials stored encrypted. | Now test with Verify connection. |
| Connection successful, credentials verified. | The integration works. |
| Firewall API integration re-enabled. | The integration runs again. |
| Firewall API integration paused. Saved settings were kept; turn the switch back on to resume. | For information. |
| Integration removed. | Record and credentials were deleted. |
| Credentials can only be stored in "persistent" mode. Change the mode first. | Set Mode to Persistent, click Save, then enter the credentials. |
| Device unreachable. Check the address, port and firewall API access permission. | Check address and port; make sure API access is allowed for the panel's address on the device. |
| Authentication failed. Check the username or password. | Enter the credentials again. Do not retry a wrong password repeatedly; the device may lock the account. |
| Certificate fingerprint mismatch. | The device's certificate changed. If you changed it yourself, contact support. |
| Unexpected response from the device. | Check that the address is the device's management address. |
| Enter a valid https:// address (only https is accepted). | Start the address with https://. |
| No integration configured yet. | Save address, port and mode first. |
| Session validation failed. Refresh the page and try again. | Refresh the page. |
| You are not authorized for this device. | This device is not linked to your account. |
| Invalid vendor or authentication type. | Contact support. |
| Done. | Done. |
On MikroTik devices the fields of this card are filled in automatically by the two-step setup and stay collapsed under Advanced settings (address, port, credentials). To set up the API while adding a Sophos device, see Sophos Firewall API Setup.
Cloud Connector
A Windows app that syncs the guest list from the hotel PMS (Opera, Elektra, etc.) to Useroam. The question mark next to the title opens the explanation: Identity key for this device. Paste this value into the connector app's Cloud Secret field. and Install it on a Windows machine inside the company network.
Download the app with Download the Connector app (Windows) and install it on a Windows machine inside the company network. Then click Generate Connector Secret. A yellow New Connector Secret (shown only now): box appears in the card. Copy the value with Copy and paste it into the app's Cloud Secret field. Below the box it says Paste this into the connector. It will not be shown again after refresh.
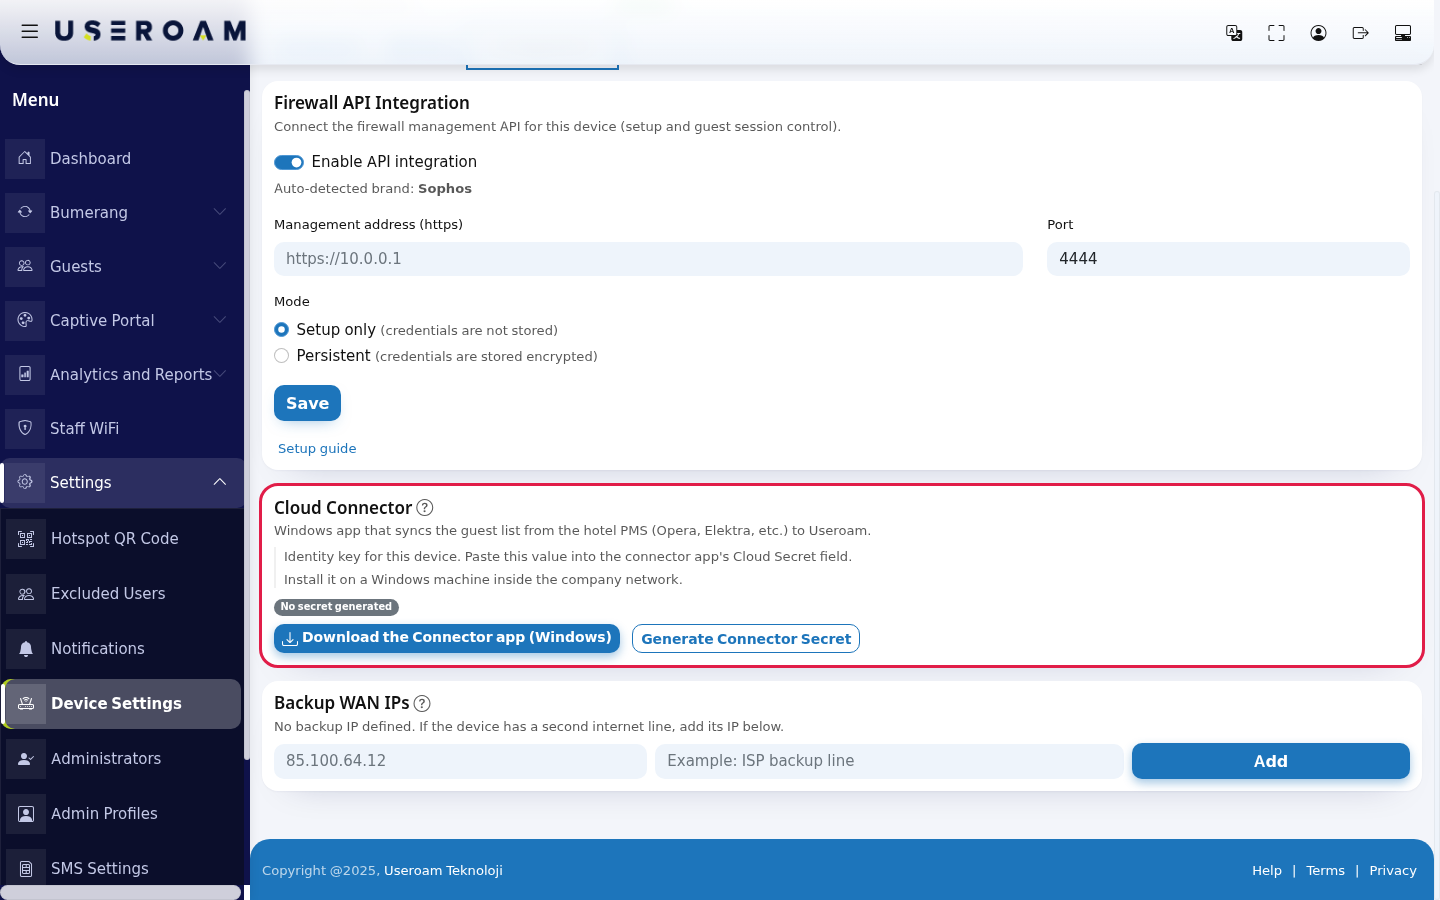
Once the app connects, the card shows the Secret set badge, Version and Last seen. Without a key it says No secret generated. To change the key, click Regenerate Secret. If you confirm A new secret will be generated; the old connector link becomes invalid. Continue?, the old key stops working and you must enter the new value in the app.
| Message at the top of the screen | What to do |
|---|---|
| Connector secret uretildi. Asagidaki degeri connectora girin. (secret generated) | Enter the value in the yellow box into the app. |
| Secret uretilemedi. (secret could not be generated) | Try again; if it continues, contact support. |
| Connector secret iptal edildi. (secret cancelled) | The key was cancelled; the app cannot connect. Generate a new key. |
| Oturum dogrulamasi basarisiz (CSRF). (session check failed) | Refresh the page and try again. |
Backup WAN IPs
Public IPs of this device's other internet lines. When the main line fails over to a backup line, guest logins, sessions and 5651 logs keep being recorded under this device. With no backup it says No backup IP defined. If the device has a second internet line, add its IP below.
Click the question mark next to the title to read the explanation. Type the backup line's IP in the first box (e.g. 85.100.64.12) and an optional note in the second (the box shows Example: ISP backup line). Click Add.
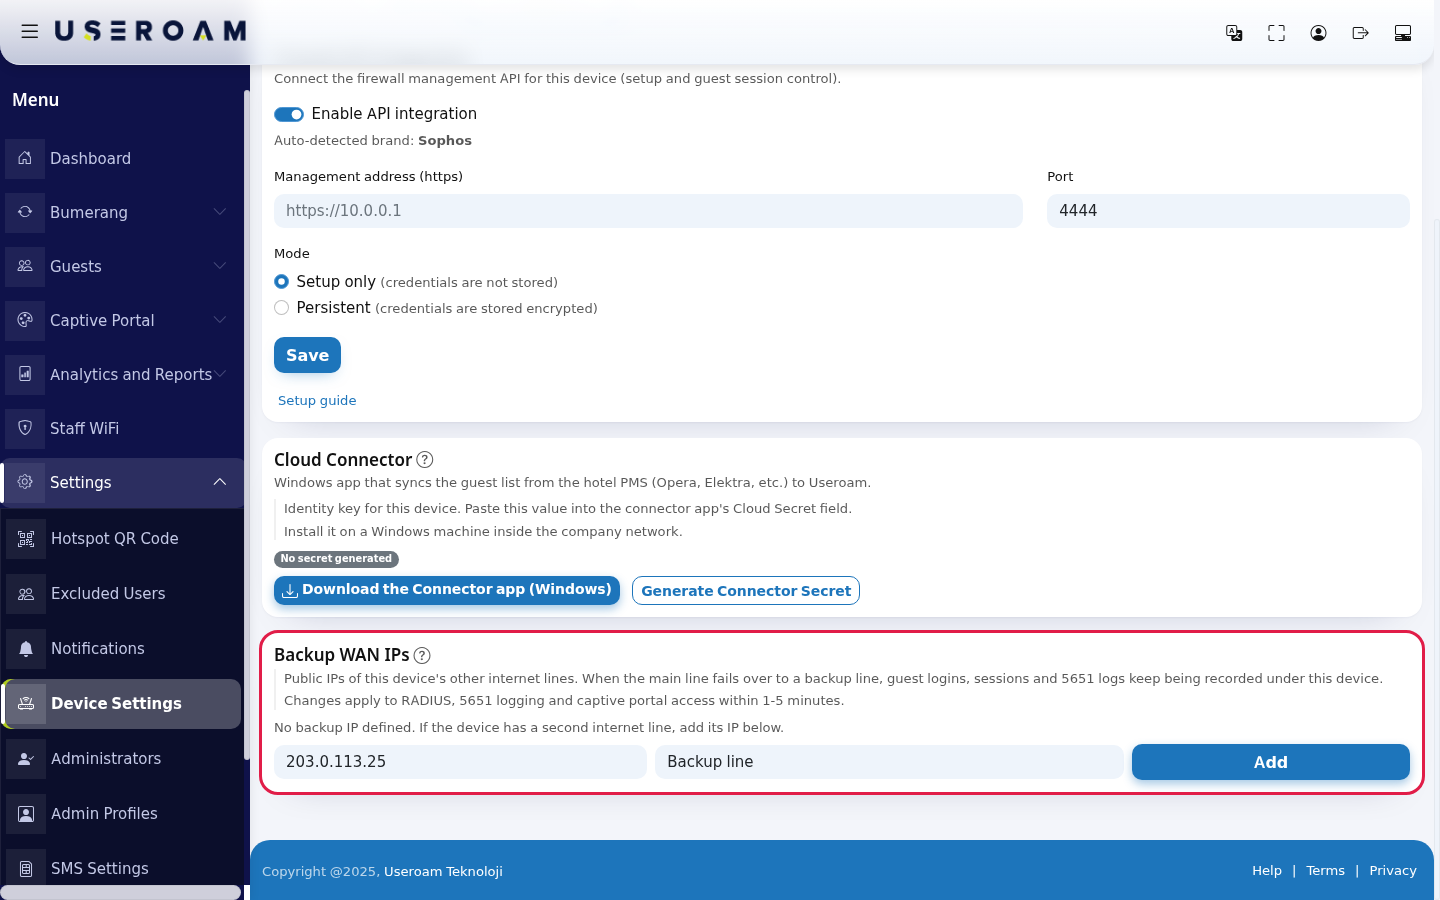
Added addresses are listed with Backup IP, Note (optional) and Added columns. Changes apply to RADIUS, 5651 logging and captive portal access within 1-5 minutes.
To remove an address, click Delete on its row and confirm Delete this backup IP? Logins from this line will be rejected.
| Message | What to do |
|---|---|
| Backup IP added. It takes effect within 1-5 minutes. | Wait. |
| Backup IP deleted. | Done. |
| Enter a valid IPv4 address. Example: 85.100.64.12 | Type a four-part IP. |
| This is the device's main IP; it cannot be added as a backup. | The main address is already in Device Address. |
| This backup IP is already added. | No need to add it again. |
| This IP is registered to another device. The same IP cannot be used by two devices; please contact support. | Contact support. |
| A device can have at most 8 backup IPs. | Delete a backup IP you no longer use. |
Frequently asked questions
I changed my internet line and guests cannot log in.
The device's public IP changed. On the General tab change Device Address to the new IP and click Save.
I have two internet lines. Which one goes where?
The main line's IP goes into Device Address, the other into Backup WAN IPs.
Does Brand Name change legal texts?
No. This name replaces |company| in campaign messages; if left empty, the account's registered legal name is used. GDPR/KVKK texts always show the legal name.
Should I change the Device Password?
Not unless you must. If you change it, enter the same password in the device's RADIUS setting too, otherwise guests cannot log in.
I lost the connector key.
The key is shown only when generated. Use Regenerate Secret and enter the new one in the app.