
Device (Advanced)
What is it for?
This page coversdescribes the fivesix screenssections inof the module'console's DEVICE (ADVANCED) group.group: TheyPorts, IP and Routing, Firewall, VPN, Device Accounts and Backup. These sections touch the device's core network configuration;settings. theyThey are not needed for day-to-daydaily operation,operation; butuse them when troubleshooting, checking a setup or following instructions from technical support.
Careful: a change in these sections can cut the device's internet or the panel's access to the device. If you are
screenusedunsure,whendotroubleshootingnotorchangeverifyinganything;athesetup.says
Warning:the same: Changes made onthesethisscreensscreen are applied to the device immediately and cannot beundone.undone. If you are unsure, do not change anything.
When
do
1.youPortsuse it?
The
device's- You
portswantandtowireless interfaces:see whichareportup,goesand how much data has passed through them.
TheThis device's connectionsbox atto thetop answers two questions: which interface carries theinternetuplink,and whichcarriesto the guestnetwork.network.If- You will check the
device cannot be read, both showundetermined. Checking here before running the setup wizard makes choosing the right interface easier.
2. IP and Routing
Thedevice's IP addresses, its route to the internetandor its DNSsettings,settings.- You want to confirm the Useroam firewall rules are in
threeplacesections:or add a rule.- You will set up VPN for remote access (separate page: VPN (WireGuard) Setup).
Before you start
- The device must be connected to the panel.
- Note what you do before a change. You can undo the last change with
IPUndoaddressesin the strip at the top (MikroTik Management).- Do not delete records with the Useroam badge; guest login, 5651 logging or panel access will break.
Step by step
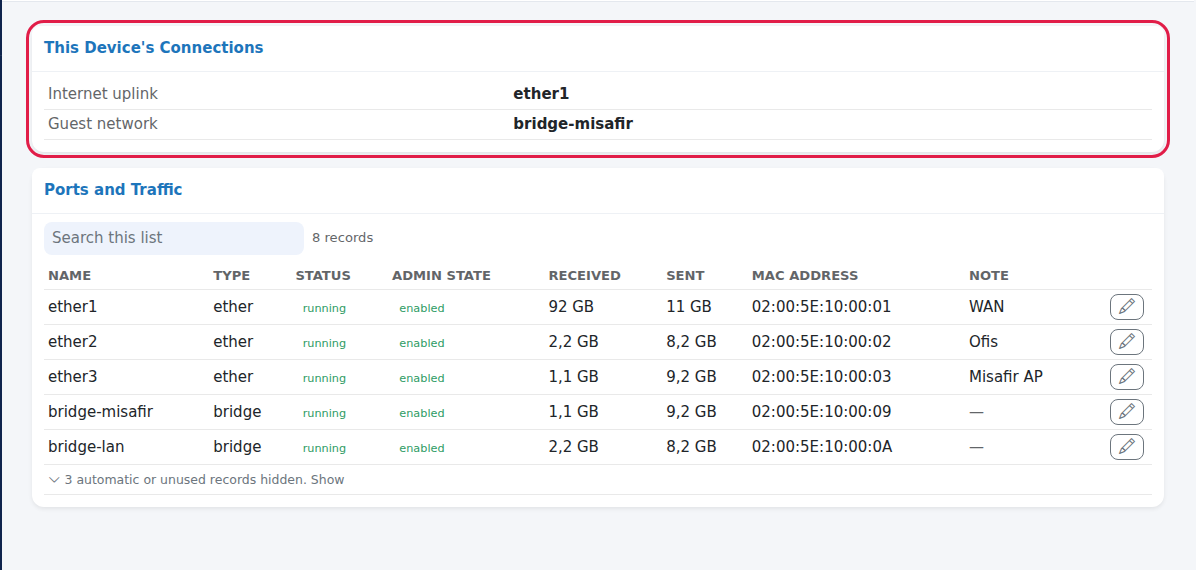
Ports. In the left menu press DEVICE (ADVANCED) > Ports (The ports and wireless interfaces of the device: which are up and how much data passed through.). The This Device's Connections card at the top answers two questions: which port is the Internet uplink and which is the Guest network; if not found it reads could not be determined. The Ports and Traffic card shows each port's Name,
routingType,tableStatus (running / down), Admin state (enabled / disabled), Received, Sent, MAC address andDNS settingNote.
Portsa
3.withoutFirewall
Showscable are hidden. With therulespencilbyonlywhichDisabled and Note can be changed. Do not disable the internet port; the devicepasseswouldorloseblocksthetraffic,panel.inWiththreenosections:ports it reads No interfaces found.
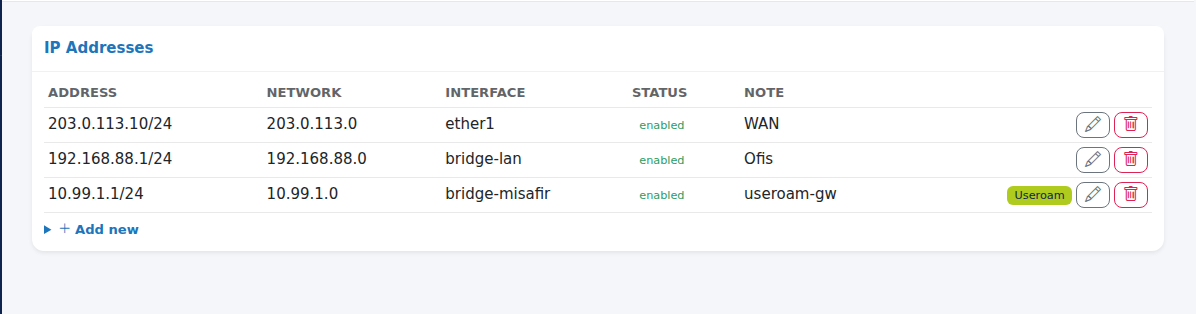
IP and Routing: IP addresses. Press
RulesIP and Routing (The IP addresses of the device, its route to the internet and DNS settings.). The IP Addresses card shows Address,NATNetwork, Interface, Status andAddress listsNote. Adding and editing use the Address (e.g. 10.99.1.1/24), Interface, Disabled and Note fields. With no addresses it reads No IP addresses defined.
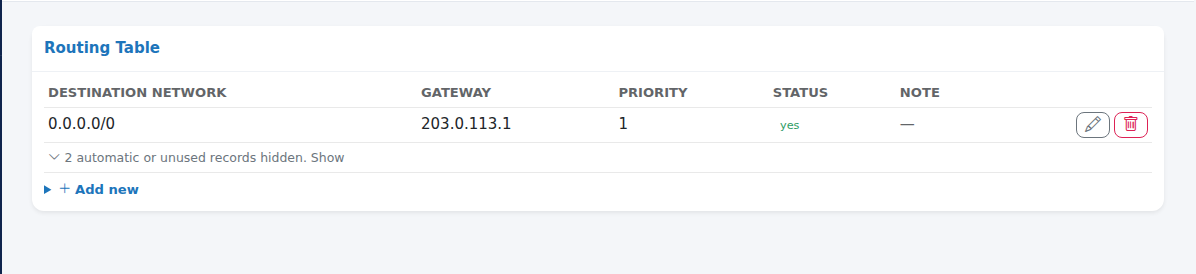
WhatIPnotand Routing: routing table. The Routing Table card shows Destination network, Gateway, Priority, Status (yes = in use now) and Note. The row with destination 0.0.0.0/0 is the device's route totouch:the internet. Routes the device creates itself are hidden and locked. A new route takes Destination network, GatewayAutomaticallyandcreatedNote. With no routes it reads No routes.
IP and Routing: DNS. The DNS Settings card has DNS servers (comma separated, e.g. 1.1.1.1,8.8.8.8) and Allow remote requests (yes / no); Save writes them. For the guest network Allow remote requests must be yes; if you turn it off guests cannot open web pages.
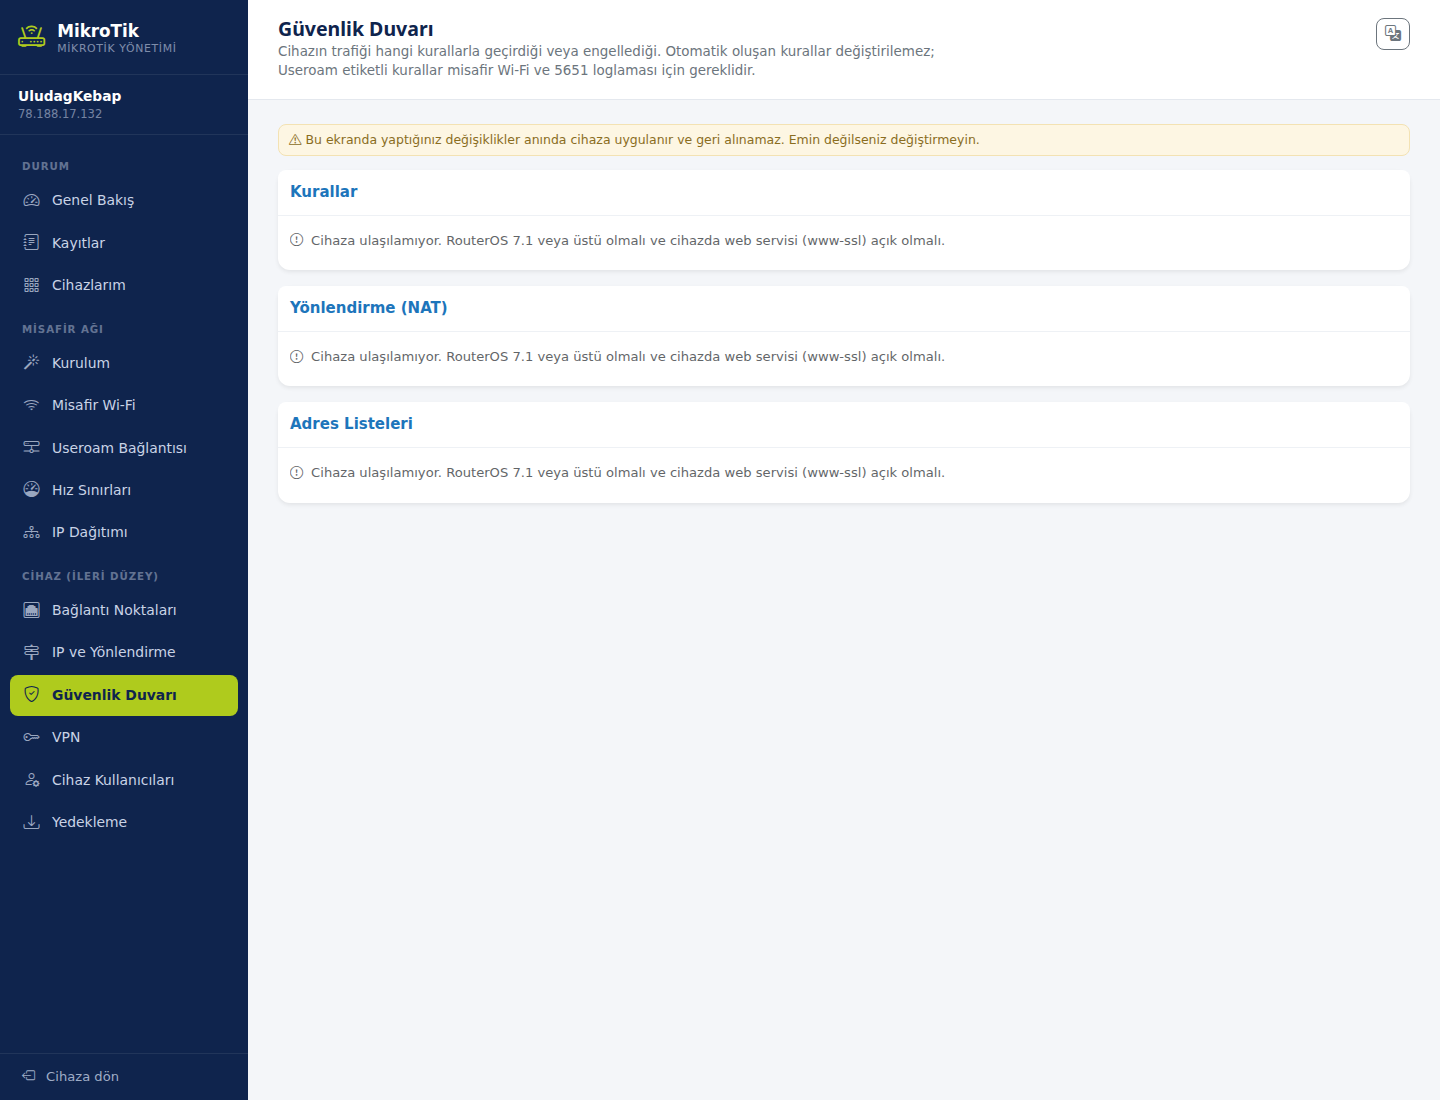
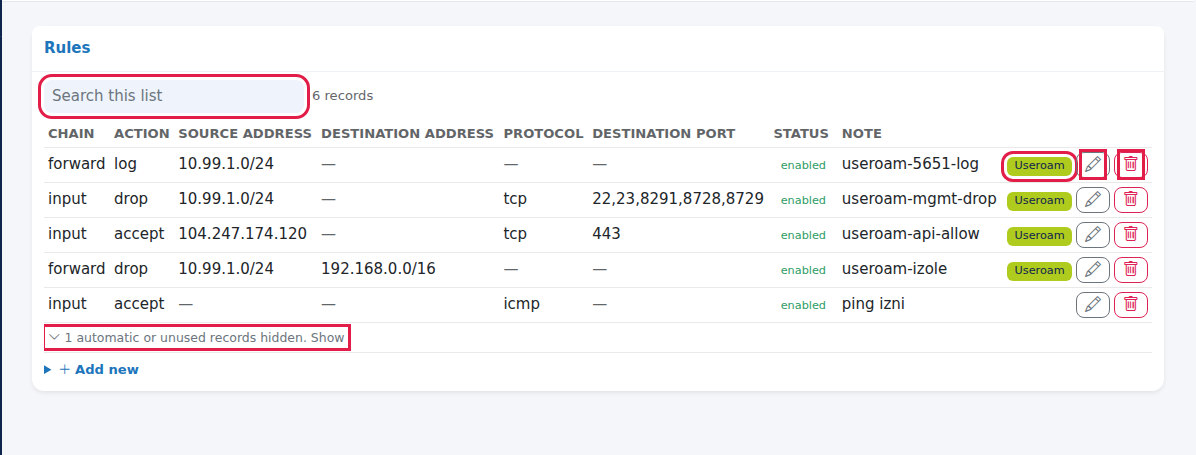
Firewall: rules. Press Firewall (Which rules the device uses to pass or block traffic. Automatic rules cannot be
changed.edited;Rulesrulestaggedlabelled Useroam are required for guest Wi-Fi and 5651logginglogging.). The Rules—cardremoving them breaks legal logging.

4. VPN
Settings for secure remote access:shows WireGuardChain, IPsecAction, Source address, Destination address, Protocol, Destination port, Status and PPP accounts.
WireGuard already ships built into your device; it only needs defining. The Set up VPN button creates the interface, the address and the required firewall permission in one goNote. The sectionsadd belowform listhas Chain (forward, input, output), Action (accept, drop, reject, log), Source address, Destination address, Protocol (empty, tcp, udp, icmp), Destination port and Note; editing also has Disabled. New rules are added to the end of the list. With no rules it reads No rules.
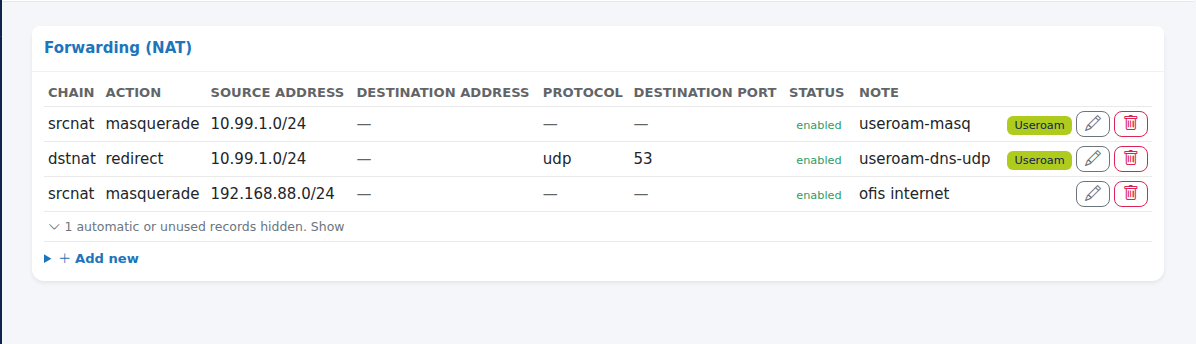
Firewall: forwarding (NAT). The Forwarding (NAT) card shows the same columns. In the add form Chain is srcnat or dstnat, and Action is masquerade, src-nat, dst-nat, redirect or accept. Guests reach the internet through the useroam-masq rule; do not delete it. With no rules it reads No NAT rules.
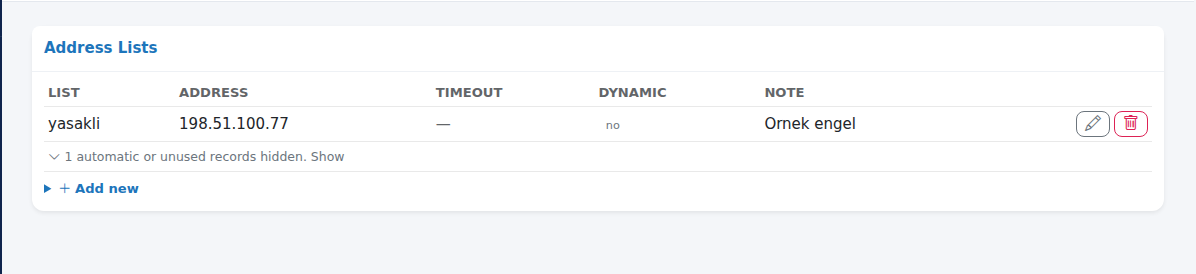
Firewall: address lists. The Address Lists card shows List, Address, Timeout, Dynamic and Note. To add, enter List name, Address and Note. With no lists it reads No address lists.
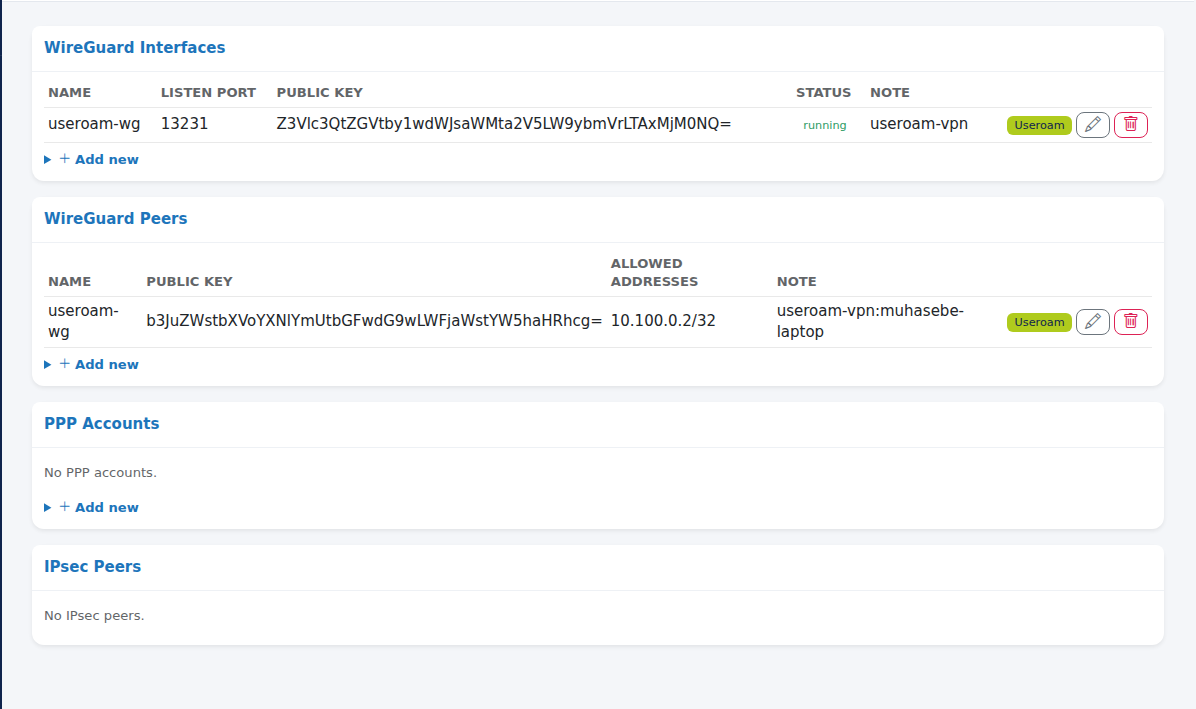
VPN. Press VPN (Secure remote access settings (WireGuard, IPsec, PPP accounts).). The VPN Setup card at the top sets up WireGuard with one button and adds people. Below it are the WireGuard interfacesInterfaces, WireGuard peersPeers, PPP accountsAccounts and IPsec peersPeers lists. Step by step: VPN (WireGuard) Setup.
5.
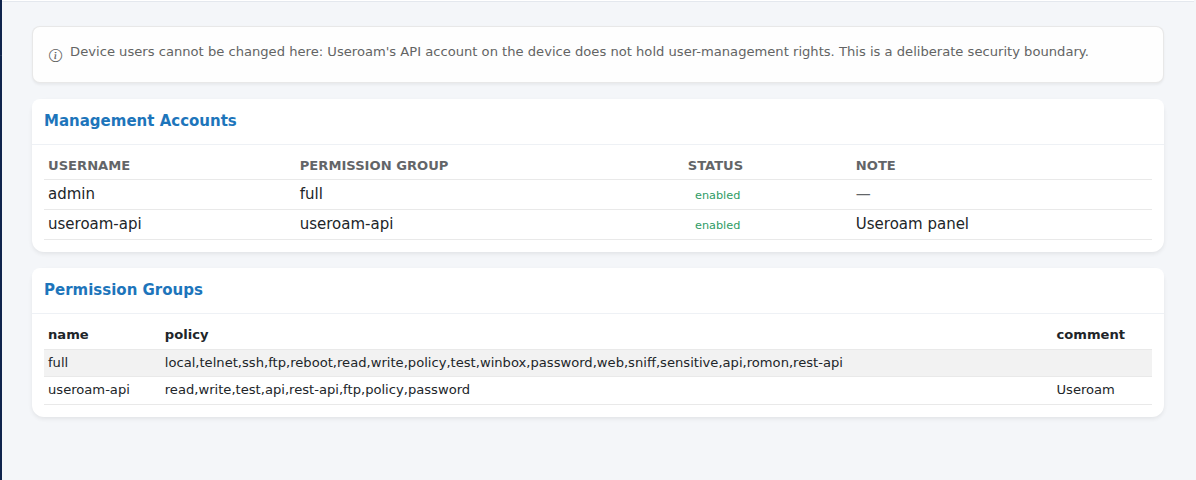
Device Accounts. Press Device Accounts
(The device's own management accounts, listedof asthe managementdevice accountsitself. andFor permissionguest groups.Wi-Fi users see the Guest Wi-Fi userssection.). are not here — they are inAt the Guesttop Wi-Fiit section.
DeviceThe Management Accounts
Youusers cannotchangebeanythingchangedhere.here: Useroam's API account on the device does not holdtheuser-managementpermission.rights. This is a deliberate securityboundaryboundary.:evencardifshows Username, Permission group, Status and Note; the Permission Groups card shows the groups' rights as they come from the device. You will see the useroam-api account in the list; the panelwereusescompromised,it to connect, do not delete it. If they cannot be read it shows Accounts could not be read. or No groups.
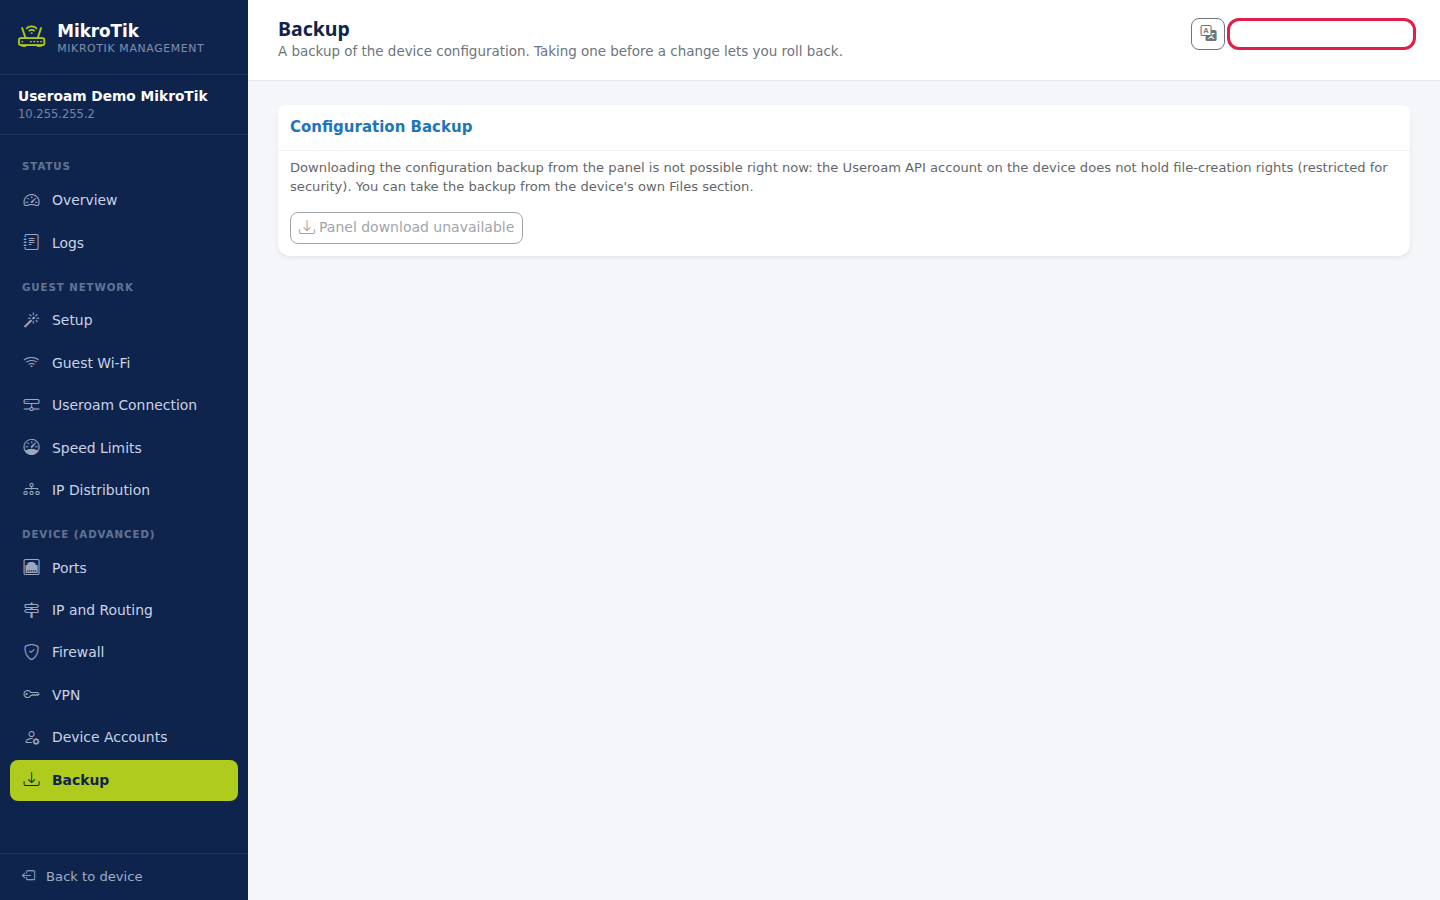
Backup. Press Backup (A backup of the device configuration. Taking one before a change lets you roll back.). The Configuration Backup card reads Downloading the configuration backup from the panel is not possible right now: the Useroam API account on the device does not hold file-creation rights (restricted for security). You can take the backup from the device's own Files section. The Panel download unavailable button cannot be pressed. Take the backup in Winbox under Files, or with /export file=backup in the terminal. The Setup Wizard also takes its own useroam-oncesi-...rsc backup before every setup.
What are the Useroam-badged records for?
| Note (comment) | Where | Purpose |
|---|---|---|
| useroam-api-allow | Firewall, Rules | Lets the panel connect to the device. If deleted the console stops working. |
| useroam-5651-log | Firewall, Rules | Logs every new guest connection for 5651. |
| useroam-mgmt-drop | Firewall, Rules | Blocks guest access to the device's management |
| useroam-izole | Firewall, | Separates |
| useroam-dns-wan-drop, | Firewall, | Stops outside use of the DNS service and blocks encrypted DNS and QUIC that bypass logging. |
| useroam-masq, useroam-dns-udp, useroam-dns-tcp | Firewall, Forwarding (NAT) | Guest internet access and redirecting DNS queries to the |
| useroam-gw | IP and Routing, IP Addresses | The guest network's gateway address. |
| useroam-vpn, useroam-vpn-port, useroam-vpn:<name> | VPN, IP Addresses, Rules | Interface, address, port permission and users added by VPN Setup. |
Frequently asked questions
I deleted a rule and guests cannot log in.
Press Undo at the top right away. If the undo time has passed, run the Setup Wizard again; it adds the Useroam records back.
My new rule does not work.
New rules are added to the end of the list; a rule above it may catch the traffic first. Rule order cannot be changed on this screen; use the device's own interface.
I want to add a device user.
Not possible here. Use System > Users in Winbox.
Related pages:pages
- VPN (WireGuard) Setup
- MikroTik Management
- Setup Wizard
,