
VPN (WireGuard) Setup
What is it for?
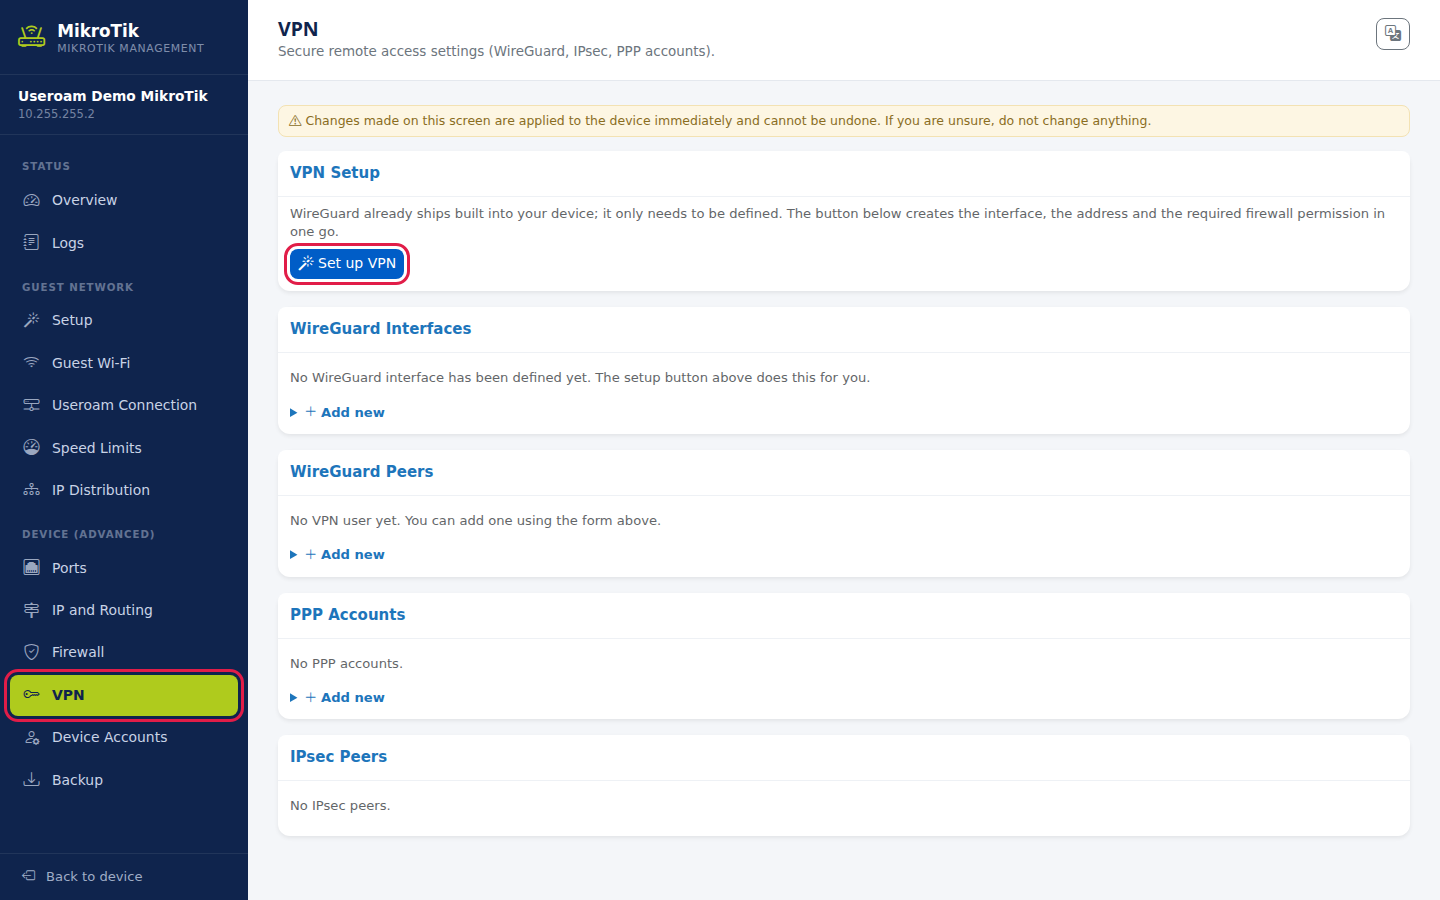
VPN Setup lets you set up WireGuard VPN on your MikroTik device with one button and add people. Your manager or accountant can then connect securely to the business's internal network from outside (home, phone). The card reads: WireGuard already ships built into your device; it only needs to be defined. The button below creates the interface, the address and the required firewall permission in one go.
How do I open this screen? In the MikroTik Management console, from the left menu: DEVICE (ADVANCED) > VPN. The wizard is the VPN Setup card at the top of the section.
When do you use it?
- A manager needs to reach the till computer or cameras from outside the business.
- You are opening secure remote access for a staff laptop.
- You want to remove someone's VPN access.
Before you start
- The device must be connected to the panel and run RouterOS 7 (WireGuard comes with RouterOS 7).
- For outside connections, UDP port 13231 must reach the device. If the device sits behind another modem, forward this UDP port to the MikroTik there. The card says so too: To connect from outside, this UDP port must be forwarded to the device on your modem or firewall. Ask us if you are unsure.
- The computer or phone that will connect needs the WireGuard app (free in the app stores).
- Open a separate VPN user for each person or device; when someone leaves you delete only theirs.
Step by step
Set up the VPN. In the left menu press VPN. In the VPN Setup card press Set up VPN. The panel creates the useroam-wg WireGuard interface (port 13231), the 10.100.0.1/24 address and a firewall permission for connections arriving on that port. When it works, VPN is set up. You can now add users. appears at the top. You do this once; if the VPN is already set up, the button is not shown.
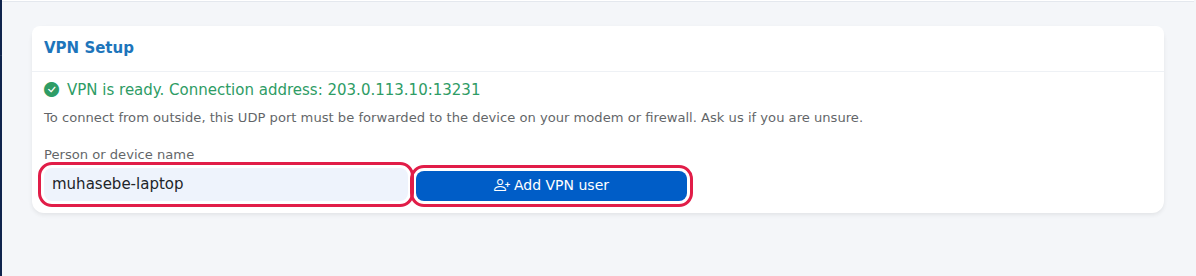
Note the connection address and add a person. After setup the card reads, in green, VPN is ready. Connection address: ... (the device's public address and port, e.g. 203.0.113.10:13231). Enter who it is for in Person or device name (e.g. accounting-laptop; only letters, digits, dot, hyphen and underscore are kept, spaces and special characters are dropped) and press Add VPN user.
Save the settings right away. Together with VPN user added. Take the settings below. the person's WireGuard settings (as text) and a QR code appear. Mind the yellow warning: These settings are shown only once. The private key is not stored on our servers. Save it now or scan the QR code. If you leave the page, these settings are never shown again; you would have to add a new user.
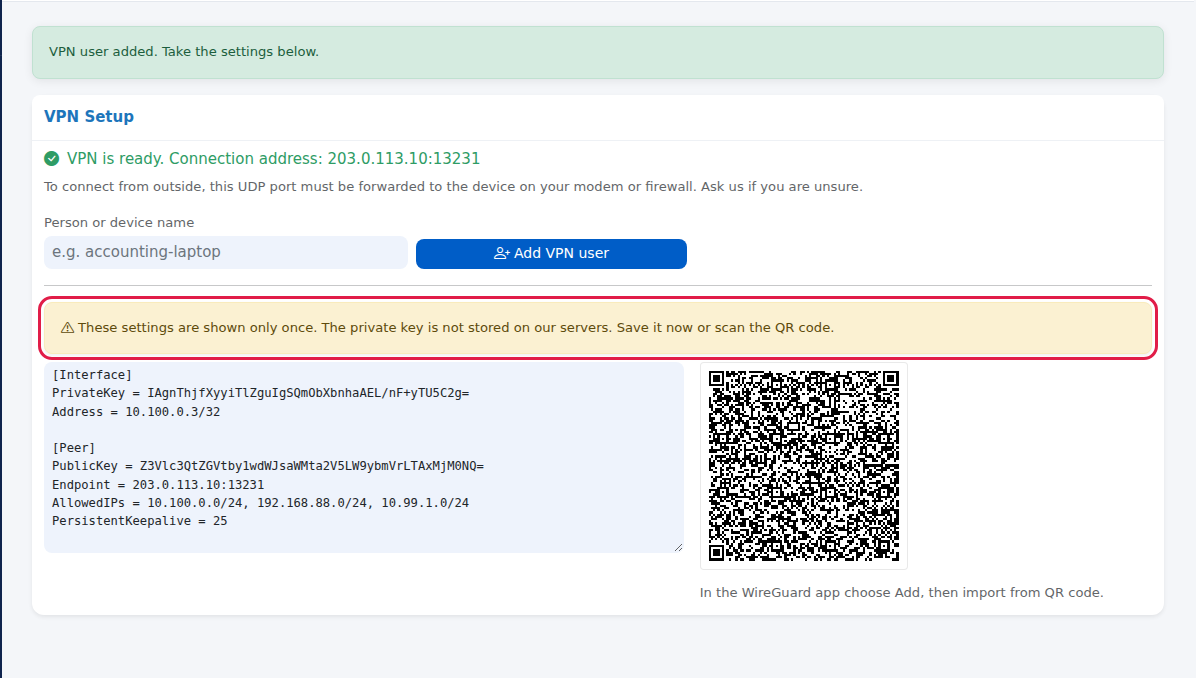
The settings and keys in the image are samples and are not used on any device.
Transfer them to the person's device. On a phone, in the WireGuard app press Add, then import from QR code and scan the code on the screen (the card also says In the WireGuard app choose Add, then import from QR code.). On a computer save the text as a .conf file and open it in the WireGuard app with Import tunnel(s) from file. The settings give the person an address from the VPN network (e.g. 10.100.0.2) and access to the device's internal networks (not the internet uplink).
See the users in the list. In the same section, each person you add is a row in the WireGuard Peers card (the interface in the Name column, Public key, Allowed addresses, and useroam-vpn:<name> in Note). To remove someone's access, press the bin on their row. The WireGuard Interfaces card shows the VPN interface's Name, Listen port, Public key, Status and Note.
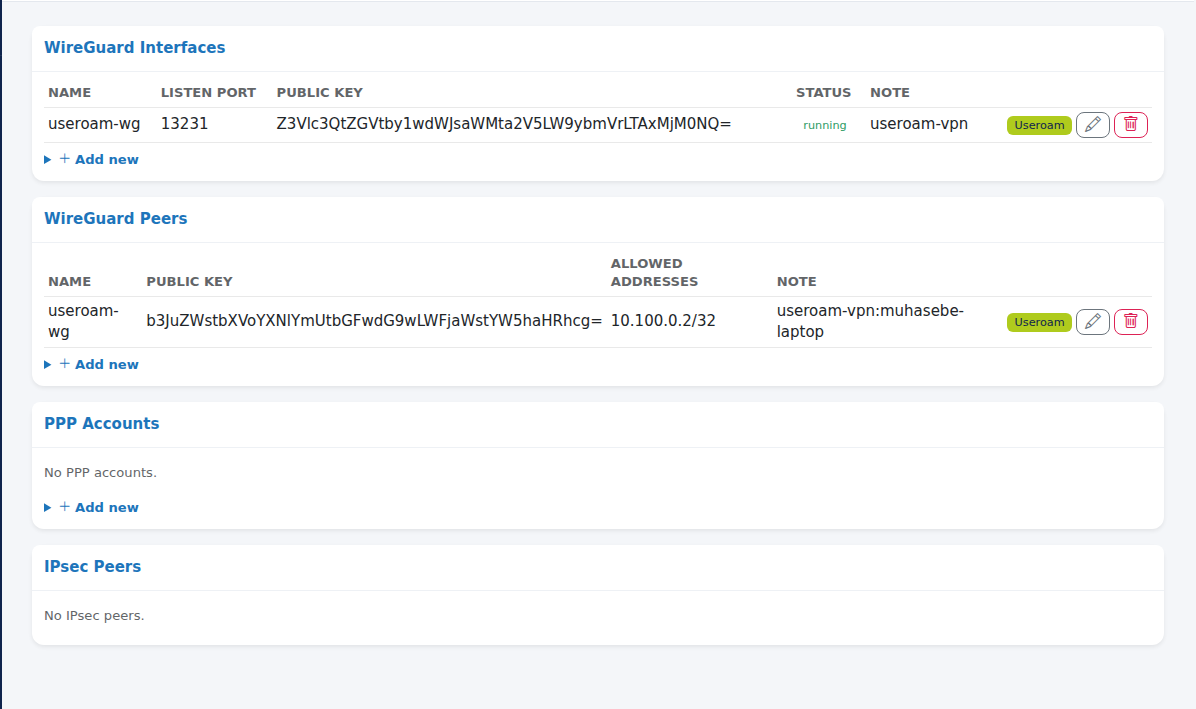
Fields, buttons and lists on the screen
| Item | What it does | Example |
|---|---|---|
| Set up VPN | Creates the WireGuard interface, its address and the port permission. Once. | |
| Person or device name | The VPN user's name; recognisable in the list note. | accounting-laptop |
| Add VPN user | Creates a new key for the person, adds it to the device and shows the settings once. | |
| WireGuard Interfaces | Name, Listen port, Public key, Status, Note. Editing: Name, Listen port, Disabled, Note. | useroam-wg, 13231 |
| WireGuard Peers | The VPN users. Manual add: Name (interface name), Public key, Allowed addresses, Note. | 10.100.0.2/32 |
| PPP Accounts | Older VPN accounts: Username, Service, Profile, Status, Note. Add: Username, Password, Service (any, pppoe, l2tp, pptp, sstp, ovpn), Note. | |
| IPsec Peers | Defined IPsec connections as they come from the device. View only. |
Warnings and error messages
| Message | Meaning | What to do |
|---|---|---|
| Please enter a name. | The name is empty or consists only of characters that are not allowed. | Enter a name with letters and digits. |
| Set up the VPN first. | A user was added before the VPN was set up. | Press Set up VPN. |
| The VPN address pool is full. | The limit of 253 users was reached. | Delete unused peers. |
| No WireGuard interface has been defined yet. The setup button above does this for you. | The VPN is not set up. | Press Set up VPN. |
| No VPN user yet. You can add one using the form above. | No users added. | Add a person. |
| No PPP accounts. / No IPsec peers. | No such connections are defined. | Normal. |
Frequently asked questions
I closed the page without saving the settings.
The private key is not stored, so the settings cannot be recovered. Delete the old row in WireGuard Peers and add a new user for the same person.
I cannot connect to the VPN.
If the device is behind a modem, check that UDP 13231 is forwarded to the MikroTik. The IP in the connection address is the device's public address; if it changed, the Endpoint line in the settings must change too.
Does the person lose their own internet while connected?
No. The settings only send the VPN network and the device's internal networks over the VPN; internet traffic leaves through the person's own connection.
An employee left.
In WireGuard Peers delete the row whose note contains that person's name.