
Setting up your restaurant on day one
What is it for?
This page walks someone who has never used the restaurant module through everything to do on day one, in order: the setup wizard, request types, points, daily tasks, staff, printing table QR codes and testing that everything works. Follow the steps in order; each one says what you should see at the end. It takes about 30-45 minutes in total.
When do I use it?
- When you turn on the restaurant module for the first time.
- When setting up a new branch (a new device).
- To show a new manager taking over the setup what to do.
Before you start
- Sign in to the panel as the account administrator and select the restaurant's device at the top.
- Have these ready: your department list (for example Waiter, Kitchen, Cleaning, Technical), staff names and mobile numbers, your table count or table names, and e-mails of outside service companies (optional).
- If your menu items are ready as Excel or PDF, the QR menu step is much shorter.
Step by step
- Open the wizard and create the restaurant. In the left menu click Restaurant → Requests; with no restaurant yet you see "Start the restaurant module". Type the business name and click Create. The panel takes you to the Venue Setup Wizard. What you should see: a green tick and your venue name on step 1.

- Set up departments. In wizard step 2 click Add restaurant departments (Cleaning, Technical, Waiter, Kitchen). If you need another (for example
Bar), type it in Department name and click Add. What you should see: department tags on the card.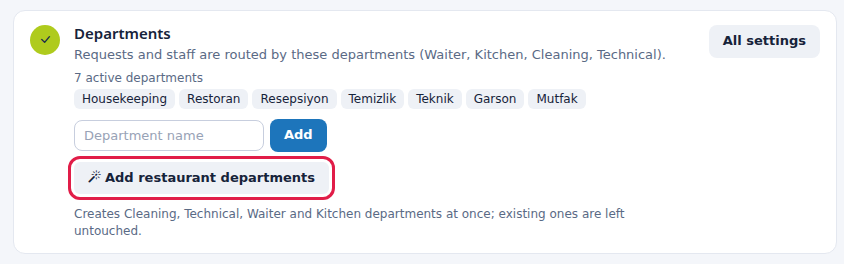
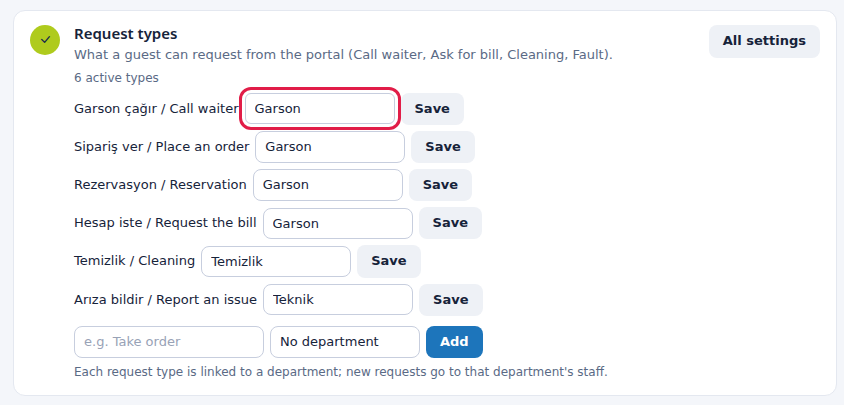
- Link request types to departments. In step 3 pick the department next to each type and click Save: Call waiter and Request bill → Waiter, Cleaning → Cleaning, Fault → Technical. Add new types for your own jobs. Details: Request Types. What you should see: no "... have no department" warning on the card.
- Review points. Ready points (restrooms, kitchen, storage and so on) were installed with the restaurant. Open Operations → Points in the left menu. Use + Add point for missing places (for example
Terrace) and open unused ones to Delete them. Set an owner for each point: click the point, choose a department in Which department looks after it? and click Save. Staff do not see a point with no owner in the app. Details: Operations.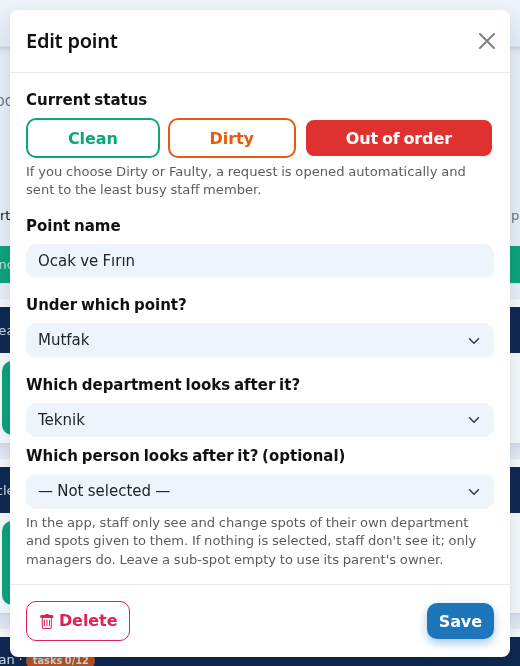
- Adjust daily tasks. Review the ready tasks in Operations → Daily Tasks. Change times and owners with Edit, delete the ones you do not need, and add missing ones with + Add task (for example
Restroom check, 09-13-17, Cleaning, photo required). For measurements such as fridge temperature, enter the unit and limits under Other settings.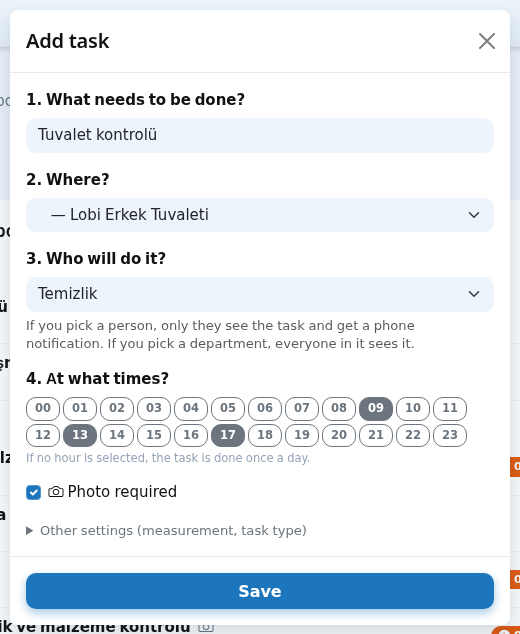
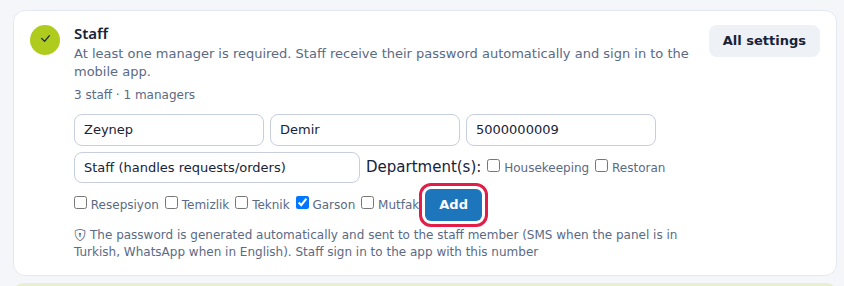
- Add staff. In wizard step 4 (or on the Staff screen) enter each person's name, last name, mobile number, role and department and click Add. At least one person must be a Manager. The password goes to the person automatically by SMS or WhatsApp. What you should see: "... staff · 1 managers" on the card.
- Staff install the app. Share the App Store, Google Play or Download page link from the Staff app card on the Staff screen. Staff sign in with their phone number and the password they received. Details: What is Useroam Go?

- (Optional) Add a delay rule. In wizard step 5 choose for example Waiter, Not picked up,
5minutes and click Add. Details: SLA. You can also set up an Automation rule for outside service companies.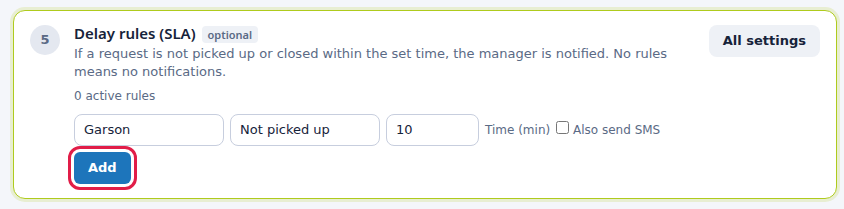
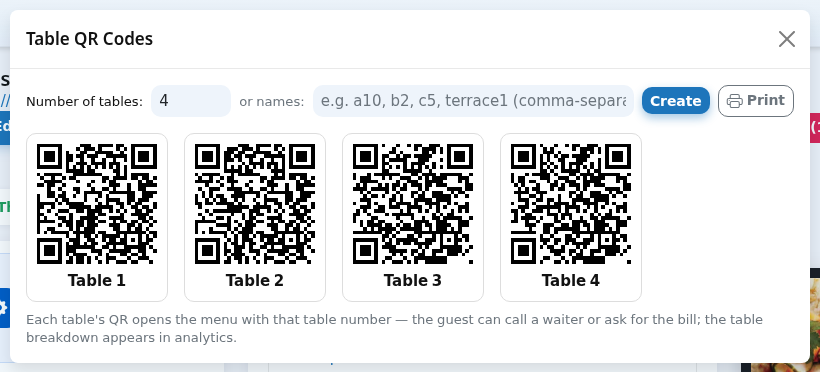
- Prepare the QR menu and print table QR codes. From the wizard's QR menu card, use Create digital menu (or Edit menu) to build your menu; details: Setting up the QR menu from start to finish. In the menu editor click Table QR, enter the number of tables (or type table names separated by commas), then click Create and Print. Stick each QR on its table: guests use it to call a waiter, ask for the bill and, if enabled, order.
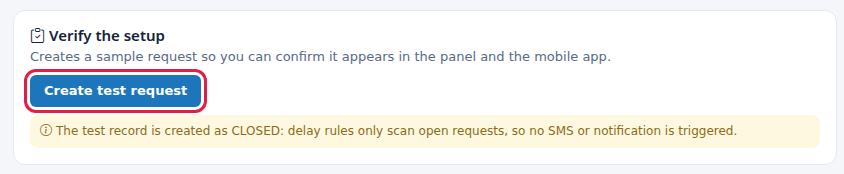
- Test. On the wizard's Verify the setup card click Create test request; check it appears in the panel (Requests → Closed) and in a manager's app, then click Delete test record. Then scan a table QR with your phone and tap Call Waiter; the call should appear on the Operations Screen and on the waiters' phones. Close the call with Done.
Day-one checklist
| Check | Where to look |
|---|---|
| The wizard says "All required steps are complete." | Venue Setup Wizard |
| Every request type has a department. | Restaurant → Request Types |
| Every point has an owner department. | Operations → Points (person icon in the box) |
| Daily task times and owners are right. | Operations → Daily Tasks |
| All staff could sign in to the app. | Staff screen, staff phones |
| Table QRs are printed and stuck; one was scanned as a test. | Menu editor → Table QR, Operations Screen |
| The test record was deleted. | Wizard → Verify the setup |
Frequently asked questions
Do I have to do all of this in one day?
No. The wizard works out where you left off from your data; open it and continue whenever you like.
Can I use the restaurant module without a menu?
Yes. Requests, points, tasks and the staff app work without a menu. The QR menu is only needed for guests to call a waiter, ask for the bill and order.
Staff phones get no notifications.
Staff must allow notifications in the app and be in the request's department. Details: Useroam Go: Warnings and Error Messages.