
Sophos Integration Guide
This guide covers the full integration between a Sophos Firewall and Useroam Cloud: RADIUS authentication, web authentication, the captive portal template, the firewall rules, and 5651 syslog forwarding.
Before you start: you need administrator access to the Sophos web interface and the WAN IP address of the firewall. If Useroam will also manage users over the API, complete the Sophos API Connection page afterwards.
1 - Adding the device to the Useroam panel
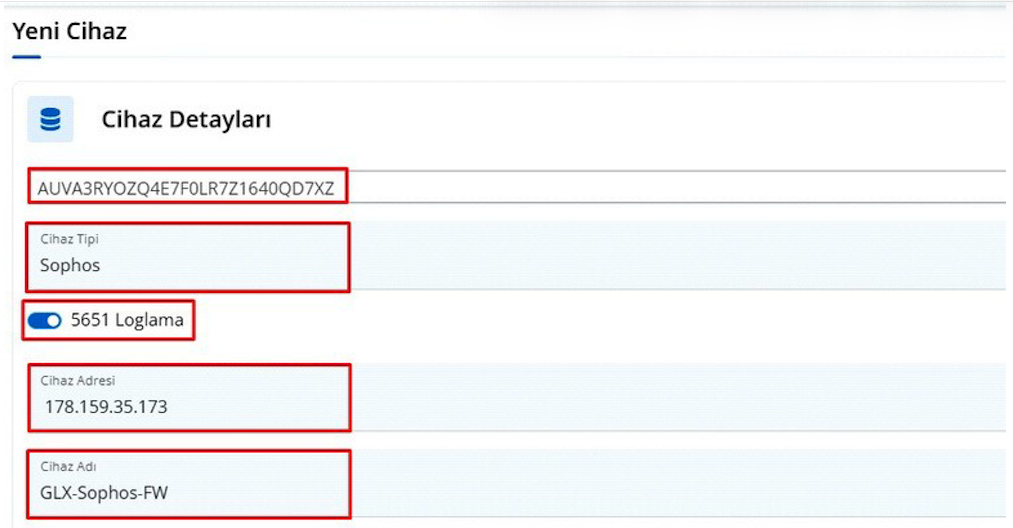
Sign in to your panel at panel.useroam.com and add a New Device. The system selects your license automatically.
- Device type: select Sophos.
- Device address: enter the WAN IP address of the firewall. If you have more than one WAN IP, the Sophos device sends this request from the first WAN interface by default.
Note: if you want the traffic to leave over a different WAN interface, create an SNAT rule to route it through the interface you want.
2 - Device Access settings
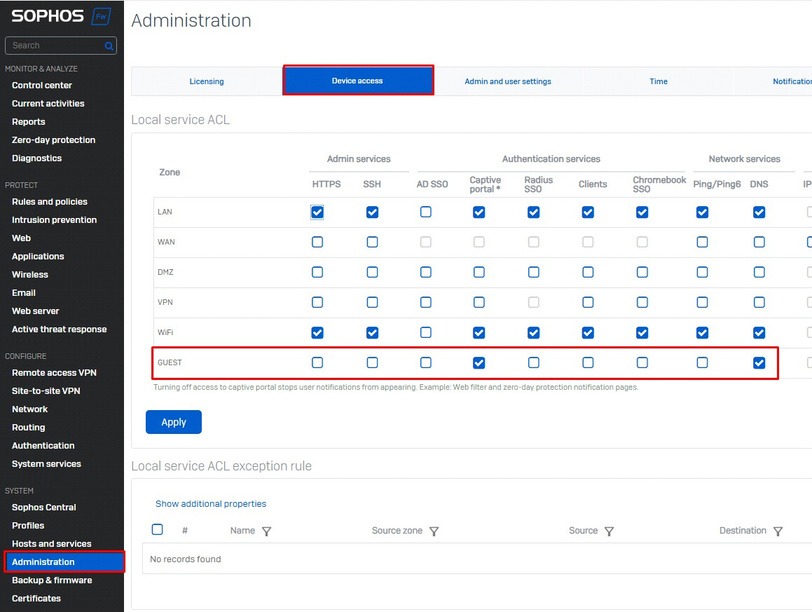
Go to Administration > Device Access. For the zone where you will use Useroam, enable only the Captive Portal and DNS options.
3 - Adding the RADIUS server
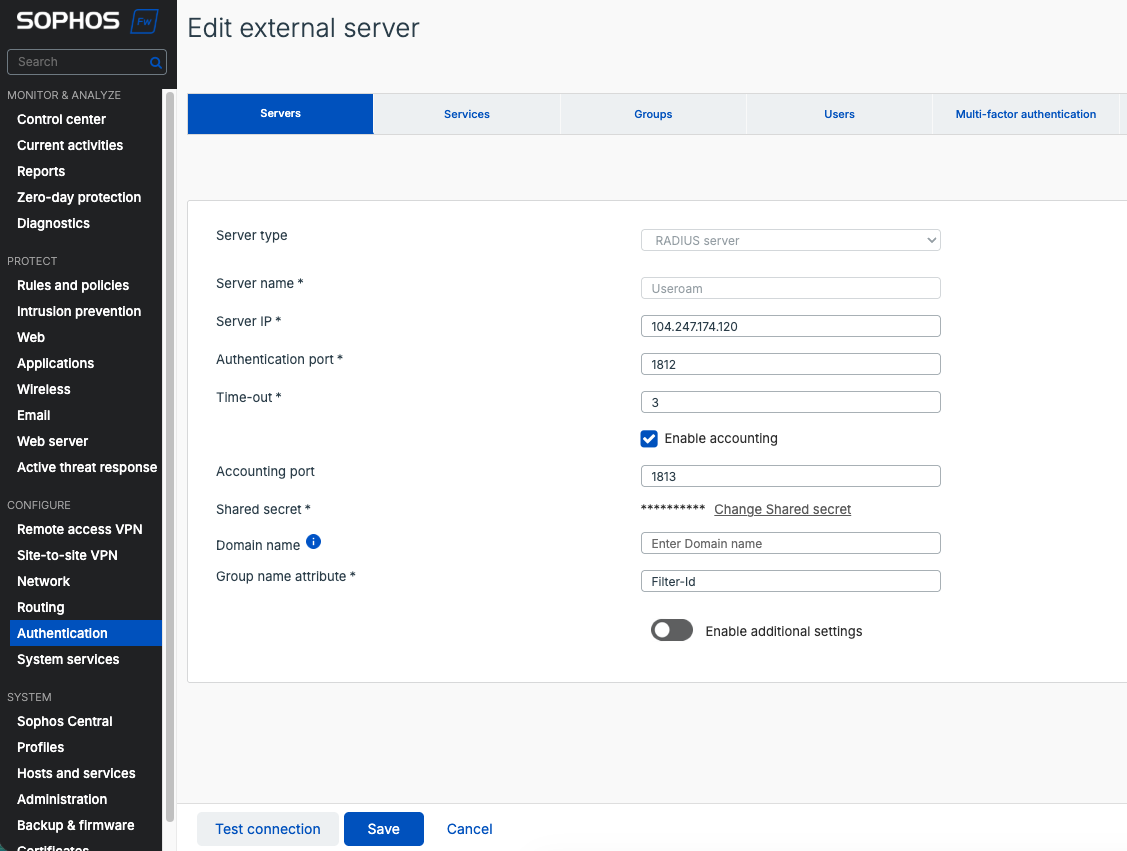
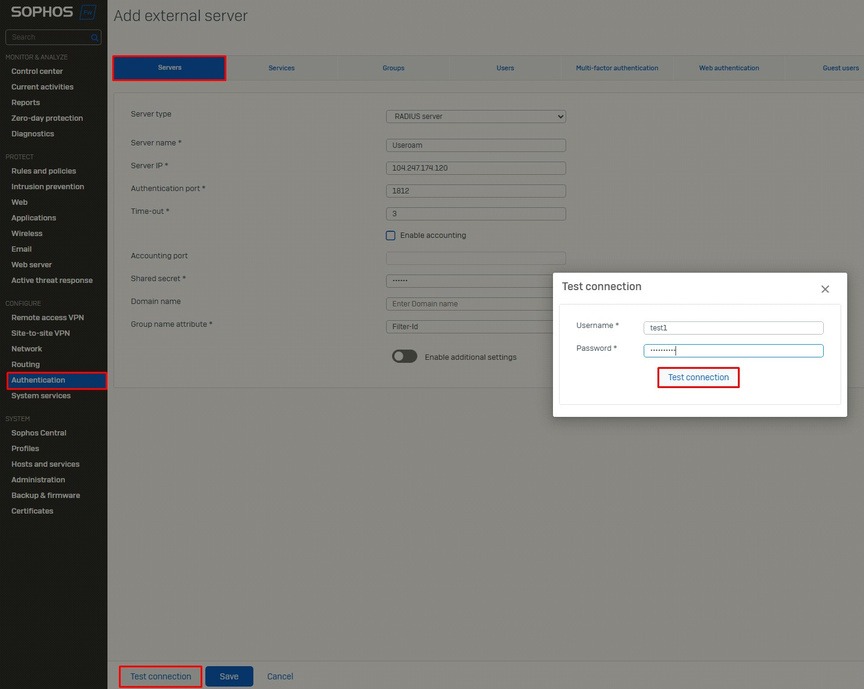
Add a new RADIUS server from Authentication > Servers. In the Server IP field, enter the IP address you get when you ping panel.useroam.com.
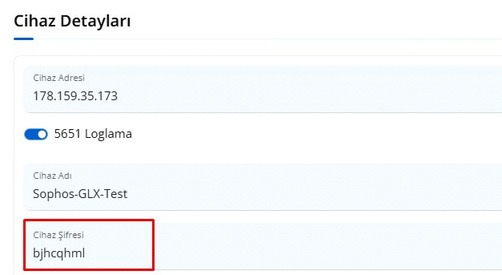
Then copy the code shown next to Device Password under Useroam > Settings > Device Settings and paste it into the Shared Secret field.
4 - Connection test (optional)
If you want to test at this point: create a new user in the Useroam Cloud panel via Guests > New User, then check the connection with Test Connection inside the RADIUS server settings on the firewall.
5 - Authentication priority (Authentication Methods)
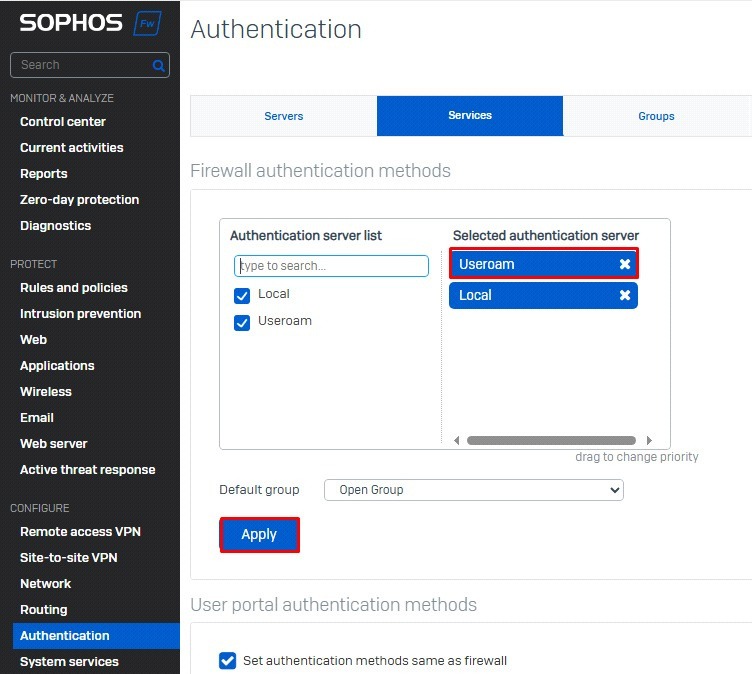
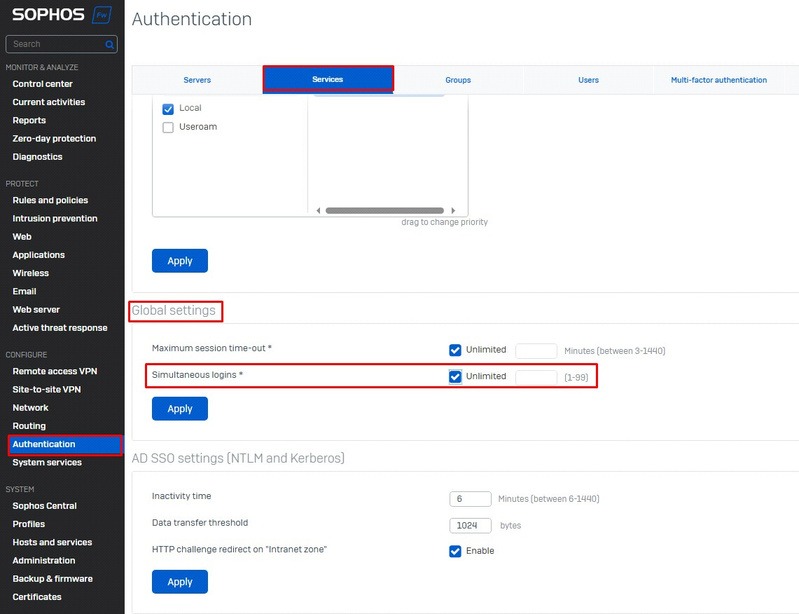
Go to Authentication > Services, move Useroam to the top of the Firewall Authentication Methods list, and click Apply to save.
6 - Web authentication settings
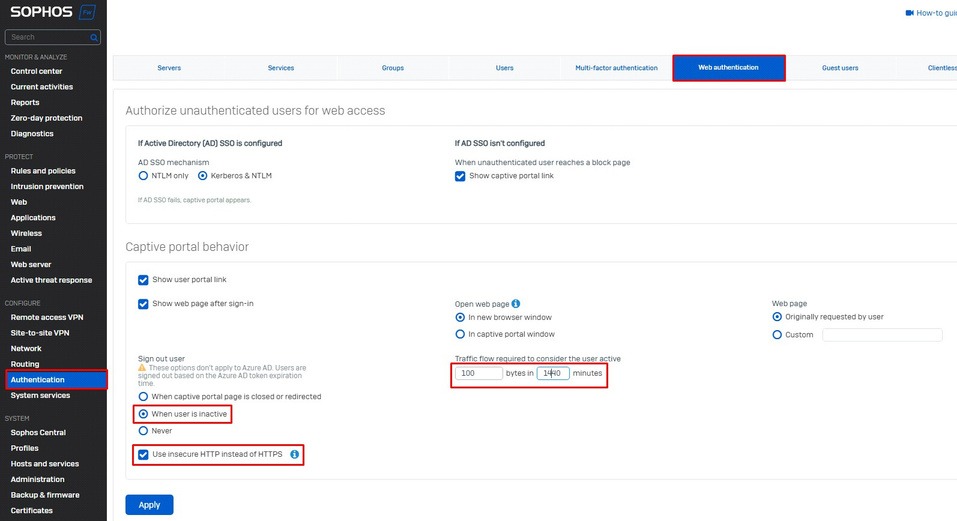
Move on to Authentication > Web Authentication. Under Sign Out User, tick When User is Inactive.
In the Traffic flow section next to it, set 1440 minutes (24 hours) for 100 bytes. With this setting, every connected device stays signed in on the firewall as long as it transfers at least 100 bytes within 24 hours. You can shorten this period if you prefer.
Finally, tick "Use insecure HTTP instead of HTTPS" and save.
7 - Integrating the captive portal design (Custom HTML)
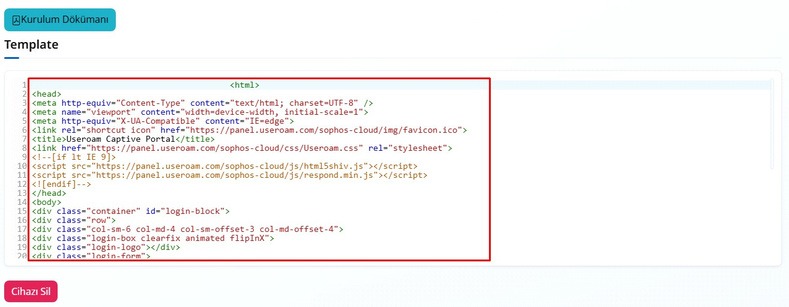
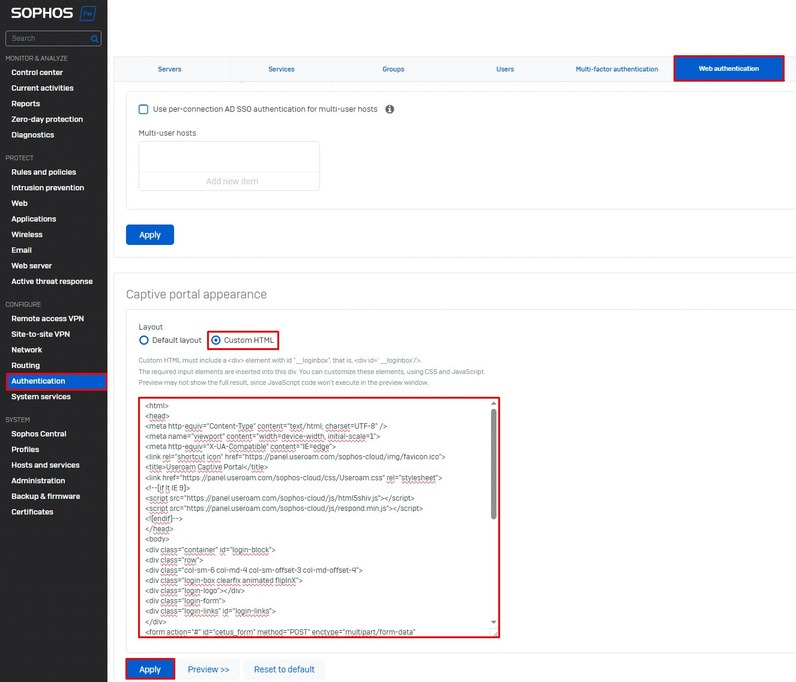
In Useroam, go to Settings > Device Settings and copy the whole block that starts with the <html> line. Paste it into Authentication > Web Authentication > Captive portal appearance > Custom HTML on the Sophos firewall and save.
Creating the firewall rules
To create the rules, go to Protect > Rules and Policies on the Sophos firewall and open the Add Firewall Rule page.
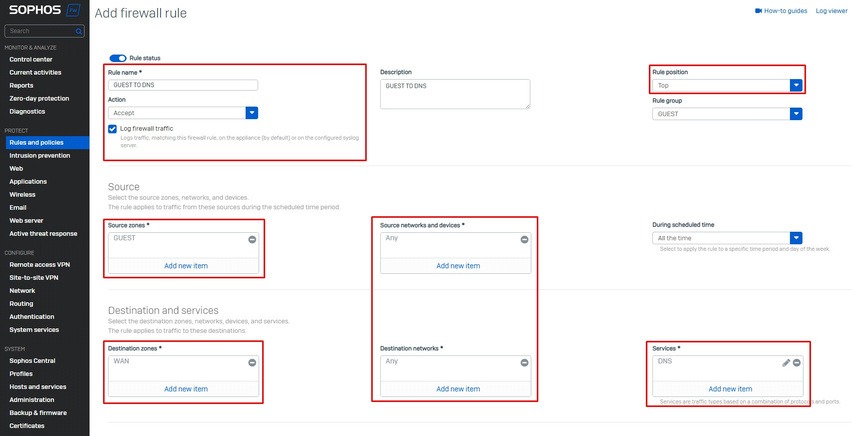
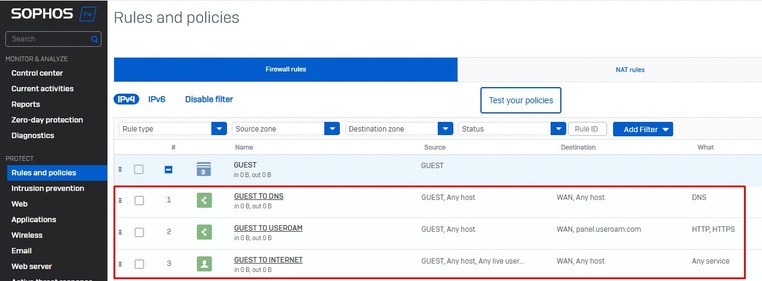
RULE 1: Guest to DNS
Every device sends a DNS query to a vendor-specific domain to work out whether the network it joined has internet access (for example captive.apple.com).
When the answer comes back, the device concludes it has internet and starts passing traffic. Without it, the hotspot redirect will not happen.
This rule must sit above the guest internet access rule.
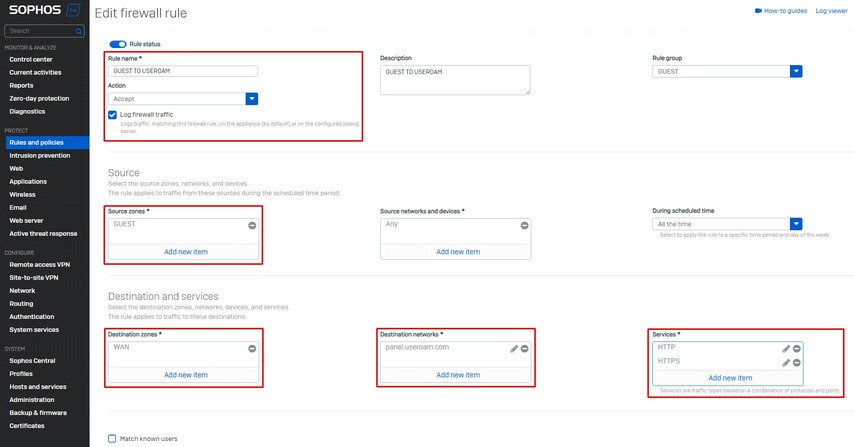
RULE 2: Guest to Useroam
This rule lets devices on your guest network reach *.useroam.com. Selecting HTTP/HTTPS under Services is enough.
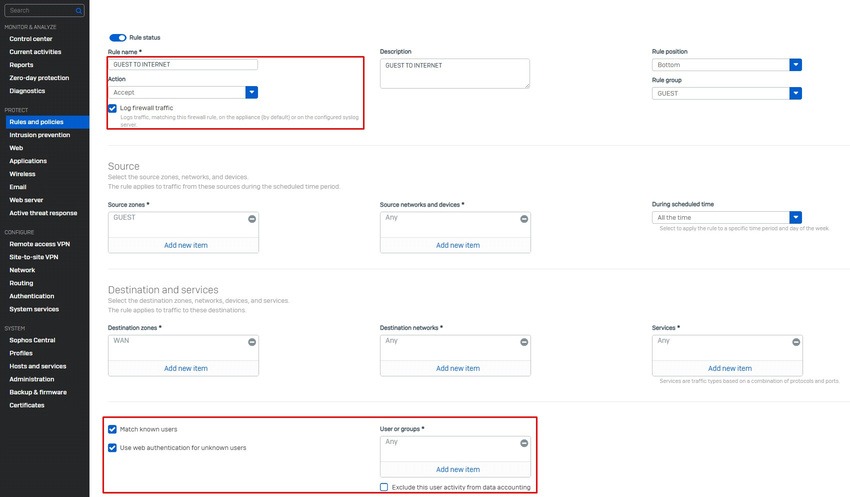
RULE 3: Guest to Internet
This rule provides internet access for your devices.
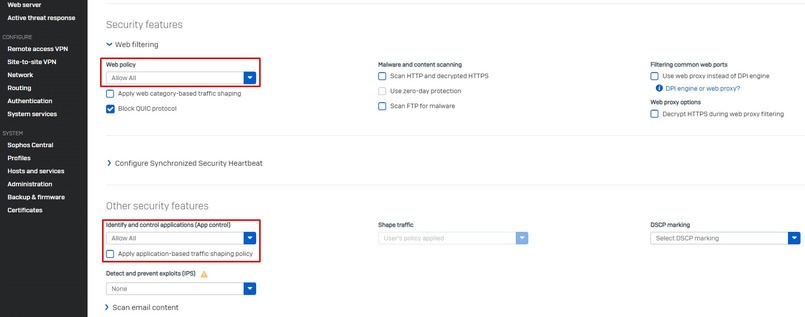
Tick the Log Firewall checkbox. So that unknown users are shown the hotspot screen, also tick Match Known Users and Use Web Authentication For Unknown Users. For Web Policy and Identify And Control Applications (App Control), select Allow All or any policy you prefer.
Forwarding logs to the Useroam device
1 - Defining the syslog server
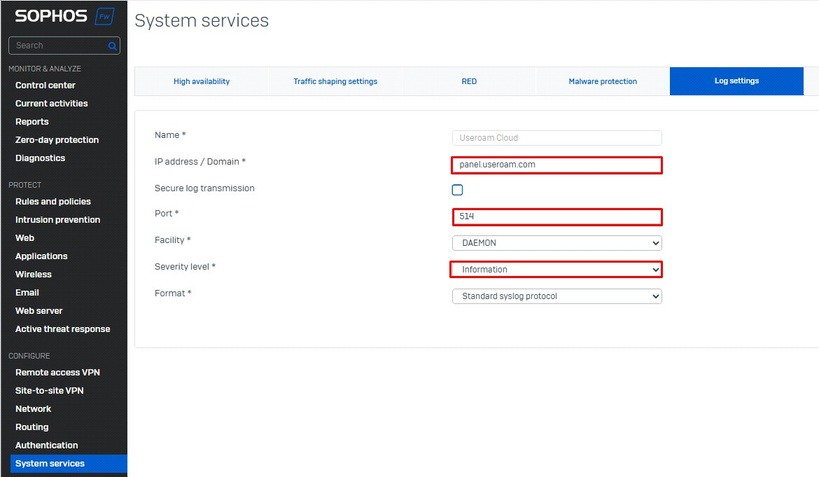
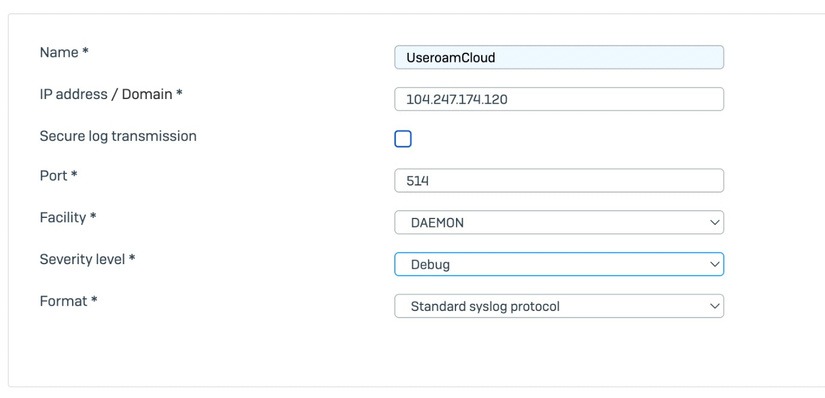
First go to System Services > Log Settings and define a new syslog server.
2 - Entering the syslog details and starting
Fill in the following details for the newly added syslog server:
- Name: Useroam Cloud
- IP address / Domain:
104.247.174.120 - Port:
514 - Facility: DAEMON
- Severity level: Debug
- Format: Standard syslog protocol
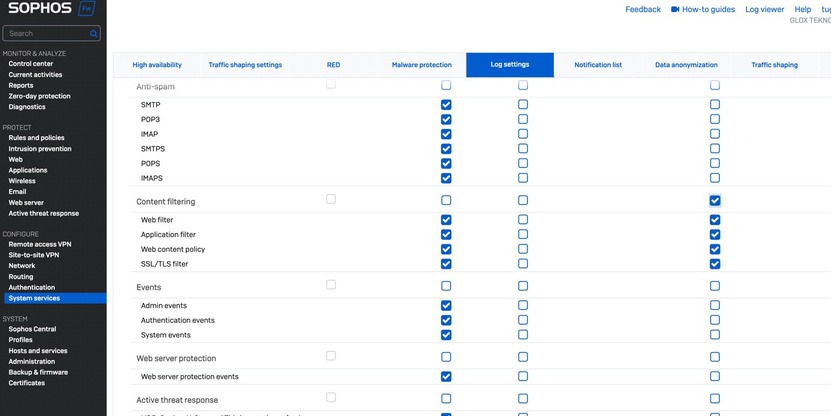
Then, on the row for the newly added syslog server, select only the Content Filtering fields to start sending logs to Useroam.
3 - Checking the log packets
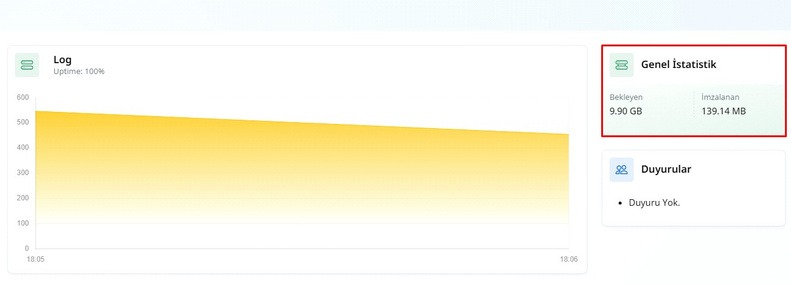
Afterwards, go back to the Useroam panel to confirm that packets are arriving from the firewall. Check the General Statistics area in the top-right corner and look at the section under Pending Signature.
Important — integration complete
Your Sophos integration is complete. If you run into any problems during the process, contact our support team at destek@useroamteknoloji.com.
Login with WhatsApp — firewall allowlist (walled garden)
For the Login with WhatsApp flow to work while the guest is still behind the captive portal (before internet access is granted), the following addresses must be allowed in your firewall or walled-garden configuration. Without these rules the WhatsApp login screen will not open and the automatic login based on delivery confirmation will not work.
Domains to allow (FQDN)
*.wa.me*.whatsapp.com*.whatsapp.netg.whatsapp.netmmg.whatsapp.netfbsbx.com*.useroam.com
IP addresses to allow
157.240.0.0— Meta / Facebook network block31.13.0.0— Meta / Facebook network block104.247.174.120— Useroam panel
Note: 157.240.0.0 and 31.13.0.0 are typically /16 network blocks (Meta infrastructure); we recommend defining them as blocks in the firewall (157.240.0.0/16, 31.13.0.0/16). 104.247.174.120 is the Useroam panel IP (/32). Use the domain list if your firewall supports FQDN-based filtering; otherwise use the IP blocks.