
Store & QR Registration
What is it for?
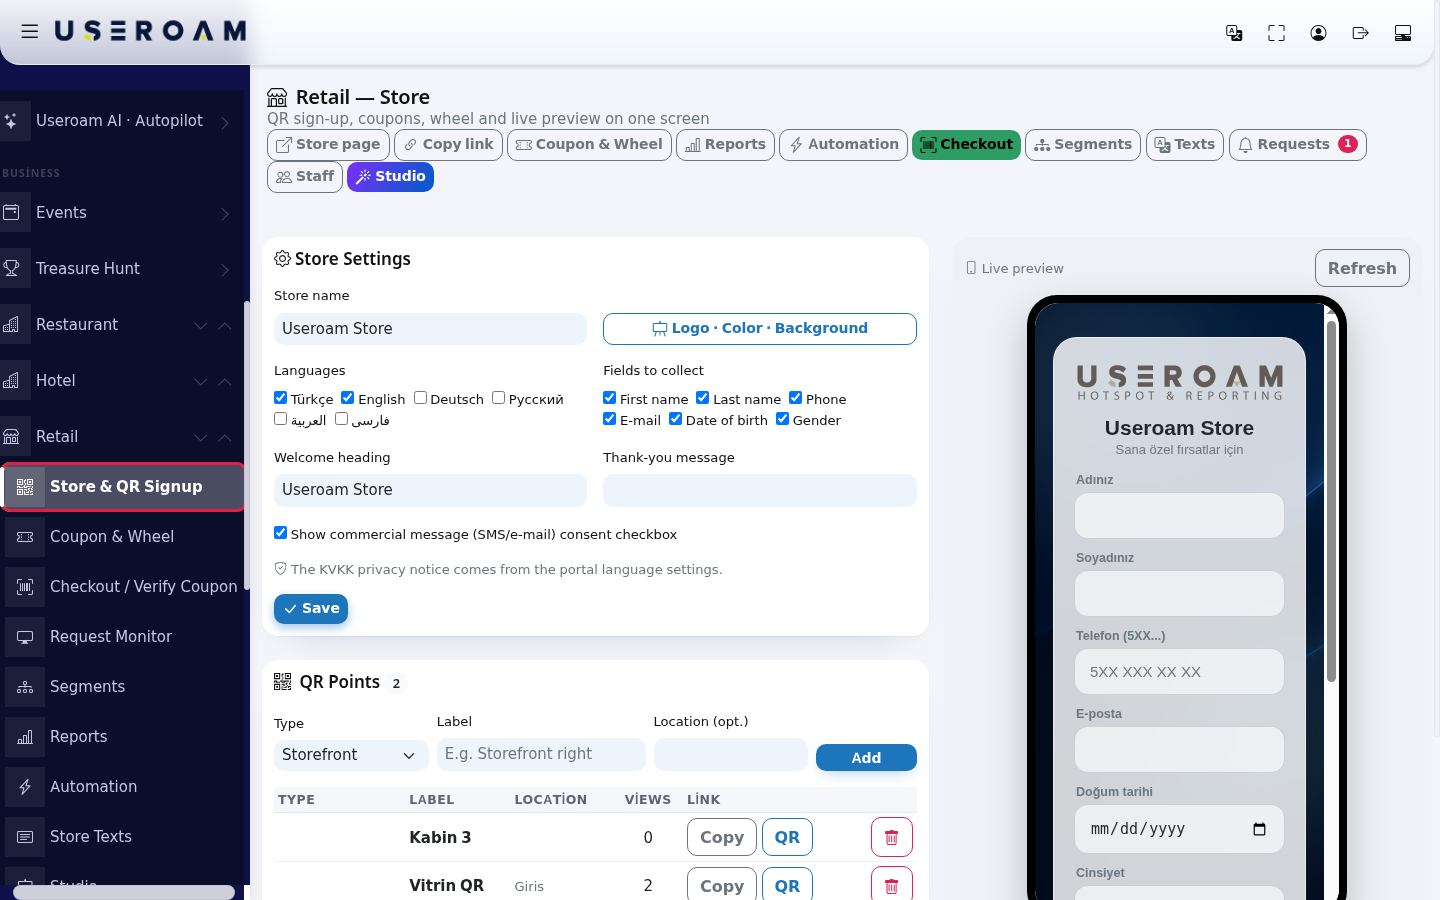
Store & QR Signup is the main screen of the Retail module. Here you set your store name and the customer form, create QR codes for places such as the storefront, fitting rooms or aisles, and watch the page customers see on their phone live on the right. All other Retail screens can be opened from here too.
The subtitle under the screen title reads "QR sign-up, coupons, wheel and live preview on one screen".
When to use it
- When setting the store up for the first time (step by step: Setting Up Store QR Sign-up and the Coupon Wheel).
- When you want to change the questions or languages on the form.
- When you put a QR code in a new place or remove an old one.
- When you want a quick look at how many sign-ups were collected.
Before you start
- The Retail section in the left menu only appears while the store is set up and on. If it is not set up, use the Set up link of the Store (Retail) row in the Business Modules card of Module Permissions.
- There is one store per device. To see another branch's store, first select that device in Device Selection.
Step by step
- In the left menu open Retail and click Store & QR Signup.
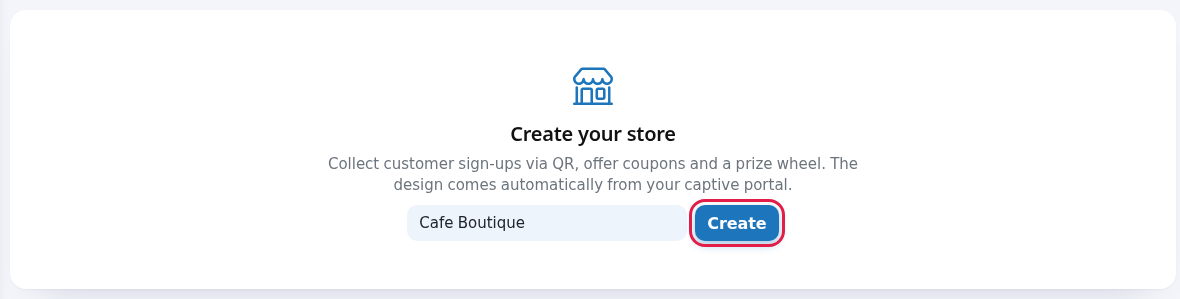
- If there is no store yet, the Create your store card appears ("Collect customer sign-ups via QR, offer coupons and a prize wheel. The design comes automatically from your captive portal."). Type the Store name and press Create.
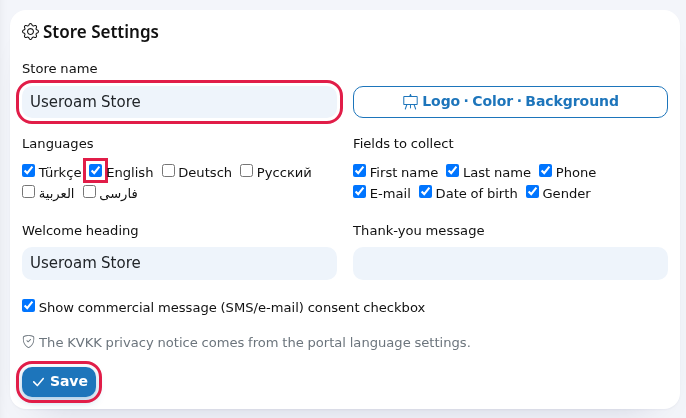
- In the Store Settings card, edit the name, languages, form fields and welcome/thank-you texts and press Save. "Saved." appears at the top.
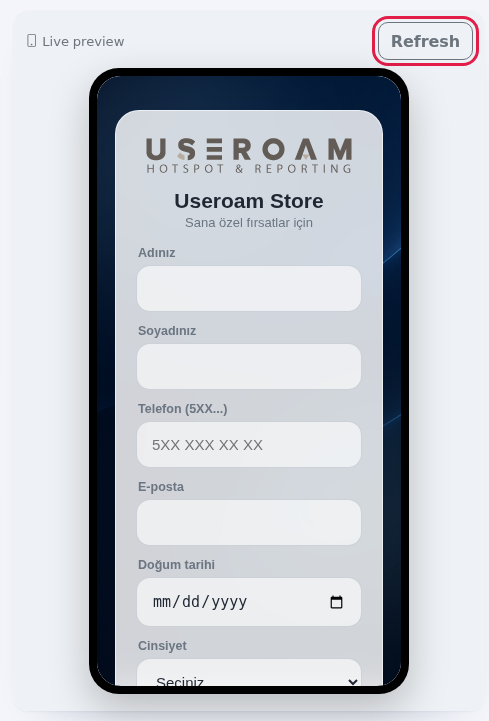
- In the QR Points card, enter a Type, a Label and optionally a Location (opt.), then press Add. "QR point added." appears.
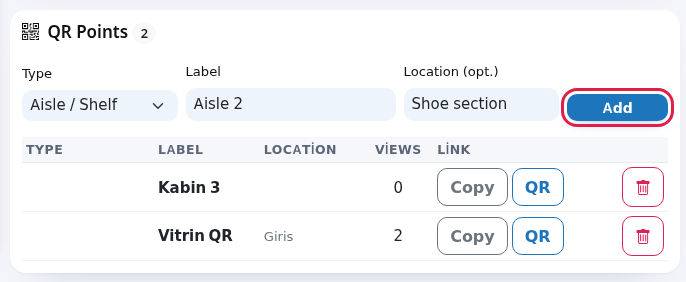
- In the list, a point's Copy button copies its address (the button briefly shows "Copied"). The QR button opens the QR window. The bin deletes the point after asking "Delete this item?".
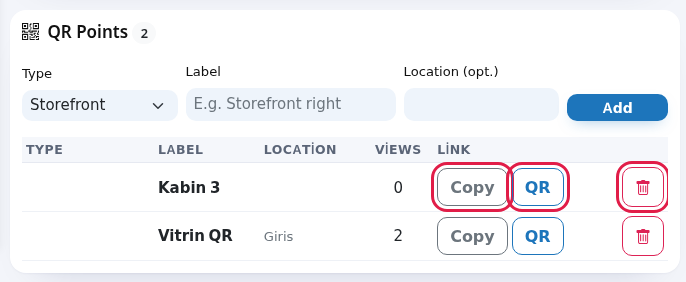
- The QR window shows the code, the point's name and its address. Print it and stick it at the point; close with Close.
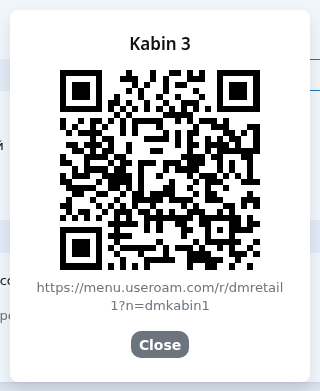
- The Live preview on the right is the page customers see on their phone. After saving settings, press Refresh.
- At the bottom, the Collected Sign-ups card shows the total. To see the list, filters and export, press View in Reports.

Buttons at the top

| Button | What it does |
|---|---|
| Store page | Opens the customer page in a new tab. |
| Copy link | Copies the store page address (without a QR point; counts as General). |
| Coupon & Wheel | Coupons & Wheel. |
| Reports | Retail Reports. |
| Automation | Automation rules. |
| Checkout (green) | Till / Coupon Validation. |
| Segments | Segments. |
| Texts | Store Texts. |
| Requests | Request Monitor. A red badge shows the number of open requests. |
| Staff | Store Staff. This screen is not in the left menu; it only opens from this button. |
| Studio (purple) | Retail Studio. |
Every field on the screen
| Field | What it does | Example |
|---|---|---|
| Store name | Required. Shown in the panel and as the browser tab title of the customer page. | Useroam Store |
| Logo · Color · Background | Opens Studio. | |
| Languages | Languages customers can choose: Türkçe, English, Deutsch, Русский, العربية, فارسی. With more than one, language codes (TR, EN...) appear at the bottom of the page. The first ticked language is the default. If none is ticked, Turkish is used. | Türkçe + English |
| Fields to collect | What the form asks: First name, Last name, Phone, E-mail, Date of birth, Gender. If none is ticked, First name and Phone are used. If Phone is ticked, a valid mobile number is required; the others may be left empty. | First name, Phone |
| Welcome heading | The large text above the form. Text entered here is the same in every language; for per-language text use Store Texts and leave this box empty. | Join us |
| Thank-you message | Short text shown after sign-up. Also the same in every language. | You are in. |
| Show commercial message (SMS/e-mail) consent checkbox | Shows the "I want to receive offers via SMS/e-mail." checkbox on the form. Customers who tick it (ETK consent) can receive automation and segment SMS. If you turn it off, no consent is collected. | Ticked |
| KVKK privacy notice note | "The KVKK privacy notice comes from the portal language settings." The privacy notice on the form comes from your guest Wi-Fi portal language settings. To change it: Editing Portal Texts. | |
| Type (QR point) | Storefront, Entrance, Checkout, General: open the sign-up form. Fitting Room, Aisle / Shelf: open the call-staff screen. The type also appears as the sign-up source in reports. | Storefront |
| Label | Required (grey sample: "E.g. Storefront right"). The point's name; also shown to customers as the title on the fitting room/aisle screen. | Fitting room 3 |
| Location (opt.) | A note for you only. | Right of the entrance |
| Views | How many times the point's QR was opened. | 2 |
| Link | Copy and QR buttons. | |
| Collected Sign-ups | Total sign-ups. Below it: "Detailed list, gender/age/date filters and CSV export moved to Reports." The ETK badge next to it counts people who gave commercial message consent (this badge may currently be hard to read on the light background). | 10 |
Messages you may see
| Message | Meaning / what to do |
|---|---|
| Store created. | The store is set up; continue with the settings. |
| Saved. | Settings saved. Update the preview with Refresh. |
| Store name is required. | Fill in the name. |
| QR point added. | The point was added to the list. |
| Label is required. | Give the point a name. |
| Deleted. | The point was deleted. A printed QR for it now opens the sign-up form as a General sign-up; the fitting room/aisle screen no longer appears. |
| No QR points yet. | The list is empty; add one with the form above. |
Frequently asked questions
The Type column looks empty.
The type is saved; its badge colour currently makes it hard to read in the list. Scan the QR to see which screen it opens.
I cannot change the privacy notice here.
It comes from the guest Wi-Fi portal language settings. Change the KVKK field on Editing Portal Texts; the store page updates too.
How do I download the sign-ups?
With Download records on Retail Reports. Names, phones and e-mails in the file are masked for KVKK.
Is there a separate file for printing the QR?
No. Take a screenshot of the QR window, or copy the address and create the code with your own QR tool.