
Portal Texts
What is it for?
It lets you change the texts staff see on the setup page (welcome sentence, buttons, error messages, Android and Windows steps) to suit your organisation. Texts are per language and per device: you change the texts of the language row you opened, for the selected device.
When do you use it?
- You want to add your organisation's name or a contact number to the welcome sentence.
- You want error messages to say something like "Call IT: extension 123".
- The Android steps do not match the menu names on your staff's phone brand.
Before you start
- An administrator account is needed. Restricted users do not see this section.
- The right device must be selected in the top menu. If you open a language row that belongs to another device, the section is not shown.
Step by step
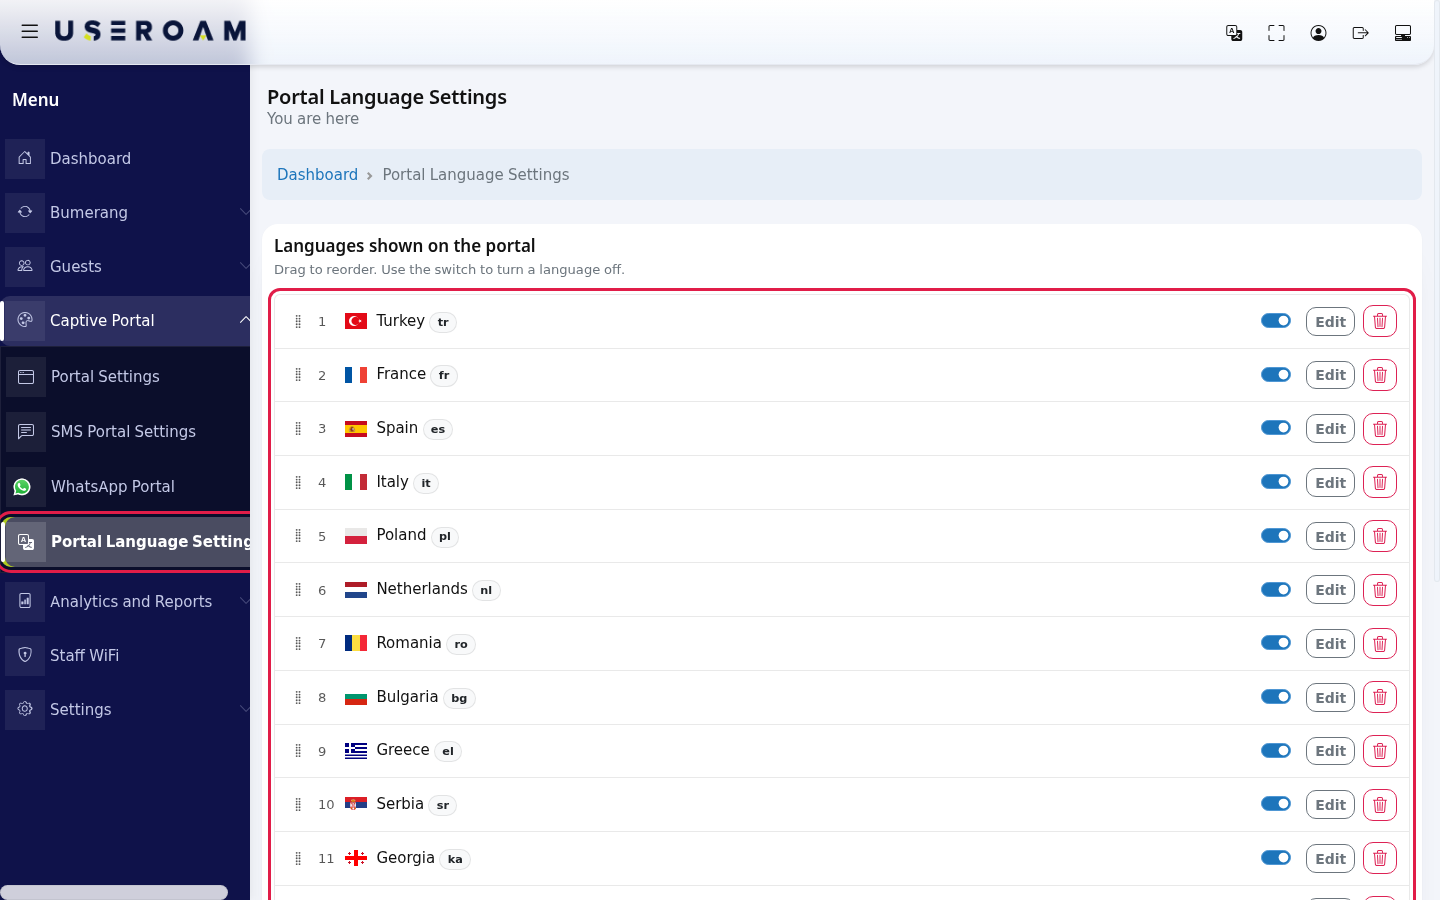
- In the left menu open Captive Portal > Portal Language Settings and click a language in the list (example: Turkish). Details: Portal Language Settings.
- On the page that opens, scroll below the guest portal fields. Click the folding section Staff Wi-Fi Texts. The grey number next to the title is how many texts have been changed for this device in that language; no number means every text uses its ready-made version.

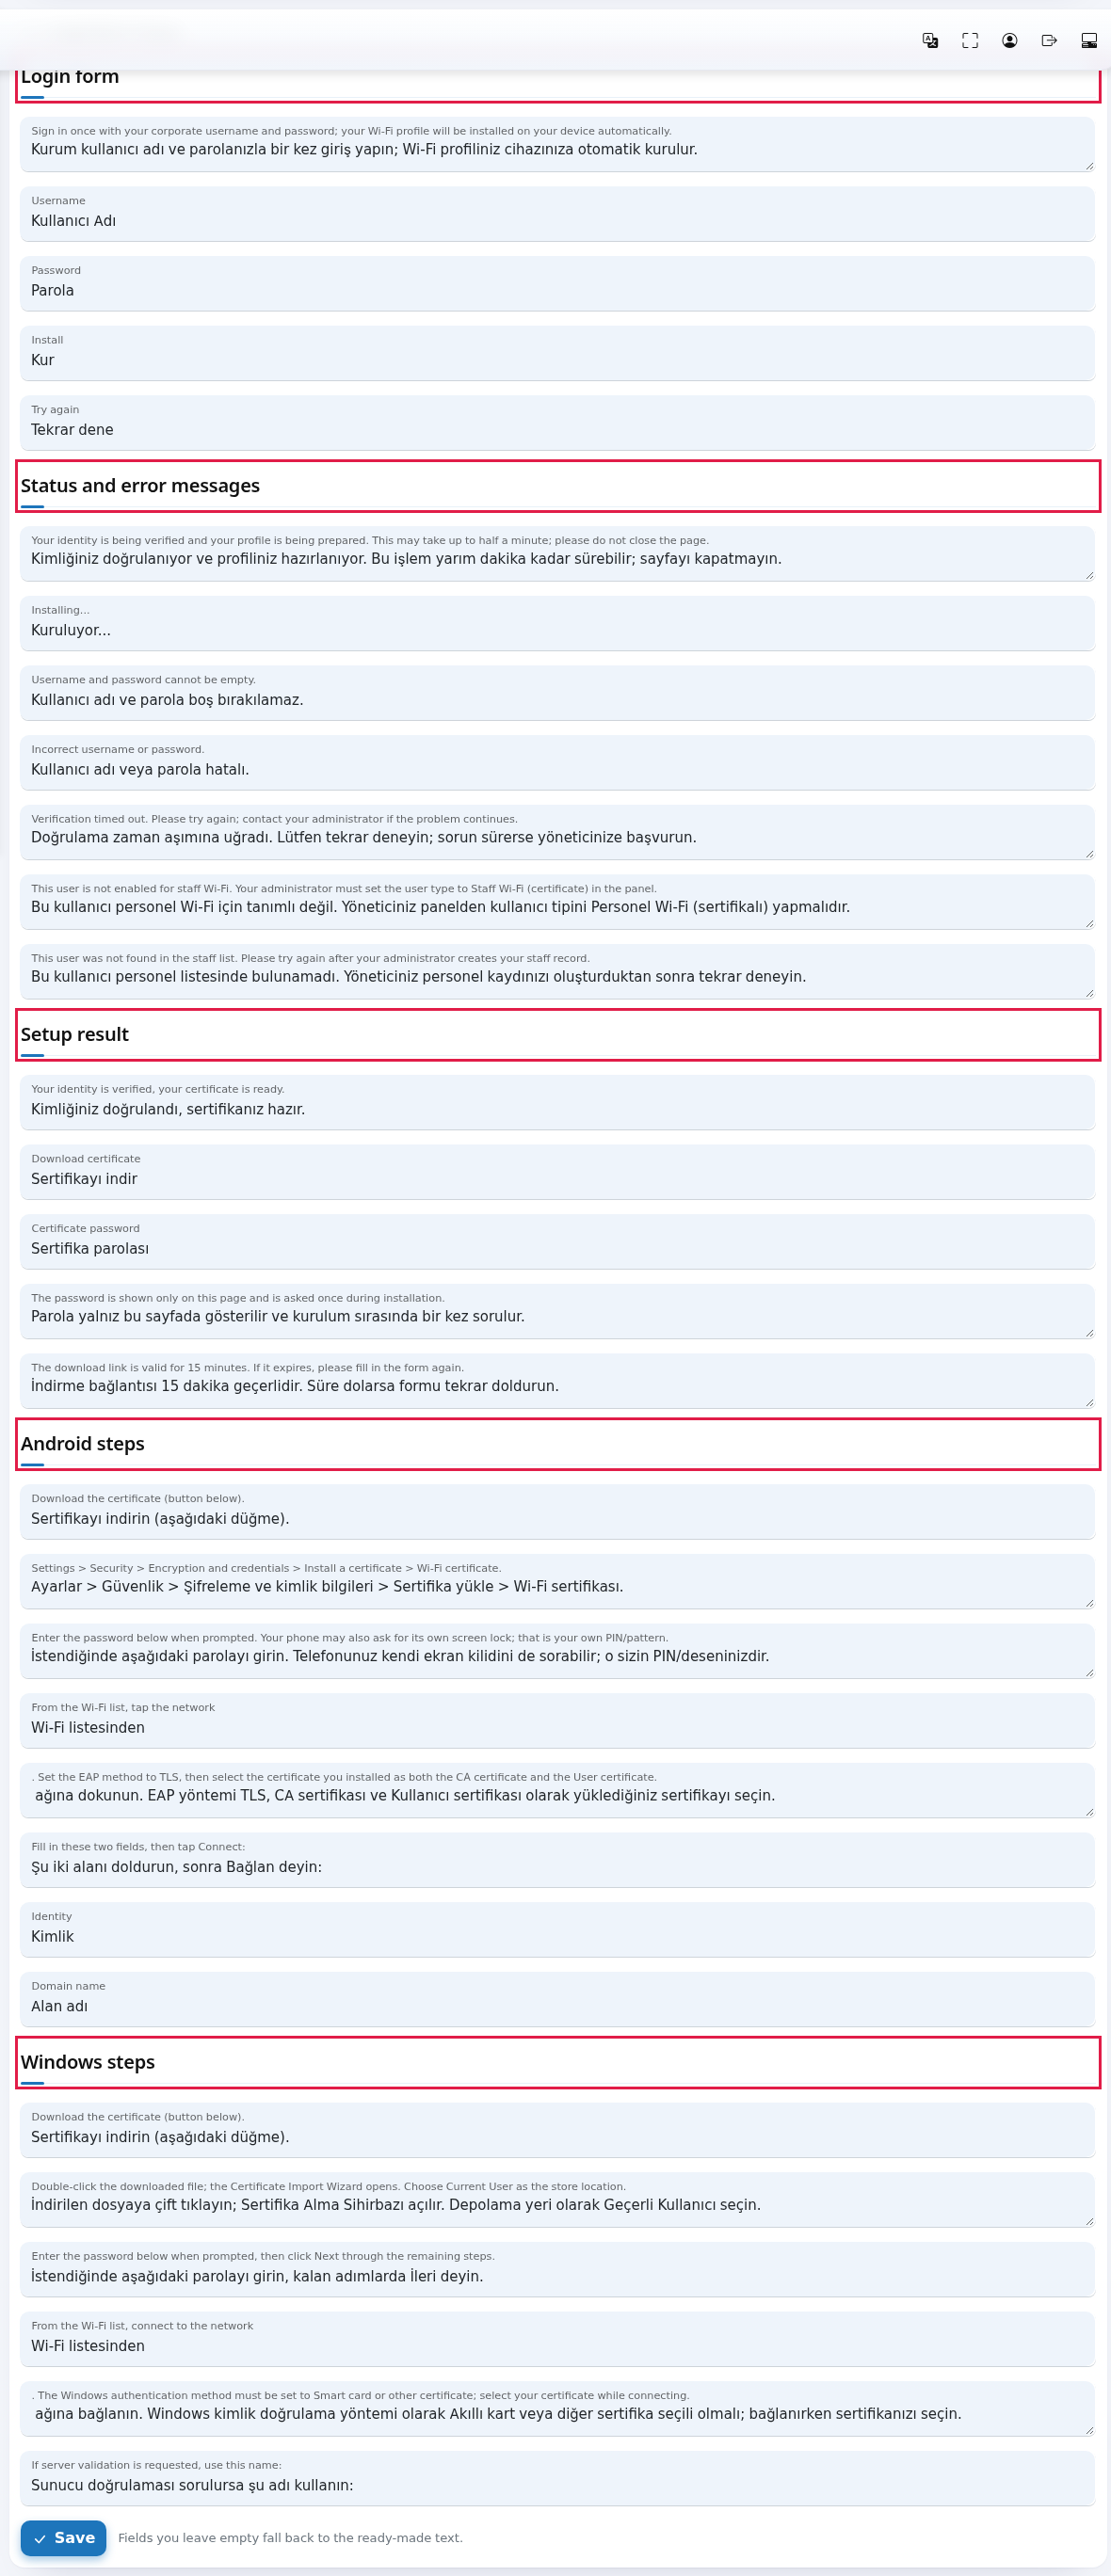
- When the section opens you see five groups. Each box comes filled with the ready-made text of that language; the small label of the box tells you which text it is, in the panel's own language. Edit the boxes you want to change and leave the others as they are.
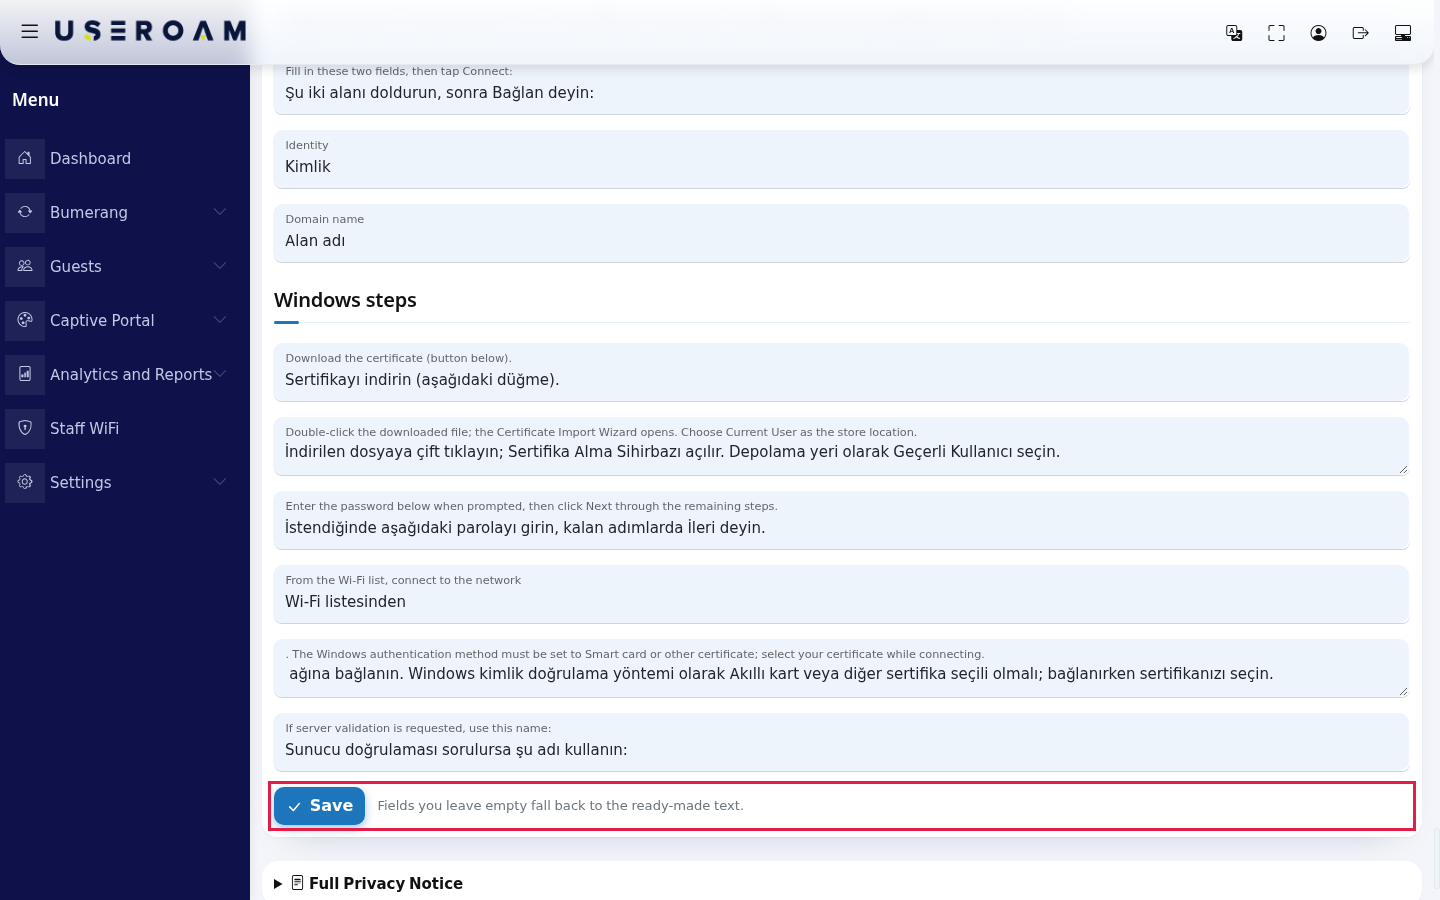
- Press Save at the bottom of the section. The note next to it: "Fields you leave empty fall back to the ready-made text."
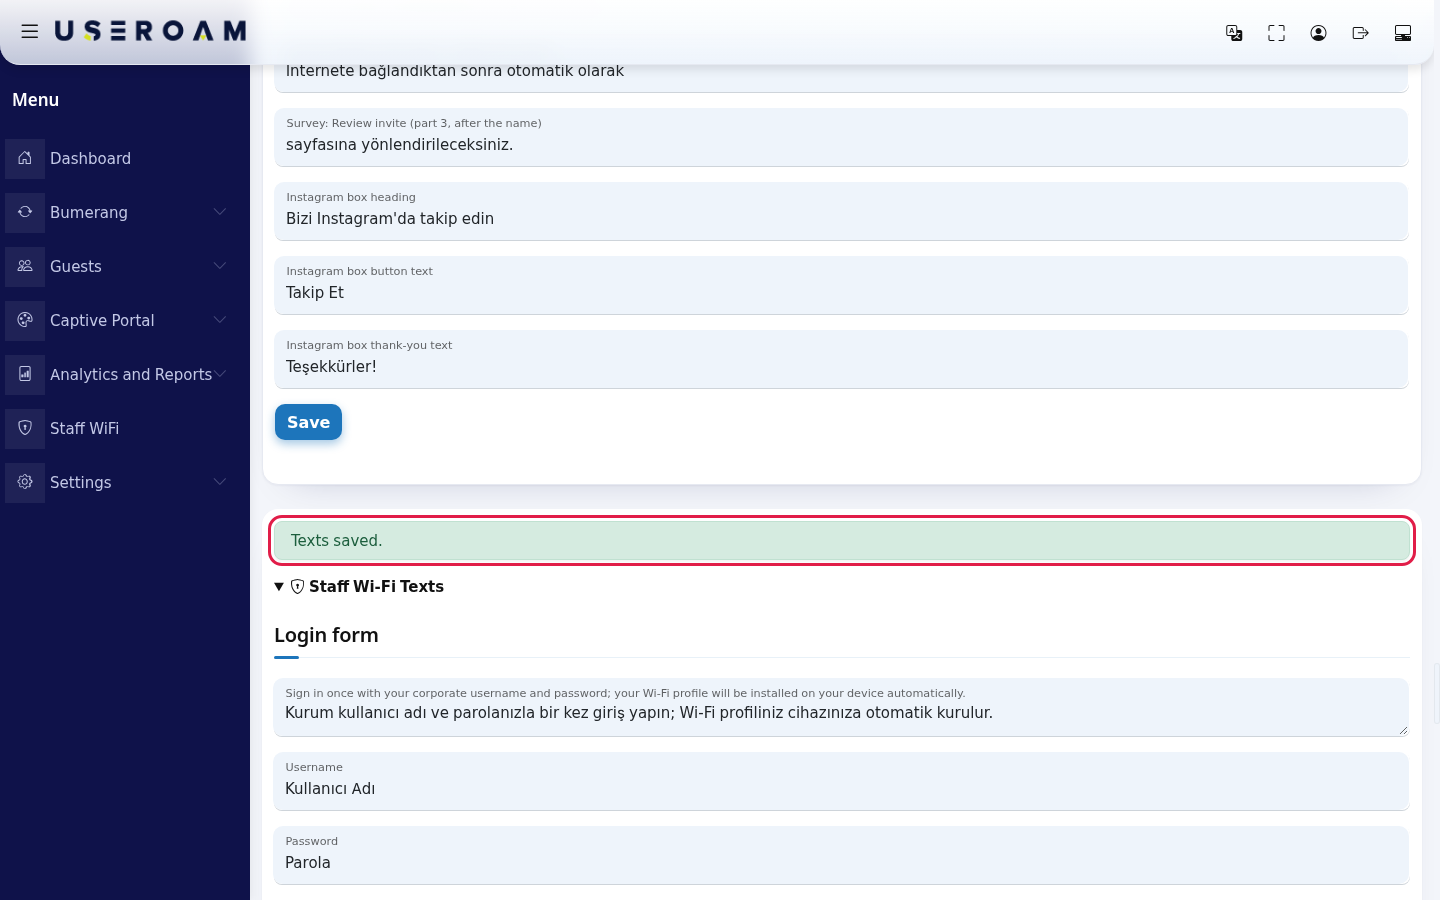
- The page reloads and a green Texts saved. appears above the section. Open the setup page and check the change.
Text groups
| Group | Texts in it (English ready-made text) |
|---|---|
| Login form | Welcome sentence ("Sign in once with your corporate username and password; your Wi-Fi profile will be installed on your device automatically."), Username, Password, the Install button, the Try again link. |
| Status and error messages | Waiting note, Installing..., "Username and password cannot be empty.", "Incorrect username or password.", time-out, "not enabled for staff Wi-Fi", "not found in the staff list". When they appear: Inviting Staff. |
| Setup result | "Your identity is verified, your certificate is ready.", Download certificate, Certificate password, "The password is shown only on this page and is asked once during installation.", "The download link is valid for 15 minutes. If it expires, please fill in the form again." |
| Android steps | Six parts: download, certificate install path, password, "From the Wi-Fi list, tap the network" + network name + the rest, "Fill in these two fields, then tap Connect:", and the field labels Identity and Domain name. |
| Windows steps | Six parts: download, Certificate Import Wizard, password, "From the Wi-Fi list, connect to the network" + network name + the rest, "If server validation is requested, use this name:". |
The two boxes around the network name are separate; your staff network name is inserted between them in bold automatically. Spaces at the start and end of these boxes matter; do not remove them.
Ready-made texts in the Android boxes:
- Download the certificate (button below).
- Settings > Security > Encryption and credentials > Install a certificate > Wi-Fi certificate.
- Enter the password below when prompted. Your phone may also ask for its own screen lock; that is your own PIN/pattern.
- From the Wi-Fi list, tap the network
- . Set the EAP method to TLS, then select the certificate you installed as both the CA certificate and the User certificate.
- Fill in these two fields, then tap Connect:
Ready-made texts in the Windows boxes:
- Download the certificate (button below).
- Double-click the downloaded file; the Certificate Import Wizard opens. Choose Current User as the store location.
- Enter the password below when prompted, then click Next through the remaining steps.
- From the Wi-Fi list, connect to the network
- . The Windows authentication method must be set to Smart card or other certificate; select your certificate while connecting.
- If server validation is requested, use this name:
Saving rules
- If you save a ready-made text without changing it, nothing is stored; that box keeps using the ready-made text, and if Useroam improves it your page is updated too.
- If you empty a box completely and save, that text goes back to the ready-made version.
- Each box takes up to 1000 characters.
- The Save of this section is separate from the guest portal form: saving staff texts does not affect the guest portal, and the other way round.
- If the page has been open for a very long time, saving may show a red "Session validation failed, please try again." Reload the page and save again.
Things to watch
- Do not type a server name. The setup page creates and shows the Identity and Domain name values itself; a value typed into the text may be wrong.
- Android CA certificate sentence: the ready-made Android text may say to select "the certificate you installed as both the CA certificate and the User certificate". The correct choice for CA certificate is Use system certificates (see Android setup). If your staff get confused, you can correct the box after the network name in Android steps like this: ". Set the EAP method to TLS. For CA certificate choose Use system certificates; for User certificate select the certificate you installed."
- Edit the language your staff use first. Other languages keep using the ready-made texts.
Frequently asked questions
I cannot see the Staff Wi-Fi Texts section.
Either your account is not an administrator, or the language row you opened belongs to a device that is not selected in the top menu.
I changed it but the setup page shows the old text.
Staff see the text of the language they opened the page in. Check that you edited that language's row and chose it with the flag on the setup page.
Related pages
- Editing Portal Texts (incl. KVKK): the guest portal texts on the same page
- Inviting Staff