
MikroTik Management
What is it for?
MikroTik Management is the console that lets you see and manage a MikroTik device connected to Useroam from the panel, without opening Winbox or SSH. You set up the guest network, see who is online, block a device, set speed limits, give fixed IPs, add VPN users and watch the device's health.
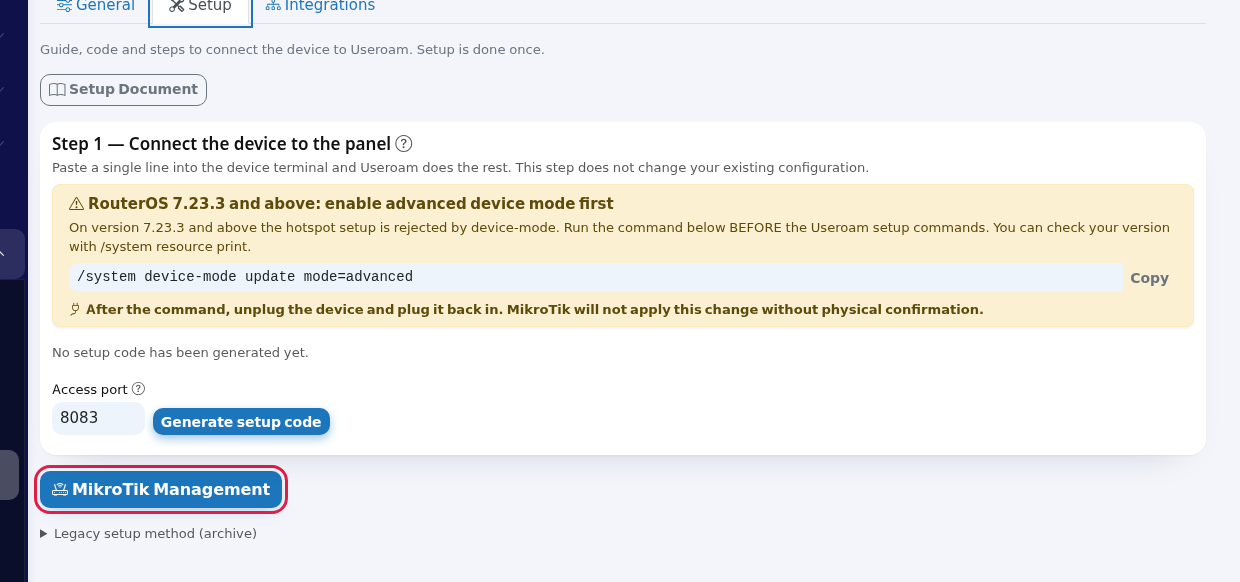
How do I open this screen? With the MikroTik Management link in the panel's left menu, or the MikroTik Management button on Device Settings > Setup. The console is a separate full-screen page; press Back to device at the bottom left to return to the panel.
When do you use it?
- You connected your MikroTik device to Useroam for the first time and will set up the guest network.
- There is a problem on the guest network and you want to see who is online and whether logins reach Useroam.
- You want to block a disruptive device, give the till computer a fixed IP or limit the guest network's speed.
- You are opening a VPN account for staff who work remotely.
Before you start
- The device type in the panel must be MikroTik and the device must be connected to the panel. The console only opens for a device with connection details; otherwise the panel sends you back to Device Settings. The connection steps are in the MikroTik Integration Guide.
- The device must run RouterOS 7.1 or newer with the web service (www-ssl) enabled.
- The console shows the device currently selected in the panel. To switch to another device use Device Selection in the panel's top bar.
Step by step: opening the console and finding your way
Open the console. On Device Settings > Setup press MikroTik Management (or use the link in the left menu).
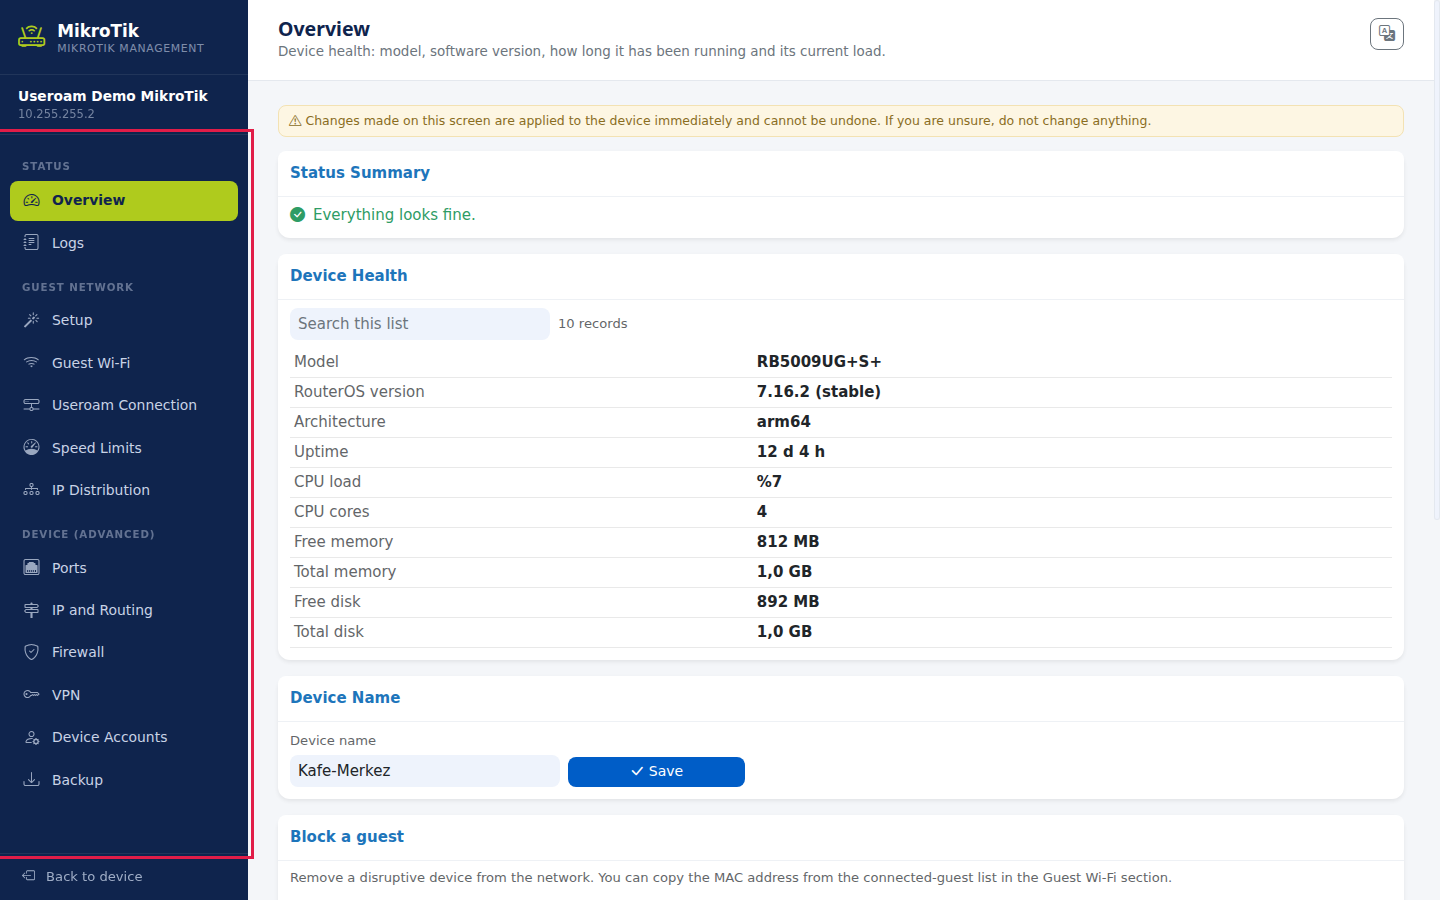
Get to know the left menu. On the left are your device's name and address, and below them the sections in three groups: STATUS (is everything fine), GUEST NETWORK (the guests' network) and DEVICE (ADVANCED) (settings you rarely touch). Pressing a section shows its title and a one-sentence description on the right. The language button at the top right switches the console between Turkish and English.
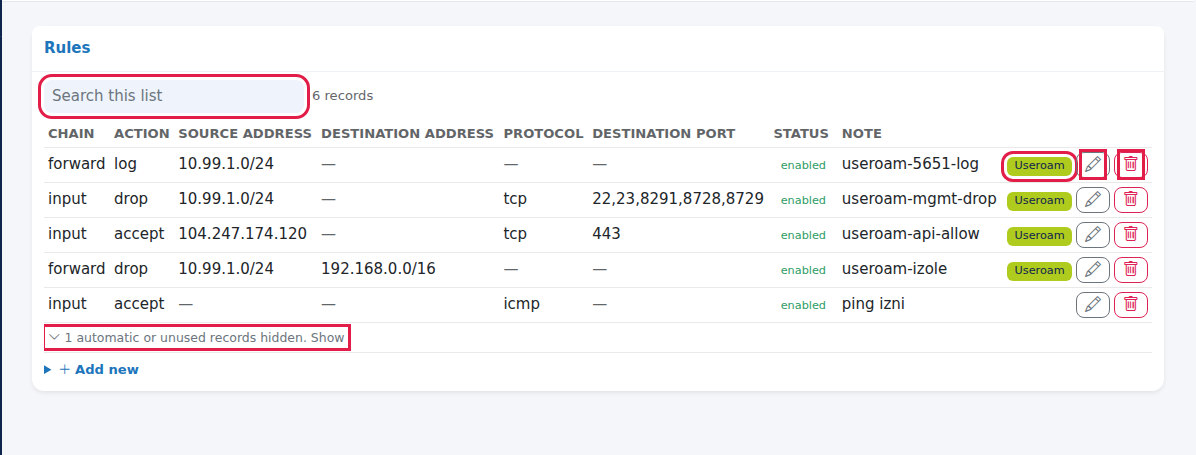
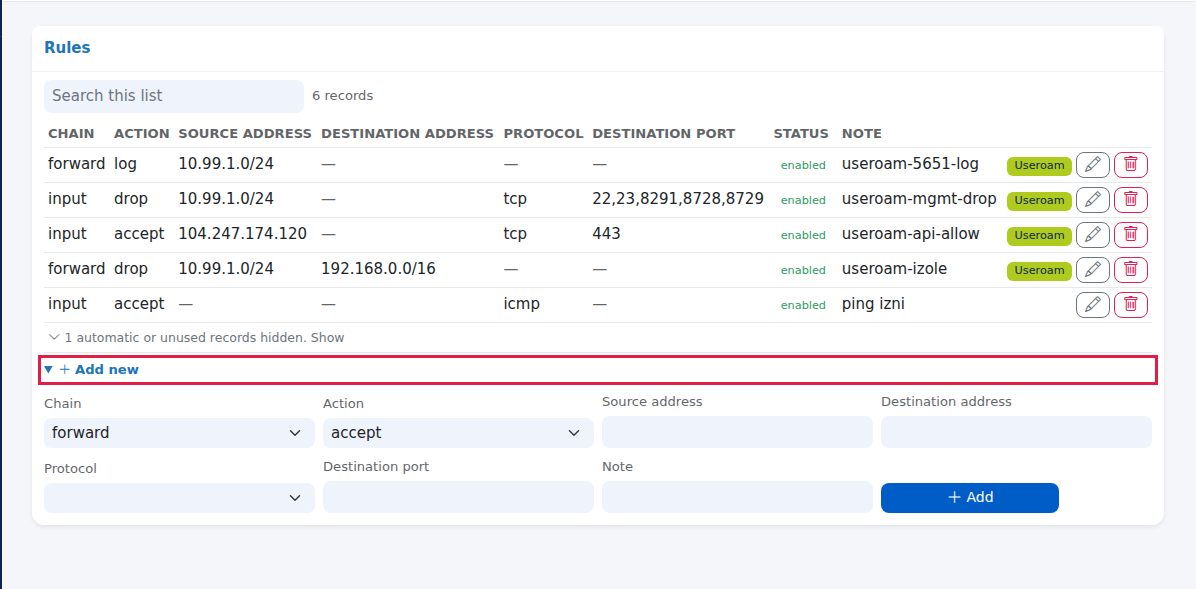
Read a list. Information is listed inside cards. Lists with five or more rows show a Search this list box and a record count (e.g. 6 records) on top; pressing a column title sorts the list by that column. The buttons at the end of a row are the pencil (Edit) and the bin (Delete). Records added by the Useroam setup carry a green Useroam badge. Records the device creates itself, or unused ones, are hidden, and a ... automatic or unused records hidden. Show link appears under the list.
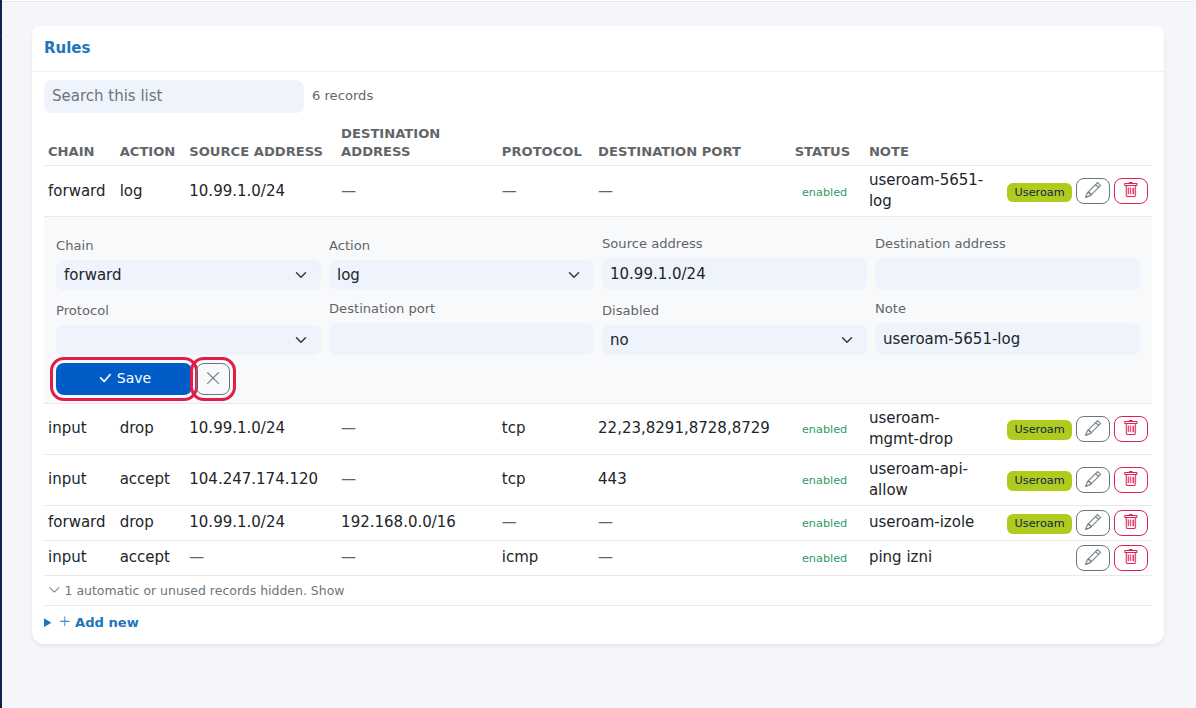
Edit a record. Press the pencil; an edit form opens below the row. Change the value and press Save. To cancel, press the cross (Close).
Add a new record. Press Add new under the list; a form opens. Fill in the fields and press Add.
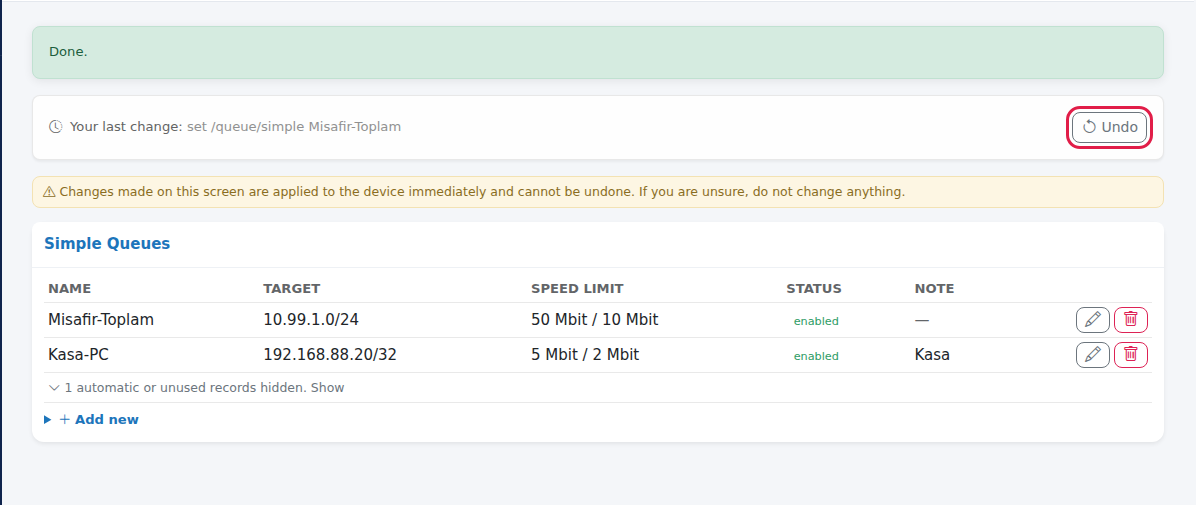
Undo the last change. After a change, a green Done. message and a Your last change: strip appear at the top. If you made a wrong change press Undo and confirm The last change will be undone. Continue?. When it works it reads The change has been undone. Undo only works for your last change, once, and for a short time (about 2 hours).
Menu sections
| Group | Section | What it shows | Can you make changes? | Described on |
|---|---|---|---|---|
| STATUS | Overview | Device health, device name, three quick actions, hardware | Yes | Overview |
| Logs | The device's event log | No | My Devices and Logs | |
| My Devices | Summary of all your MikroTik devices if you have more than one (not in the menu with a single device) | No | My Devices and Logs | |
| GUEST NETWORK | Setup | The wizard that sets up the guest network | Generates a code, does not write to the device | Setup Wizard |
| Guest Wi-Fi | Guests online, guest accounts, bindings, pre-login addresses | Yes | Guest Wi-Fi and Useroam Connection | |
| Useroam Connection | Whether logins reach Useroam (RADIUS) | Yes | ||
| Speed Limits | Speed limits per user or network | Yes | Speed Limits and IP Distribution | |
| IP Distribution | IP pools, DHCP servers, devices holding an IP | Yes | ||
| DEVICE (ADVANCED) | Ports | Ports and traffic, which port is the internet uplink and which is the guest network | Yes (enable/disable, note) | Device (Advanced) |
| IP and Routing | IP addresses, routing table, DNS | Yes | ||
| Firewall | Rules, forwarding (NAT), address lists | Yes | ||
| VPN | WireGuard setup, VPN users, PPP and IPsec | Yes | ||
| Device Accounts | The device's management accounts | No | ||
| Backup | Configuration backup | No (panel download unavailable) |
The VPN setup is described step by step on its own page: VPN (WireGuard) Setup.
Items you may see in every section
| Item | Meaning |
|---|---|
| Yellow strip: Changes made on this screen are applied to the device immediately and cannot be undone. If you are unsure, do not change anything. | Always shown in sections where changes are possible. Save, Add and Delete write to the device immediately. |
| Badge: field names being verified | Shown next to the title (Logs, Backup). Information in this section is shown as it comes from the device, with English column names. |
| Lock box: Editing is not enabled yet in this section... | If editing is not enabled in a section, its forms are faded and cannot be pressed. Information is read-only. |
| Useroam badge | Hovering shows This record belongs to the Useroam setup. Think twice before deleting it. The record belongs to the Useroam setup (5651 logging, management port block, pre-login access and so on). It can be deleted, but you are asked first: WARNING: This record was created by Useroam. Deleting it may break guest Wi-Fi login, 5651 logging or your security settings. Delete anyway? |
| automatic badge (locked) | The device creates and manages this record itself; it cannot be edited manually. No Edit or Delete buttons. |
| Delete confirmation: Are you sure you want to delete this record? This cannot be undone. | Shown when deleting a normal record. |
| Status badges | running / down (is the port or service running), enabled / disabled (is the record in use), yes / no. |
| Durations | Written as d, h, min (e.g. 12d 4h). |
| Empty list | No records., No data. or a sentence specific to the section. If a search finds nothing: No records match your search. |
| Applying... | After you press a button, a spinning icon with this text appears on it, a thin moving line appears at the top of the screen and the other buttons cannot be pressed for a moment. Wait until the device answers. |
Error messages
| Message | Meaning | What to do |
|---|---|---|
| Cannot reach the device. It must run RouterOS 7.1 or newer and have the web service (www-ssl) enabled. | The panel cannot connect to the device. It may be off, offline or its connection settings may be broken. | Check the device is on and online. If it continues, generate a new connection code on Device Settings > Setup. |
| The username or password was rejected. Please update the connection settings. | The useroam-api user on the device was deleted or its password changed. | Generate a new connection code and paste it into the device again. |
| No connection details have been entered for this device. Set up the connection from the device page first. | The connection was never set up. | Follow the MikroTik Integration Guide. |
| The security certificate of the device has changed. The connection was stopped for safety. | The device's HTTPS certificate changed (the device was reset or another device is in between). | If you changed the device, generate a new connection code. If not, contact support. |
| You are not authorised for this device. | Your user has no access to this device. | Ask your account administrator for access. |
| This action is not supported on this device. | The action is not available on this device or in this section. | Do it from the device's own interface. |
| The device returned an unexpected response. / The operation could not be completed. | The device did not accept the request (for example a wrong value). | Check the values and try again. |
| Editing is not enabled yet in this section (waiting for lab verification). | Editing has not been enabled in that section. | Make the change from the device's own interface. |
| Session verification failed. Please refresh the page and try again. | The page was open for too long. | Reload the page. |
| Unknown operation. | An unrecognised request was sent. | Reload the page. |

Frequently asked questions
MikroTik Management does not appear in the menu.
The selected device is not a MikroTik or it is not connected to the panel. Choose your MikroTik device in Device Selection; if it is not connected, follow the integration guide.
I made a change by mistake.
Press Undo in the strip at the top right away. Undo only works for the last change.
Is the information in the console old?
No; each section reads the device at the moment it opens. Reload the page to refresh.
Does the console work on a phone?
Yes. On narrow screens the left menu is hidden and opens with the menu icon at the top. The same bar holds the language, device selection, profile and log out icons.