
Event Studio
What is it for?
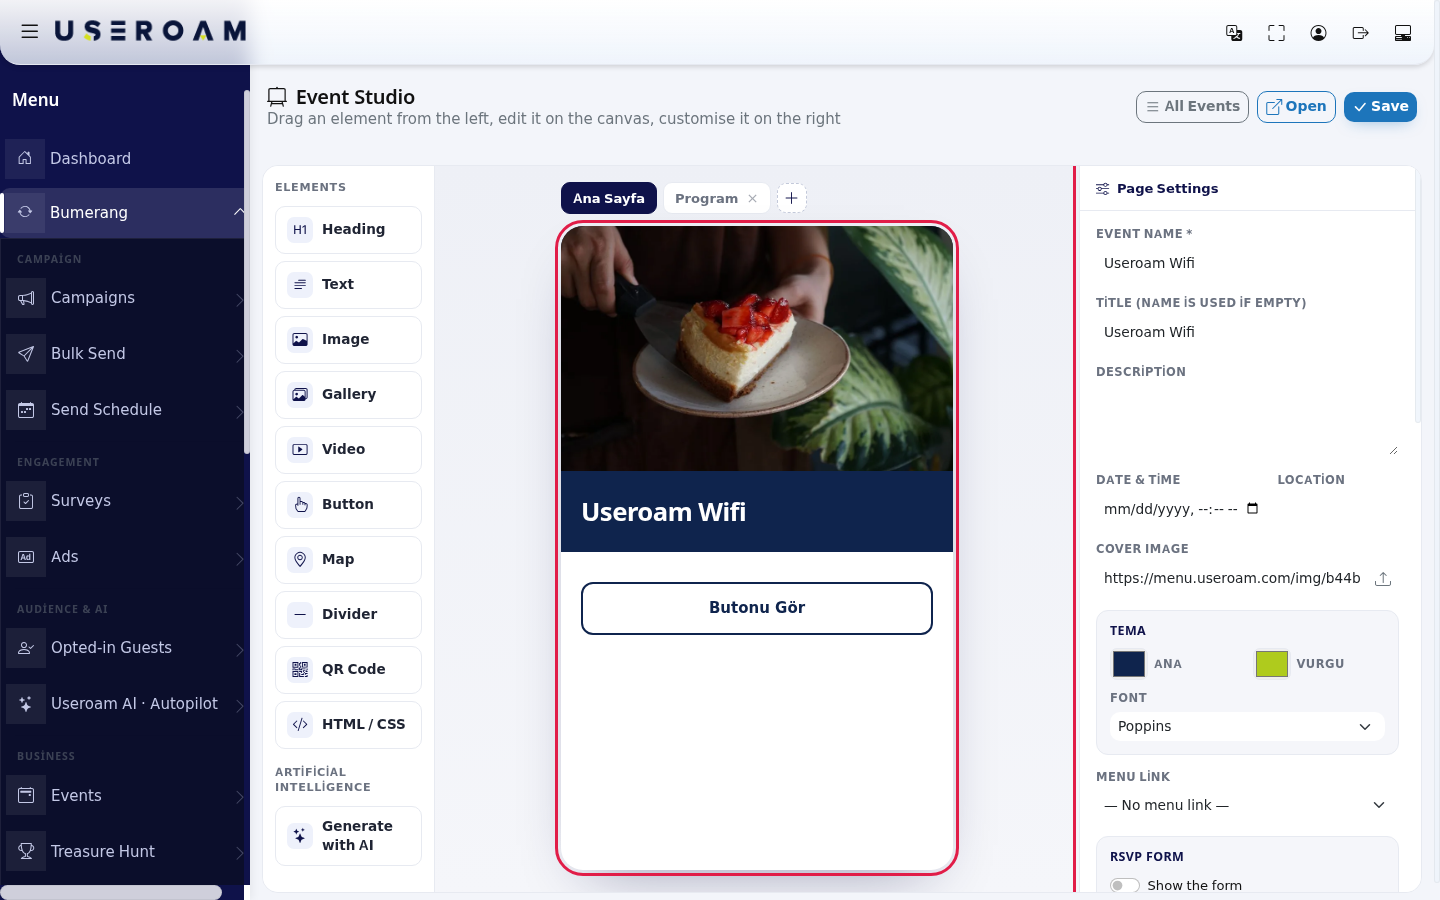
The screen subtitle: "Drag an element from the left, edit it on the canvas, customise it on the right".
Event Studio is where you design the event invitation page guests see on their phone. You build it with a title, date, location, cover image, colours and drag-and-drop blocks. The RSVP form, QR menu link, languages and QR scan rules are also set here.
How do I open this screen? On Bumerang → Business → Events, press New Event or the pencil (Edit) on a card.
Note: some labels on this screen stay in Turkish even when the panel is in English; the Turkish label is given in brackets where that happens.
When to use it
- When creating a new event (the first save happens here).
- When you want to add a programme, map, gallery or video to the invitation.
- When you want to switch on the RSVP form, translate the page or set QR service allowances.
The three areas of the screen
- Left: ELEMENTS. Heading, Text, Image, Gallery, Video, Button, Map, Divider, QR Code, HTML / CSS; below them ARTIFICIAL INTELLIGENCE and Generate with AI.
- Middle: phone preview. Above it the page tabs (Ana Sayfa, the home page, and pages you add) and the + button.
- Right: Page Settings. General settings with no block selected; the block's settings when one is selected.
Top right: All Events (back to the list), Open (opens the guest page in a new tab; only for a saved event) and Save.
Step by step: preparing the invitation
- Type the name into Event Name * and press Save. Without a name nothing is saved. After the first save you stay on the screen and "Saved." appears. Until you type a title, a new event's preview shows "Event Title".
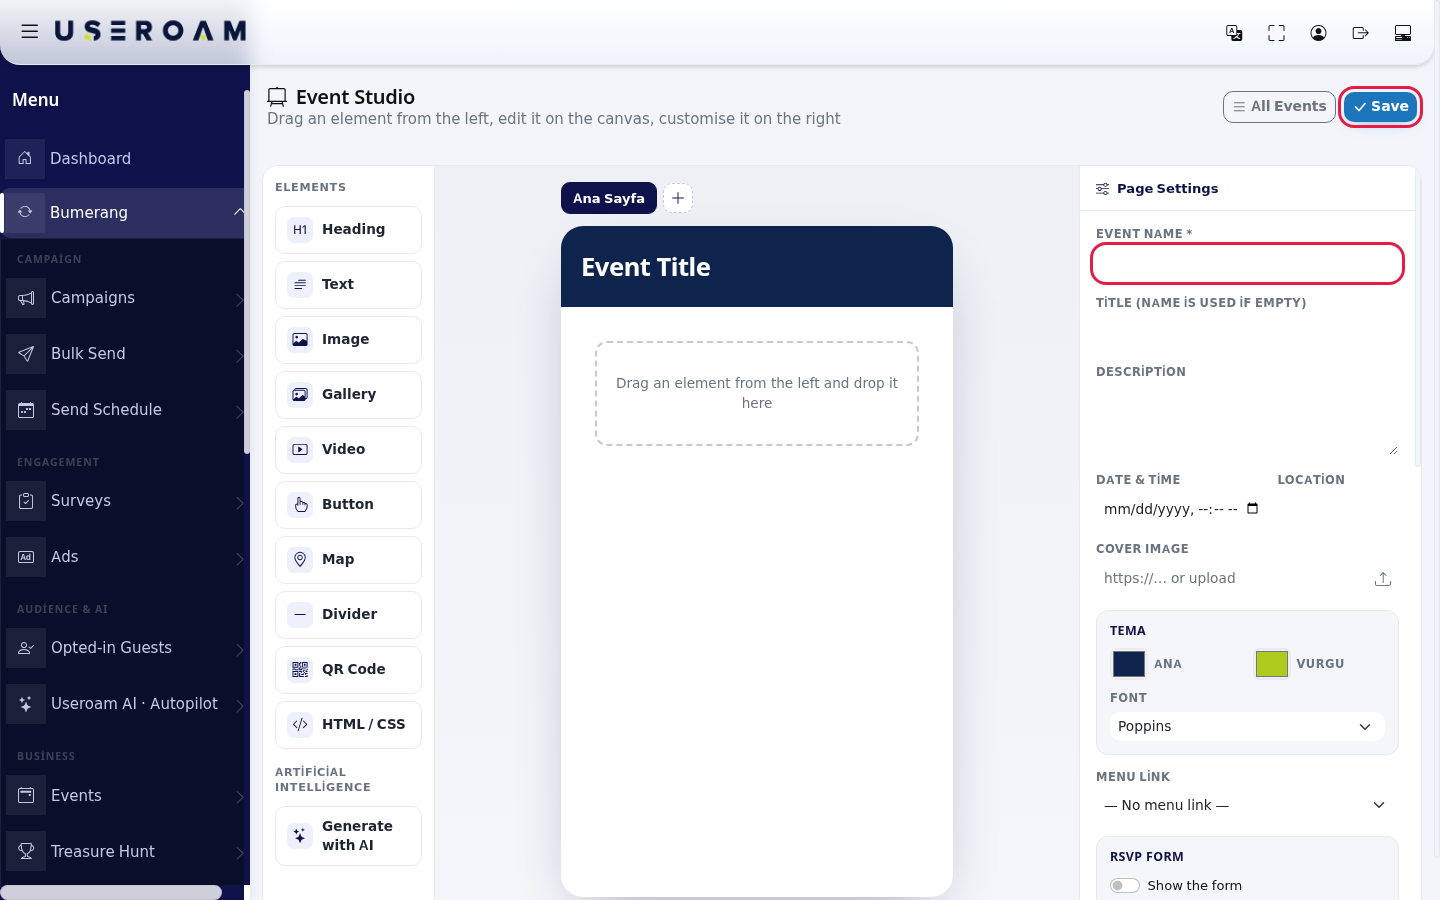
- Drag an element from the left into the phone. An empty page shows "Drag an element from the left and drop it here".
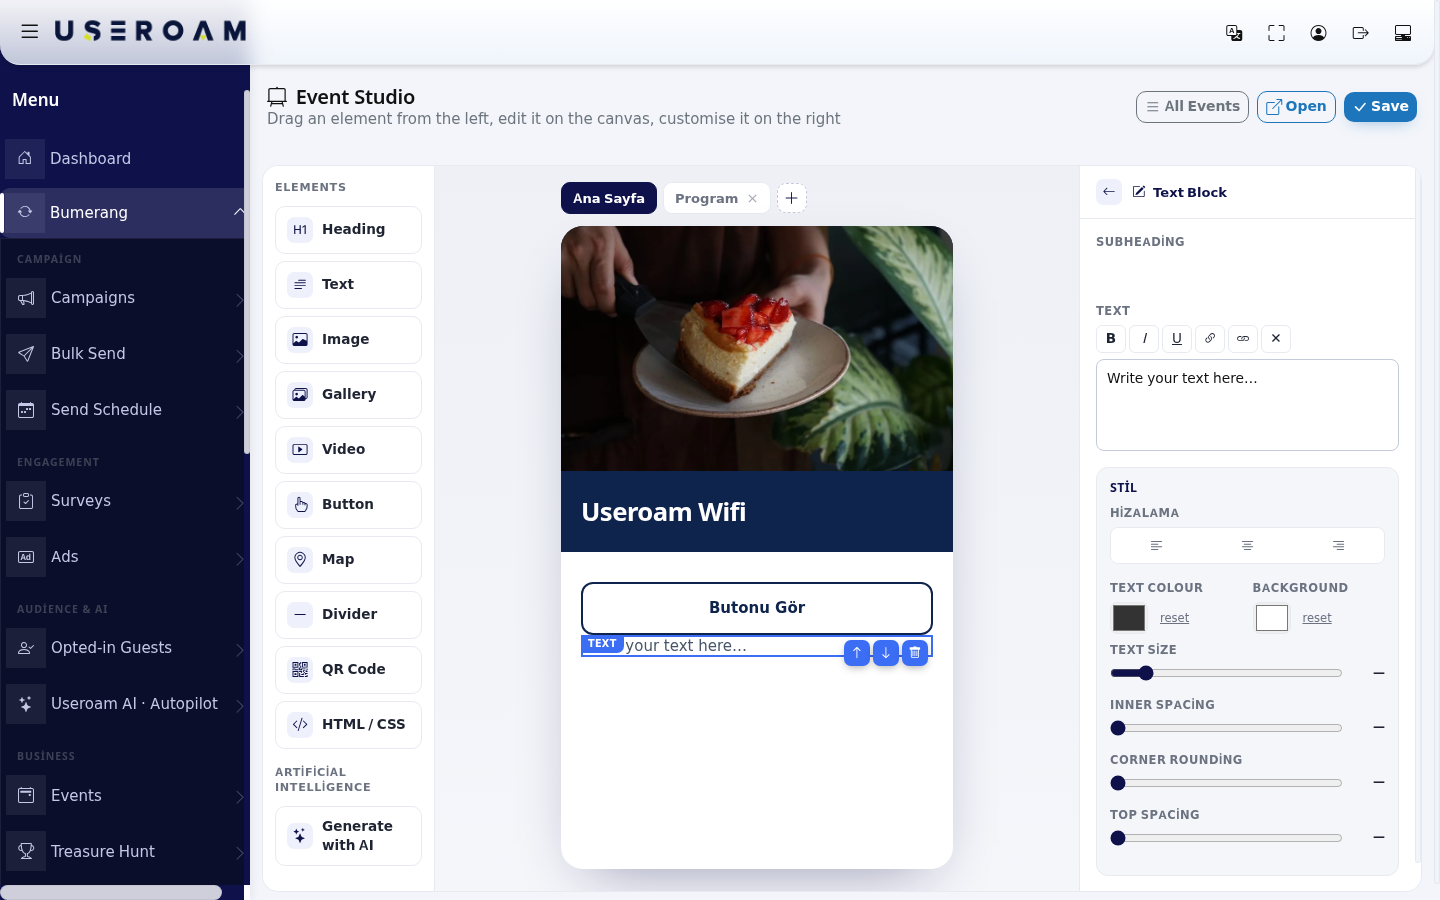
- Click the block; the right panel switches to its settings. Enter the text or link. Use the back arrow ("Back to Page Settings") to return. Reorder blocks with the drag handle or the Up / Down arrows; the bin (Delete) removes a block.
- For an extra page press + (Add page) and answer "New page name:" (suggestion
Program). Double-click a tab name to rename it via "Page name:"; the cross on a tab (Delete page) deletes the page. Up to 12 extra pages are saved. - Scroll the right panel down, set the RSVP form, languages and QR rules, then press Save. Press Open to see the page.

Page Settings
| Field | What it does | Example |
|---|---|---|
| Event Name * | The event's name. Required. | Friday Jazz Night |
| Title (name is used if empty) | The large title at the top of the page. | Jazz Night |
| Description | Text under the title. | |
| Date & Time | Event start; shown on the page and in the list. | 26.09.2026 20:00 |
| Location | Place name; shown next to the date. | Garden |
| Cover Image | Paste a link ("https://… or upload") or use the upload button. JPG, PNG, WEBP or GIF; at most 5 MB. | |
| Theme (Tema): Main (Ana) / Accent (Vurgu), Font | Colours and typeface (Poppins, Inter, Fraunces, Montserrat). |
Menu Link and RSVP Form
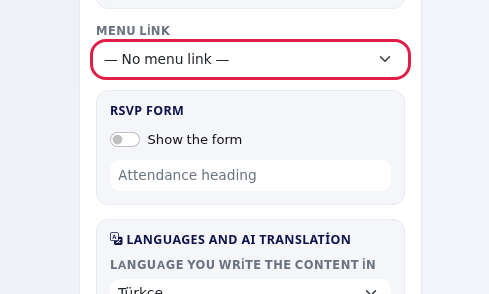
Languages and AI Translation
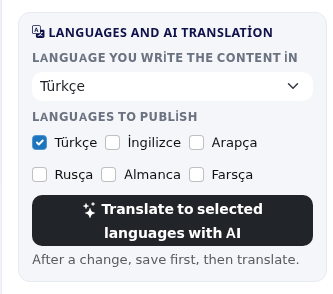
- Language you write the content in: the language you wrote the page in.
- Languages to publish: Turkish, English, Arabic, Russian, German, Persian. Selected ones become language buttons on the guest page.
- Translate to selected languages with AI: translates the content. The note below: "After a change, save first, then translate." When done it shows how many languages were translated. For an unsaved event the button is replaced by "Save first, then AI translation appears." Without an extra language: "Pick at least one language other than the one you wrote in."; trying before saving: "Save first, then translate."
Preview link
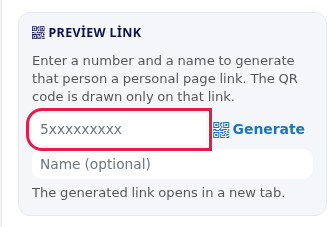
Note: "Enter a number and a name to generate that person a personal page link. The QR code is drawn only on that link." Fill in the number (5321234567) and Name (optional), then press Generate; "The generated link opens in a new tab." For an unsaved event: "Save first, then you can generate a preview link." This sends no message.
QR scan rule and Allowance per department
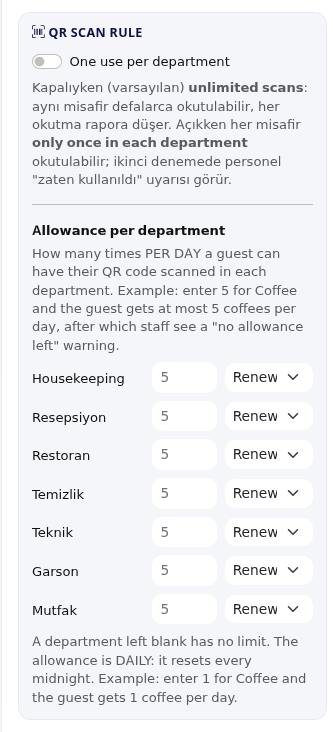
- One use per department: off (default) means unlimited scans: the same guest can be scanned again and again and every scan is reported. On means each guest can be scanned only once in each department; on a second attempt staff see an "already used" warning (this explanation is shown in Turkish on screen).
- Allowance per department: "How many times PER DAY a guest can have their QR code scanned in each department. Example: enter 5 for Coffee and the guest gets at most 5 coffees per day, after which staff see a "no allowance left" warning." Each department has a number box and a period: Renews daily or Whole event. The note below: "A department left blank has no limit. The allowance is DAILY: it resets every midnight. Example: enter 1 for Coffee and the guest gets 1 coffee per day." (With Whole event the allowance does not renew.)
- Without departments: "No departments defined for this device." Add them on Bumerang → Staff.
Block settings
Every block has a Style (Stil) card at the bottom: Alignment (Hizalama: left, centre, right), Text colour, Background (each with reset), and sliders for Text size, Inner spacing, Corner rounding and Top spacing.
| Block | Settings |
|---|---|
| Heading | Heading text (a new block reads "New Heading"). |
| Text | Subheading and Text. The text toolbar has Bold, Italic, Underline, Add link (asks "Link (https://…):"), Remove link, Clear formatting. A new block starts with "Write your text here…"; an empty box shows "Write your text…". |
| Image | Image URL or the upload button. While empty the preview shows "Image: add a URL on the right". |
| Gallery | Images list: one link per row, Add URL opens a new row, Add image uploads a file, the cross is "Remove this image". For many images, paste links into Have a lot? Paste your list (one per line or separated by spaces; the box shows https://ornek.com/1.jpg https://ornek.com/2.jpg) and press Add list. While empty: "Gallery: add images on the right". |
| Video | YouTube link (YouTube linki). While empty: "Video: YouTube link on the right". File upload is not available. |
| Button | Button text (default "View Button"), Target: External link (URL) or one of your pages ("Page: Rules"). For an external link, the Link box. With no extra page the note says "To target an internal page, first add a new page from the top." |
| Map | Address and Button text (default "Yol Tarifi", directions). |
| Divider | No settings: "A divider is just a separator line; it needs no content." |
| HTML / CSS | HTML / CSS / JS code and Height (pixels). Note: "The frame cannot measure its own height; adjust it manually to fit the content." The code runs in an isolated frame. A new block comes with a sample design titled "Your own design" reading "HTML, CSS and JavaScript can be used freely in this block." With empty code the preview shows "HTML: write code on the right". |
| QR Code | A guest-specific QR code. The block text explains that the QR is drawn when the page is opened from a personal link, otherwise the warning below appears, and staff scan this QR to record the service. Settings: Title (example Your QR code), Alt not (sub note, example "Show this code to the staff member"), Warning shown when there is no personal link (example "This page must be opened from the personal link sent to you.") and Generate a test link: type a number and optional name and press Generate ("Enter a number, open that person the personal link and see the QR code."; "Opens in a new tab; the QR is drawn on that link."). For an unsaved event: "Save the event first." In the preview the block appears as a placeholder square labelled Guest-specific QR and "a personal link". |
Generate with AI
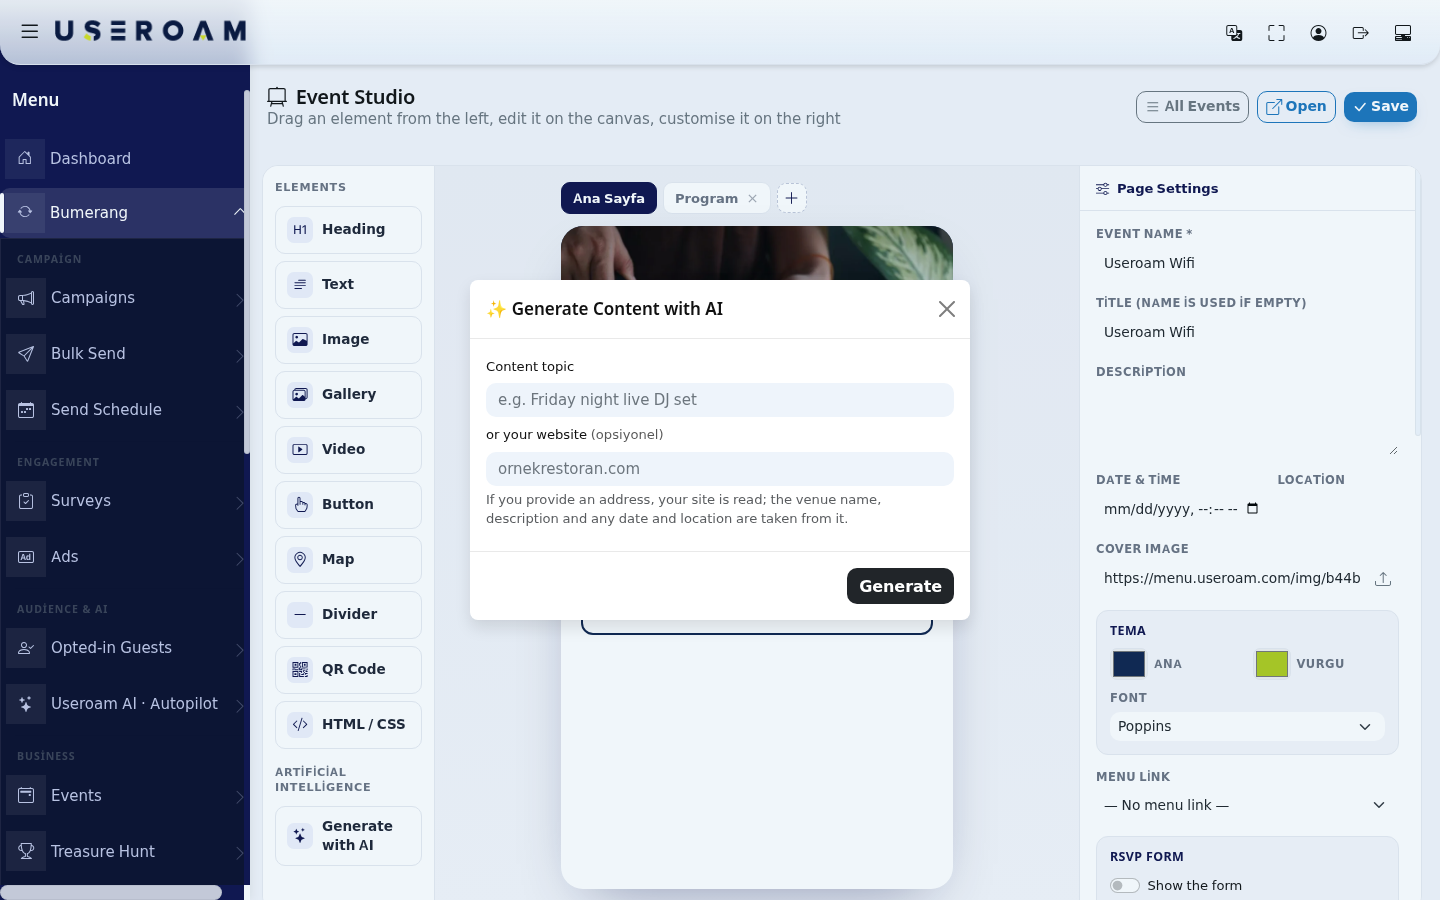
- Press Generate with AI on the left. The Generate Content with AI dialog opens.
- Type the topic into Content topic (example:
Friday night live DJ set) or enter your website address in or your website (optional). Note: "If you provide an address, your site is read; the venue name, description and any date and location are taken from it." - Press Generate. You see "Reading your site and preparing the content…" or "Preparing the content…". When done: "Ready. The fields on the right have been filled, press Save."
- Press Save.
| Message | What to do |
|---|---|
| Write the event topic or enter a web address. / Write a topic or enter a web address. | Fill in at least one of the two boxes. |
| Enter a valid web address. / This address cannot be read (local/private addresses are blocked). | Enter a public website, for example examplerestaurant.com. |
| No readable text was found on the site (it may be rendered with JavaScript). Please write the topic manually. | Clear the address and type the topic yourself. |
| The AI could not respond right now, please try again. / The AI output could not be read, please try again. / AI error / Connection error | Press Generate again after a few seconds. |
| This device has no marketing (Bumerang) licence, AI generation is disabled. | Contact your sales team about the licence. |
| The AI dialog could not be opened | Refresh the page and try again. |
Image upload messages
- "images only": only JPG, PNG, WEBP or GIF can be uploaded.
- "en fazla 5MB" (at most 5 MB): make the file smaller and try again.
- "Upload failed" / "upload error": check your connection and try again.
Frequently asked questions
I saved but the page does not open.
The event may be a Draft in the list; publish it with the play button on the card.
Why is the QR not visible on the page?
The QR is drawn only on the personal link. The public /e/... address shows the block's warning text instead. Send personal links from the QR Scan Report in the Events list.
My changes disappeared.
The studio does not save automatically; press Save before leaving.
Related pages
- Events: list, RSVPs, QR Scan Report.
- Treasure Hunt Studio: the treasure hunt designer that works the same way.