
Setup Wizard
What is it for?
The Setup section (Setup Wizard) generates the configuration that sets up the guest network, guest login (hotspot), the Useroam connection (RADIUS) and 5651 logging on your MikroTik device, made for your device. It does not use a fixed template: it reads your device first, asks which port should carry the guest network, shows you the full script it generated and only after you approve it gives you the single line to paste into the device.
How do I open this screen? With the Open the setup screen button on Device Settings > Setup, or in the MikroTik Management console from the left menu: GUEST NETWORK > Setup.
When do you use it?
- You connected the device to the panel (Connected.) and are setting up guest Wi-Fi for the first time.
- You want to move the guest network to another port or bridge.
- You stopped halfway or the code expired and you want to generate it again.
Before you start
- The device must be connected to the panel. If it is not, first do steps 1-6 of the MikroTik Integration Guide. Without a connection the lists on this screen are empty and Cannot reach the device... warnings appear. If the panel cannot reach the router, or you do not want to expose it to the internet, use the offline setup instead of this wizard.
- Decide which port the guest network will use. You will pick the port your guest access point (AP) is plugged into, or the bridge that port belongs to.
- On RouterOS 7.23.3 and above you must have enabled device mode beforehand (the yellow box in step 3). Otherwise the device rejects the hotspot setup.
- You need to be able to connect to the device with Winbox or SSH and open a terminal.
Wizard steps
Three steps are shown at the top of the screen: 1. Choose, 2. Review script, 3. Code. The current step has a blue badge, finished steps green and upcoming steps grey. The wizard itself writes nothing to the device; the settings are only applied when you paste the line from step 3 into the device terminal.
Step by step
Open the Setup section. In the console's left menu press Setup under GUEST NETWORK. Below the title it reads Builds the guest network, hotspot, RADIUS and 5651 logging setup from the configuration read off the device. Your existing settings are preserved.
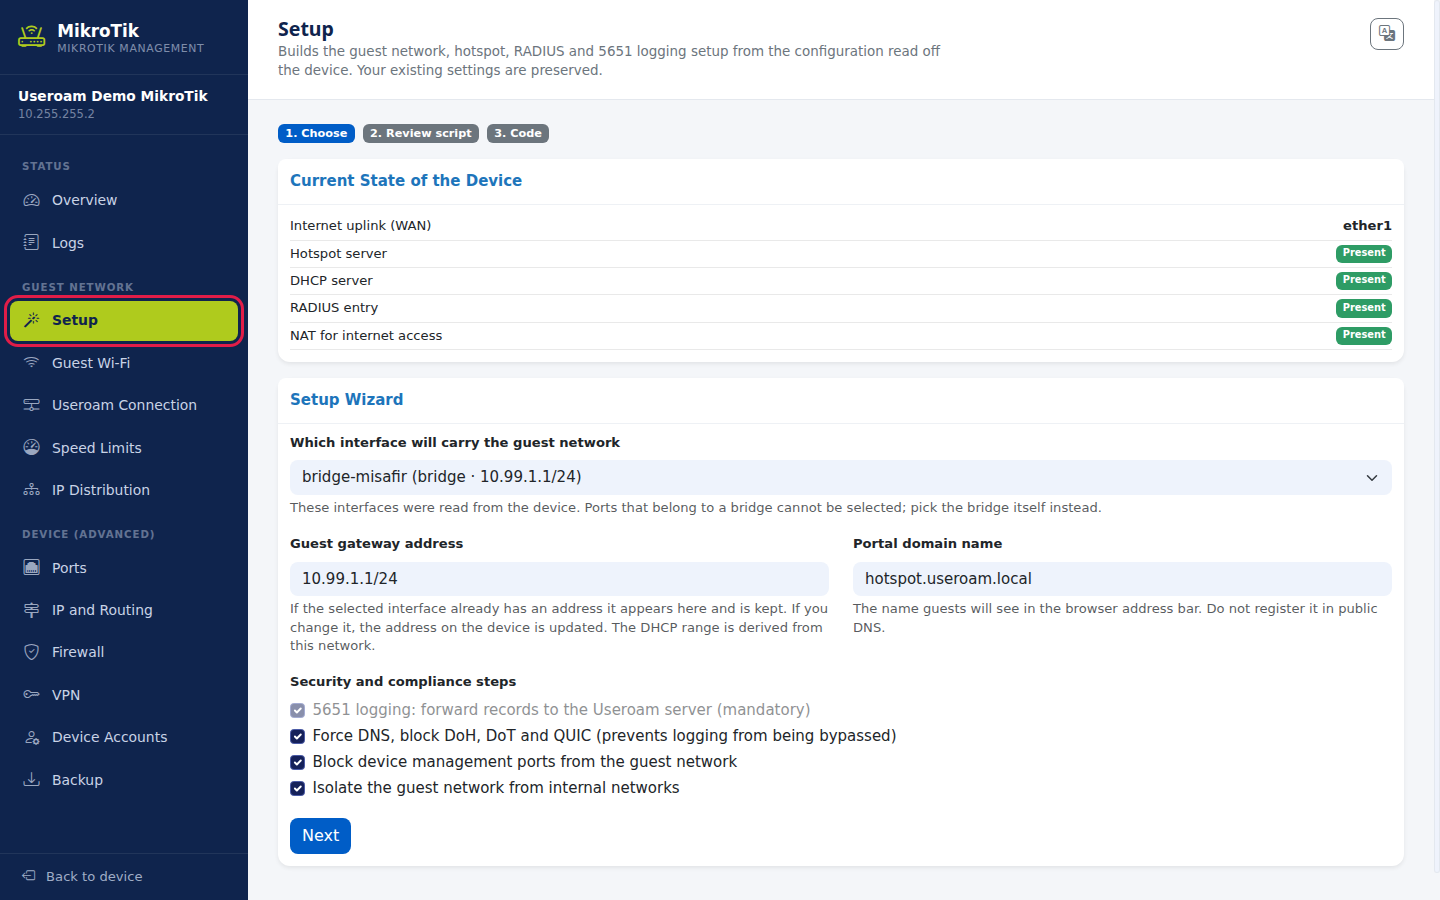
Right below the step badges there is a Device closed to the internet? Offline setup button. If your router cannot be reached from outside, or you do not want to expose it, press this button: the panel does not read the router and asks you for the names of the guest interface and the internet uplink. Details: Setting up MikroTik without exposing it to the internet (offline).
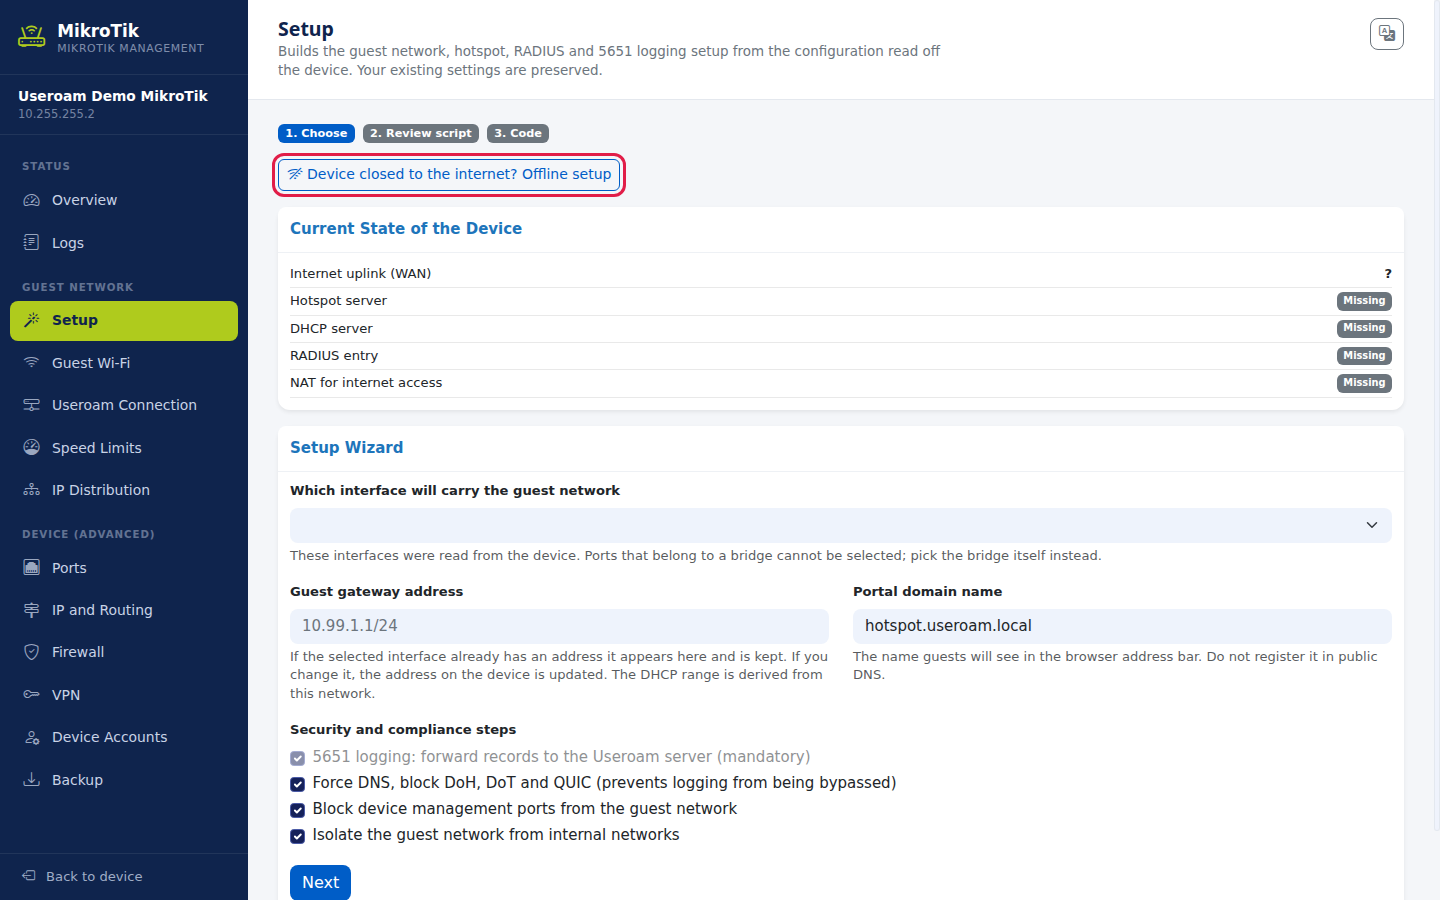
Check the device state. The Current State of the Device card shows five things read from the device: Internet uplink (WAN) (the port the device uses to reach the internet, e.g. ether1; ? if it cannot be read), Hotspot server, DHCP server, RADIUS entry and NAT for internet access. Each line reads Present or Missing. On a first setup most are Missing; after setup you can come back to this card and check they are all Present.
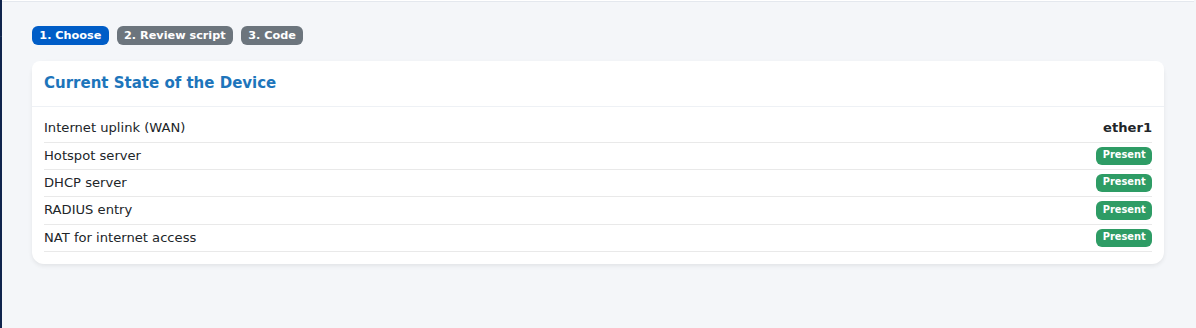
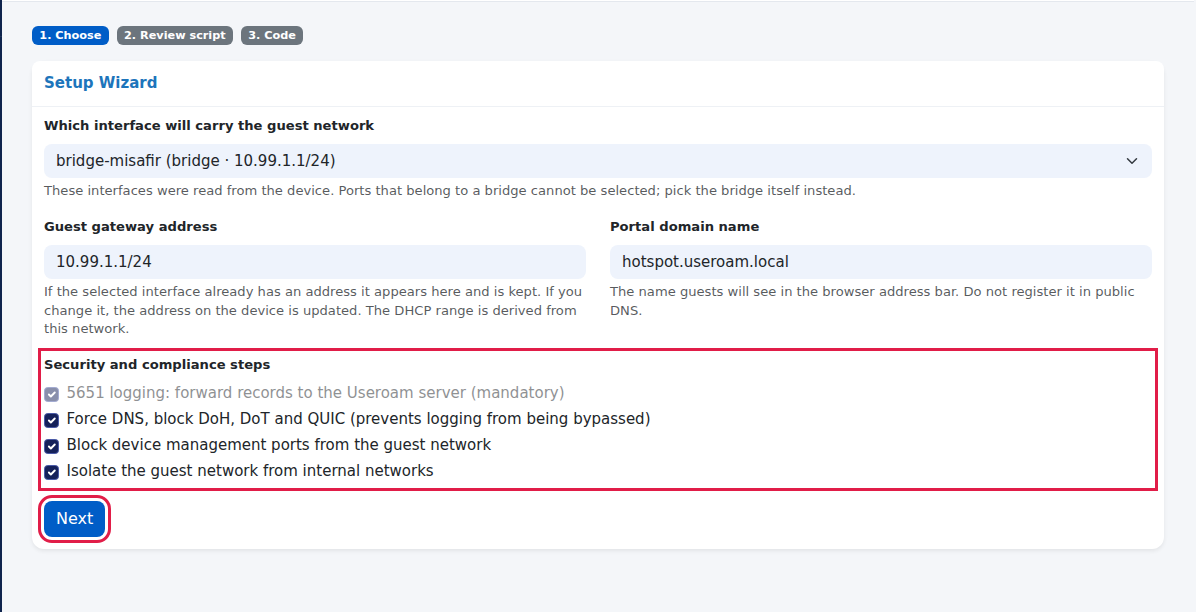
Choose the guest network port. In the Setup Wizard card open the Which interface will carry the guest network list. The list is read from the device; each line shows the port name, type and address if any (e.g. bridge-misafir (bridge · 10.99.1.1/24)). Ports that belong to a bridge are grey and cannot be selected, with member of: ... next to them; pick the bridge itself instead. Ports without a cable show down.
The Guest gateway address field fills in automatically with the selected port's address if it has one (otherwise 10.99.1.1/24 is suggested). If you change it, the address on the device is updated. The IP range handed out to guests is derived from this network (.10 to .254 on a /24 network). Portal domain name is the name guests see in the browser address bar; the default is hotspot.useroam.local. Do not register it in public DNS.
The hints under the fields read: These interfaces were read from the device. Ports that belong to a bridge cannot be selected; pick the bridge itself instead. · If the selected interface already has an address it appears here and is kept. If you change it, the address on the device is updated. The DHCP range is derived from this network. · The name guests will see in the browser address bar. Do not register it in public DNS.
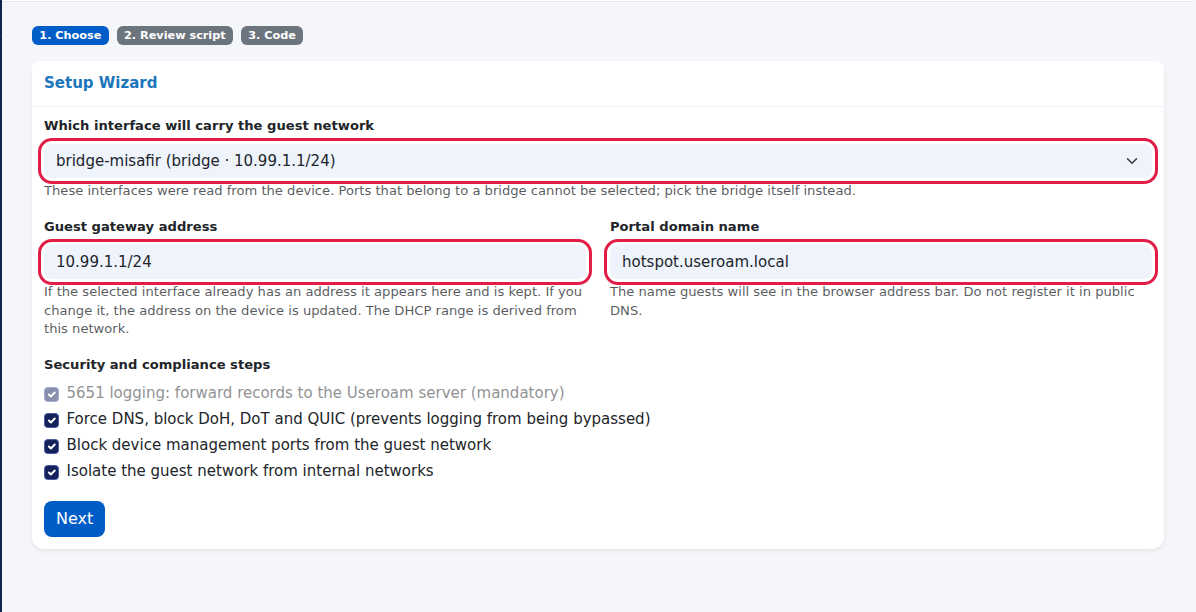
Check the security steps and press Next. Security and compliance steps has four boxes (explained in the table below). The first is mandatory and cannot be unticked; the other three come ticked and we recommend leaving them ticked. Press Next. This button writes nothing to the device; it generates the script and prepares a setup code valid for 60 minutes. Any earlier unused setup codes for this device become invalid.
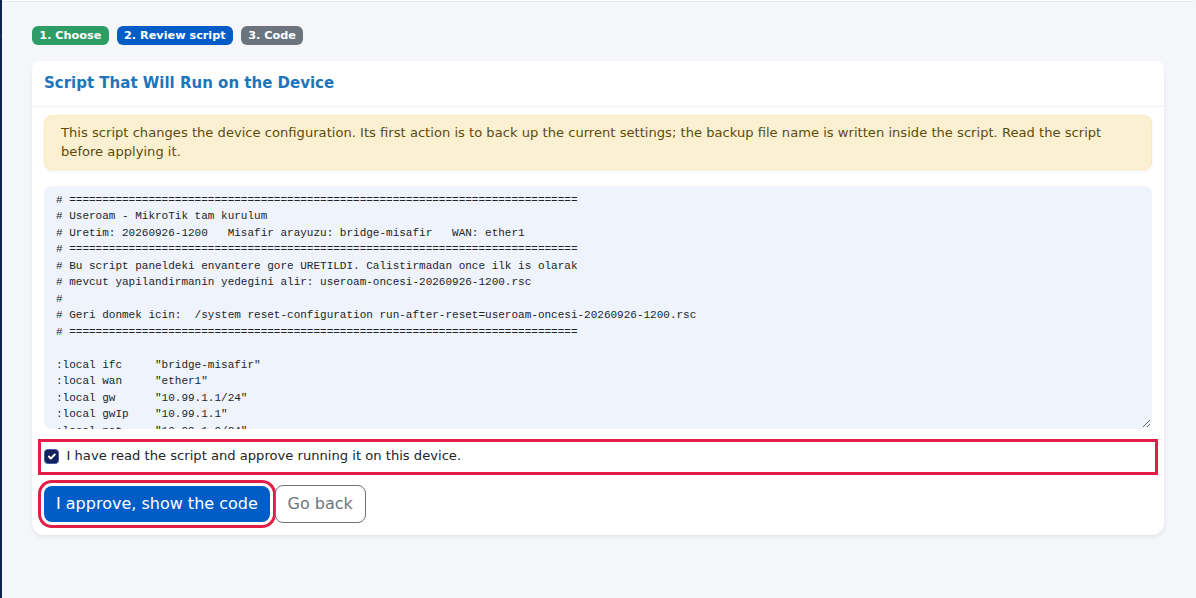
Read and approve the script. The Script That Will Run on the Device card opens. The yellow warning at the top reads This script changes the device configuration. Its first action is to back up the current settings; the backup file name is written inside the script. Read the script before applying it. What the script does is explained in plain words in the "What does the script do?" table below. After reading, tick I have read the script and approve running it on this device.; only then can you press I approve, show the code. Press Go back to cancel.
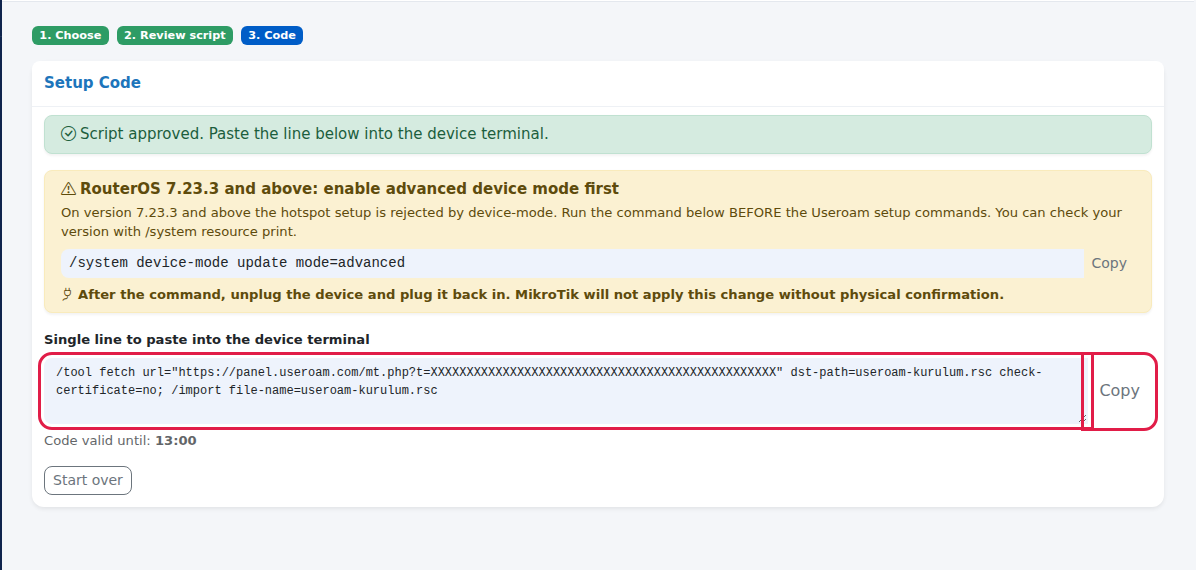
Copy the line. The Setup Code card reads Script approved. Paste the line below into the device terminal. Below it are the device mode warning (for 7.23.3 and above) and the Single line to paste into the device terminal box. Press Copy (the button briefly shows Copied). Apply it before the time shown in Code valid until. To generate it again, press Start over.
Paste the line into the device terminal. Connect to the device with Winbox or SSH, open a New Terminal, paste the line and press Enter. The script runs step by step and prints a line starting with Useroam: ... for each step. At the end it prints a result line from the panel and Test: connect a device to ... and open any web page - the Useroam portal should appear.
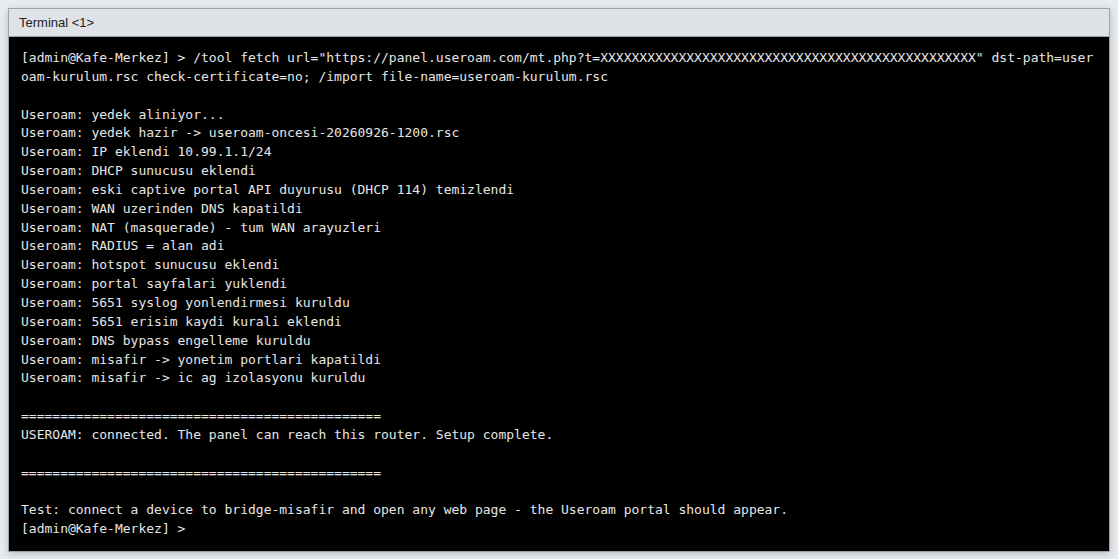
The image is a sample terminal output; the lines are the script's own messages (some are in Turkish without special characters).
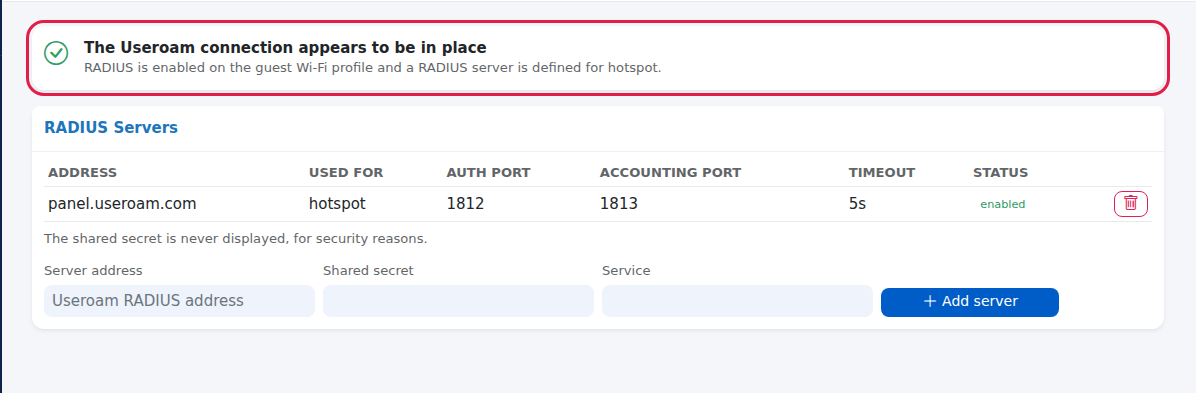
Check the result. Open the Setup section in the console again: the lines in Current State of the Device should read Present. The Useroam Connection section should read The Useroam connection appears to be in place. Finally connect a phone to the guest network and open a web page; the Useroam welcome page should appear.
Fields and buttons on the screen
| Field / button | What it does | Example |
|---|---|---|
| Which interface will carry the guest network | The port or bridge for the guest network. Only interfaces read from the device can be chosen; bridge member ports cannot. | bridge-misafir |
| Guest gateway address | The guest network address on the device, with its size. A network (.0) or broadcast address is not accepted. | 10.99.1.1/24 |
| Portal domain name | The name guests see in the address bar. Letters, digits, dot, hyphen and underscore only; an invalid name falls back to hotspot.useroam.local. | hotspot.useroam.local |
| 5651 logging: forward records to the Useroam server (mandatory) | Sends hotspot, DHCP and connection records to Useroam for signing. Cannot be unticked. | ticked |
| Force DNS, block DoH, DoT and QUIC (prevents logging from being bypassed) | Forces guest DNS queries through the device; blocks encrypted DNS (DoT) and QUIC. | ticked |
| Block device management ports from the guest network | Stops guests reaching the device's SSH, Telnet, Winbox and API ports (80 and 443 stay open for the welcome page). | ticked |
| Isolate the guest network from internal networks | Stops guests reaching internal networks such as office, till or cameras. Guests cannot reach each other either. | ticked |
| Device closed to the internet? Offline setup | Opens the offline wizard, which works without connecting to the router: you type the two interface names, the following steps are the same as on this page. | |
| Next | Generates the script and moves to step 2. Writes nothing to the device. | |
| I approve, show the code | Shows the code when the approval box is ticked. | |
| Go back / Start over | Returns to step 1. | |
| Copy | Copies the line to the clipboard. |
What does the script do?
The script itself is written without special characters (the RouterOS terminal does not show them reliably). In order:
| Part | What it does | Your existing settings |
|---|---|---|
| Backup | Writes the current configuration to useroam-oncesi-<date-time>.rsc. | Unchanged. |
| 1. Guest network address | Adds the gateway address to the chosen port. | If the port already has an address it is changed. |
| 2. DHCP | Sets up the useroam-pool pool and useroam-dhcp server (1 hour lease). | An existing DHCP server on the port is kept. |
| 2b. Old entry cleanup | Removes DHCP option 114 (captive portal announcement) entries left from older Useroam setups. | Only Useroam's own entries are removed. |
| 3. DNS | Lets the device answer DNS for guests; adds 8.8.8.8 and 1.1.1.1 if no server is set; blocks DNS queries coming from the internet. | Your DNS servers are kept. |
| 4. Internet access (NAT) | Creates an interface list named WAN and adds a NAT rule for the guest network. Works with several internet lines. | An old Useroam NAT rule is replaced. |
| 5. RADIUS | Adds the Useroam RADIUS server (panel.useroam.com first, the IP if the name is not accepted). | An old Useroam RADIUS entry is removed and added again; other RADIUS entries are not touched. |
| 6. Hotspot | Sets up the useroam-profile profile and useroam-hotspot server (RADIUS on, 30 minute idle timeout). | An existing hotspot on the port is attached to the Useroam profile. |
| 7. Welcome pages | Downloads the Useroam welcome pages into the device's hotspot folder. | Files with the same names are overwritten. |
| 8. Pre-login access | Adds the addresses guests need before logging in (Useroam, WhatsApp, Facebook, Google and Apple sign-in). The phones' "is there internet" check addresses are deliberately left out; if allowed, the login screen does not open. | Old Useroam entries are renewed. |
| 9. 5651 logging | Sets up syslog forwarding to Useroam and a rule that logs every new guest connection (useroam-5651-log), moved to the top of the list. | Does not block traffic. |
| 10. DNS bypass block | (If ticked) redirects DNS to the device, blocks DoT and QUIC. | |
| 11. Management ports | (If ticked) blocks guest access to the device's management ports. | |
| 12. Isolation | (If ticked) blocks guest access to 10.0.0.0/8, 172.16.0.0/12 and 192.168.0.0/16. | |
| Done | Tells the panel the setup is complete and prints the test instruction. |
If a part fails, the script prints USEROAM WARNING: ... step failed, continuing. and carries on. If you see such a line, check that section in the console or contact support.
Warnings and error messages
| Message | When it appears | What to do |
|---|---|---|
| The selected interface was not found on the device. Refresh the page and try again. | The chosen port changed or was removed on the device meanwhile. | Reload the page and choose again. |
| The gateway address is invalid. Example: 10.99.1.1/24 | The address is incomplete, or a network or broadcast address. | Enter an address with its size as in the example. |
| The setup code could not be saved. | A temporary problem on the panel side. | Press Next again; contact support if it continues. |
| The setup code was not found or has expired. Please start over. | You waited more than 60 minutes at step 2, or generated a newer code meanwhile. | Generate a new code with Start over. |
| Session verification failed. Please refresh the page and try again. | The page was open for a long time or the session was renewed in another tab. | Reload the page. |
| Cannot reach the device. It must run RouterOS 7.1 or newer and have the web service (www-ssl) enabled. | The panel cannot read the device; the list is empty. | Check the connection status on Device Settings > Setup. |

What if I want to go back?
The comment at the top of the script contains a rollback command: /system reset-configuration run-after-reset=useroam-oncesi-<date-time>.rsc. This command resets the device and loads the backup file again; remote access to the device may be lost meanwhile. This rollback has not been tested by Useroam. Only use it when you are at the device and sure; otherwise contact support. To undo a single change, the Undo button in the console is a safer way (MikroTik Management).
Frequently asked questions
The list is empty, no ports are shown.
The panel cannot read the device. Check that the card on Device Settings > Setup reads Connected.
The port I want is grey and cannot be selected.
The port belongs to a bridge. Choose the bridge itself; the guest network then works on every port of the bridge.
After setup the login page does not open on the guest's phone.
First check the Useroam Connection section. If it looks fine, disconnect the phone from Wi-Fi, reconnect and open an address starting with http in the browser. On RouterOS 7.23.3 and above, if device mode was not enabled the hotspot may not have been set up at all.
What happens if I run the wizard a second time?
The script finds and updates Useroam's own entries; it does not add the same entries twice. A new backup is still taken on every run.
The code expired.
Press Start over and generate it again with the same choices.