
Venue Setup Wizard
What is it for?
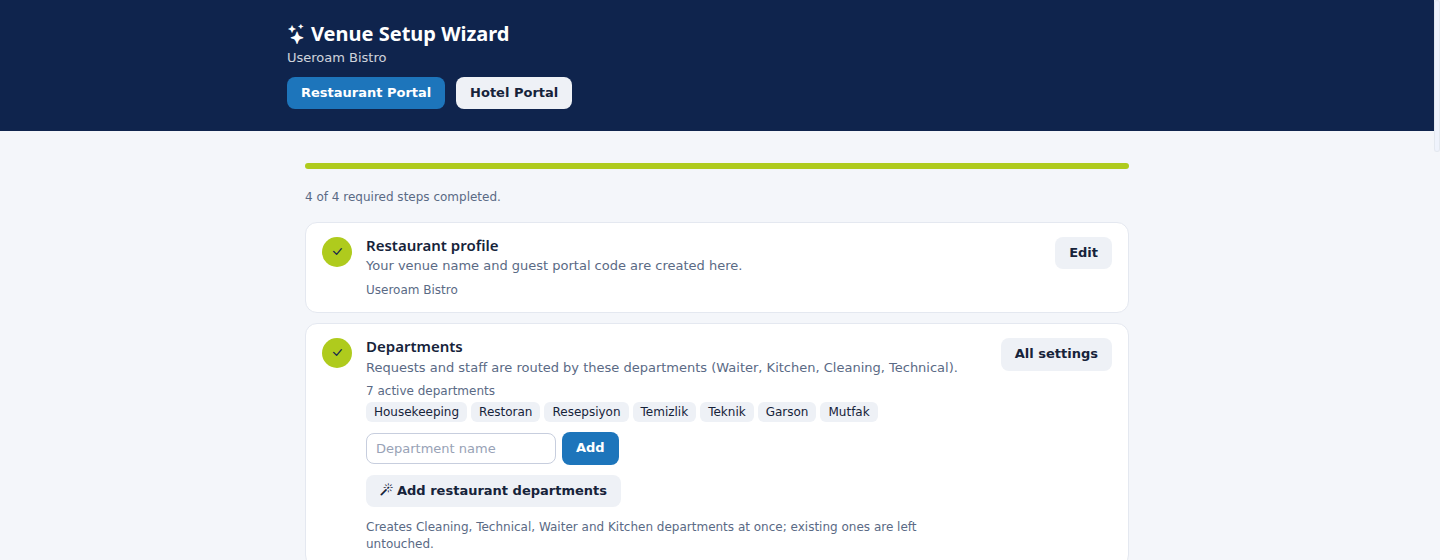
The Venue Setup Wizard gets your venue ready on a single page, in numbered steps, the first time you turn on the restaurant or hotel module: profile, departments, request types (rooms for hotels), staff, delay rules and daily tasks. Every step has its form inside the wizard, so you fill everything in without leaving the page. The page title is Venue Setup Wizard, with your venue name underneath.
The same wizard has two modes: restaurant mode and hotel mode. Both are covered on this page.
When do I use it?
- When you turn on the restaurant or hotel module for the first time (the wizard opens by itself).
- After deleting a department, a request type or your last manager, to see what is now missing.
- To add a new staff member quickly, or to confirm the setup works with a test request.
Before you start
- The forms are shown only to the account administrator (an admin user) or to a staff member with the manager role at this venue. Other users can see the page but get this warning at the top: "You can view this page, but changes require an account administrator or a venue manager."
- Select the right device (venue) at the top of the panel. The wizard sets up the venue of the selected device.
- The wizard stores no progress flag: every time it opens, it recalculates each step from your data. You can open it again as often as you like.
Three ways to open the wizard
- Automatically: when you first create the restaurant, or open Restaurant Management for a restaurant with no requests and no task records yet, the panel sends you to the wizard once. For hotels, Request Management does the same once while there are no requests. It does not force it again in the same session.
- On Restaurant Management, click Setup wizard to the right of the tabs. (Hotel Request Management has a button with the same name.)

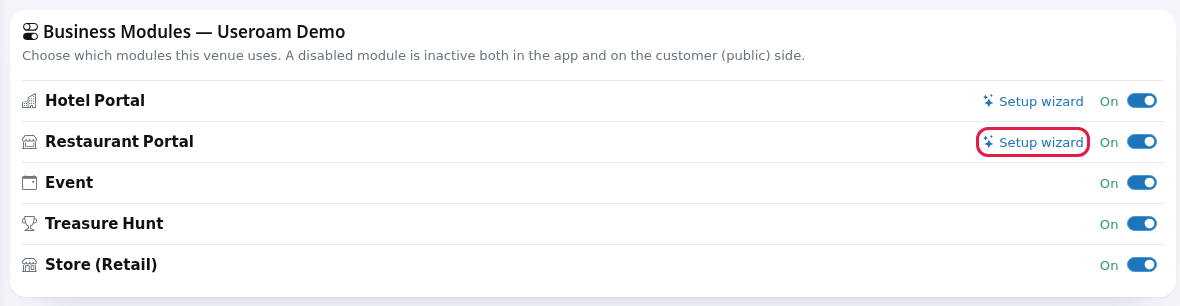
- Go to Settings → Module Permissions, and in the Business Modules card click Setup wizard on the Restaurant Portal or Hotel Portal row. If the module has never been set up, the row says Not set up · Set up; Set up takes you to the Restaurant Management create screen, and after you enter the business name and click Create the wizard opens.
Page layout
- Top band: title and venue name. If the venue has both a restaurant and a hotel, Restaurant Portal and Hotel Portal buttons appear; the blue one is the current mode. With only one module the wizard opens in that mode; with both it opens in restaurant mode.
- Progress bar with a line such as "2 of 4 required steps completed." Only required steps count.
- Step cards: a numbered badge (a green tick when done), the step name, a description and the current state (for example "7 active departments"). The next missing step has a green frame. Optional steps show an optional tag next to the name.
- Each card has a button on the right: All settings on steps with a form (opens the full screen for that topic); on steps without a form, the step's own button while it is missing (for example Edit tasks) or Edit when it is done.
- Below the steps: the QR menu card (restaurant) or Guest portal card (hotel), the Verify the setup card, and a final card that takes you back to the panel.
Step by step: restaurant mode
The step numbers below match the screen. Steps 1-4 are required; 5 and 6 are optional.
- Restaurant profile. If there is no profile yet, the card shows a box: type the business name (for example
Sea Cafe) and click Create. Creating it also sets up 4 ready request types (Call waiter, Request bill, Cleaning, Fault), ready points and ready daily tasks. If the profile exists, the card shows its name; click Edit to change it and other settings (opens Restaurant Management).
- Departments. Requests and staff are routed by department. The fastest way is Add restaurant departments: it creates Cleaning, Technical, Waiter and Kitchen at once and leaves existing ones untouched. To add your own, type it in Department name (for example
Bar) and click Add. Existing departments appear as small tags on the card.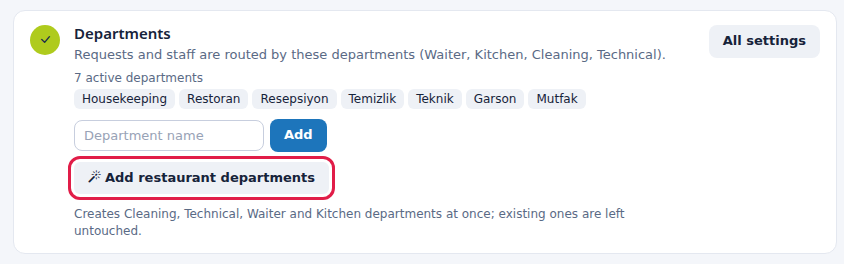
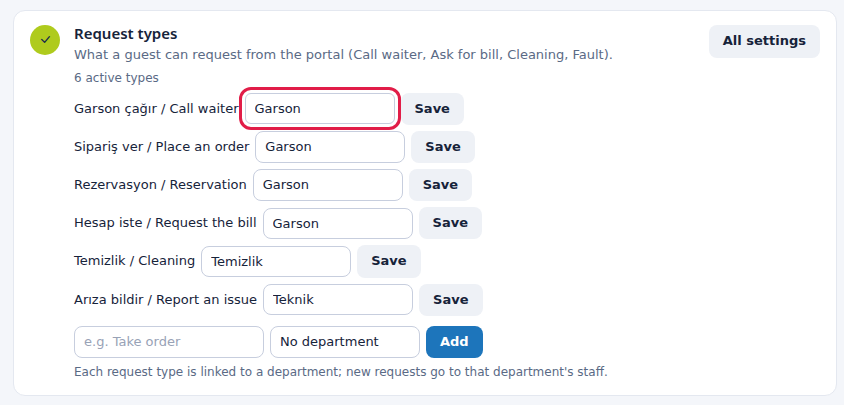
- Request types. Each request type has a department box next to it; a new request goes to that department's staff. Pick the right department on each row and click Save. For a new type, type the name in e.g. Take order, choose a department and click Add. If some types have no department, the card says "2 of them have no department: those requests cannot be routed".
- Staff. At least one manager is required. Enter Name, optional Last Name and mobile number (for example
5321234567), pick the role (Manager (manages staff + assignments) or Staff (handles requests/orders)), tick one or more Department(s), and click Add. The password is generated automatically and sent to the person (SMS when the panel is in Turkish, WhatsApp when in English). Staff sign in to the app with this number. The card shows a count such as "3 staff · 1 managers".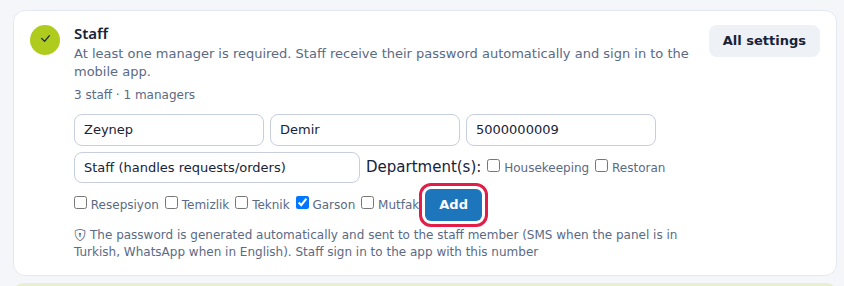
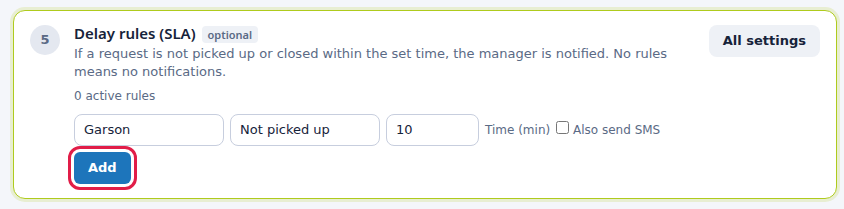
- Delay rules (SLA) (optional). If a request is not picked up or not completed in time, the manager is notified. Choose the department (All departments covers all), the stage (Not picked up / Not completed), type the Time (min) (default 15), tick Also send SMS if you want, and click Add. Without rules no notifications are created.
- Daily tasks (optional). Recurring work such as temperature checks, restroom rounds and closing checklists. Ready tasks are installed when the restaurant is created, so this card has no form; it shows the number of active tasks. To change tasks click Edit (or Edit tasks if none exist); the Daily Tasks tab of Operations opens.

- QR menu card. In a restaurant the page guests use is the QR menu. If you have a menu, its address (
https://menu.useroam.com/...) and an Edit menu button appear; if the menu is closed you see "The menu is currently closed: guests cannot see it." Without a menu there is a Create digital menu button; a menu is optional. Details: Setting up the QR menu from start to finish.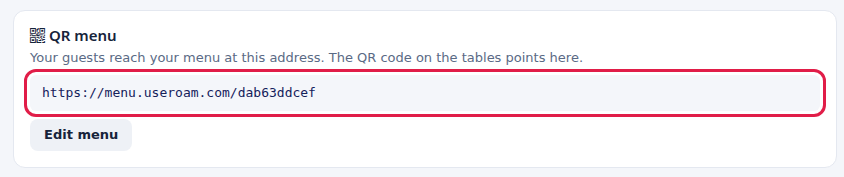
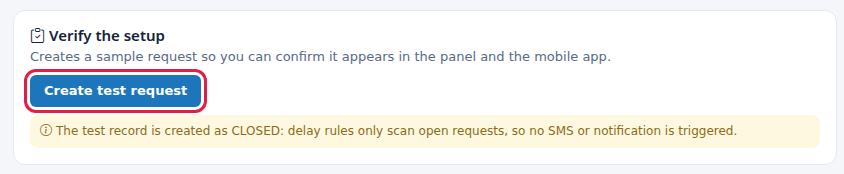
- Verify the setup. Click Create test request. The panel writes a sample request you can see under Restaurant Management → Requests with the Closed filter, and in the mobile app. The test record is created as closed: delay rules only scan open requests, so no SMS or notification is triggered. While a test record exists, a Delete test record (1) button appears; click it after testing. If the restaurant has no request types, the test button is disabled.
- When all required steps are done, the bottom card says "All required steps are complete. Your venue is ready to use." Click Go to restaurant panel.

Step by step: hotel mode
If the venue has a hotel, click Hotel Portal in the top band (or open the address /venue-kurulum?m=otel). Under the title you see Hotel module setup or the hotel name. Steps 1-4 are required; 5 and 6 are optional.

- Hotel profile. If there is none, type the business name and click Create; the hotel name and guest portal code are created here. If it exists, Edit opens the guest portal settings.

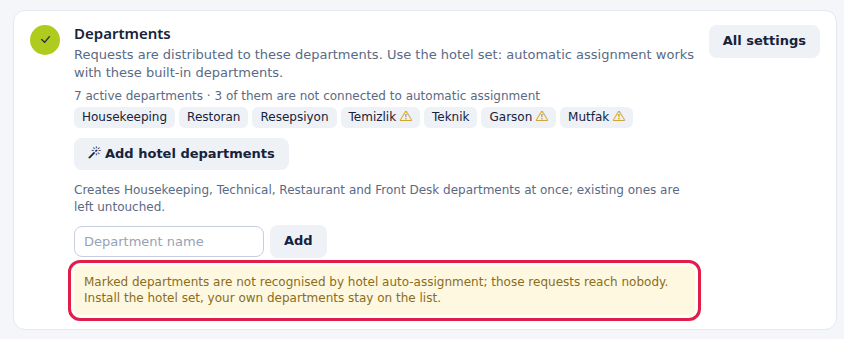
- Departments. Click Add hotel departments: Housekeeping, Technical, Restaurant and Front Desk are created at once and existing ones are left untouched. Automatic assignment only recognises these built-in departments. Your own departments get a yellow triangle, and the card says "3 of them are not connected to automatic assignment" plus "Marked departments are not recognised by hotel auto-assignment; those requests reach nobody. Install the hotel set, your own departments stay on the list." What to do: click Add hotel departments; your own departments are not deleted.
- Rooms. A guest request is tied to a room. For numbered rooms type the first and last number in Room range (for example
101and120creates 20 rooms; max 300 at once) and click Create rooms. For names with letters (A101,Suite-3,Lobby) type one name per line in the large box below, or paste the room column from Excel (max 500 at once), and click Add list.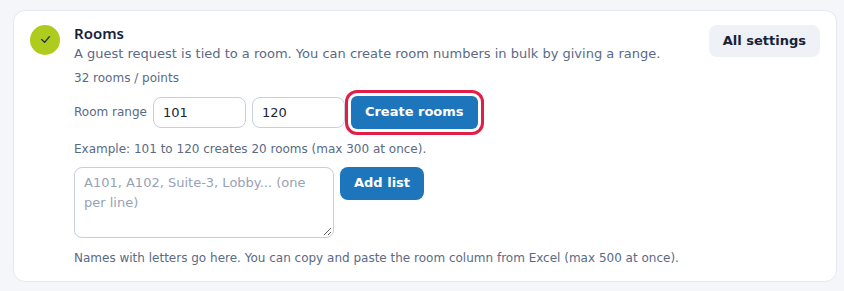
- Staff. Same form as step 4 in restaurant mode. At least one manager is required.
- Assignment rules (optional). Choose which request type goes to which department: the type on the left (Room Cleaning, Extra, Malfunction, Room Service, Late Check-out, Early Check-in), the department on the right (Housekeeping, Technical, Restaurant, Front Desk), then Add. Without a rule the request waits in the pool.

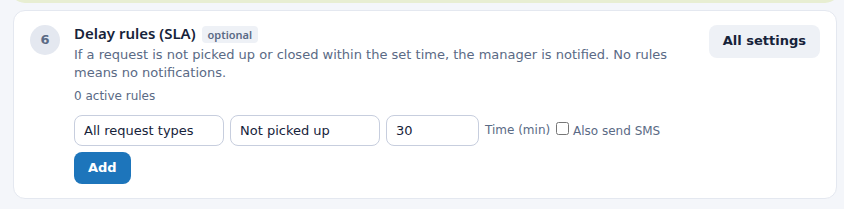
- Delay rules (SLA) (optional). In hotels a rule is set per request type, not per department: All request types, Room Cleaning, Malfunction or Room Service. Stage, Time (min) (default 30) and Also send SMS work as in restaurants.
- Guest portal card. Guests open this address from the QR code in the room and create requests (
https://menu.useroam.com/o/...). If the hotel module is off, it says "The hotel module is currently off: guests cannot see this page." Print QR codes opens the Guest Portal settings and Edit appearance opens the hotel Studio. Below, the number of request types guests can choose is shown.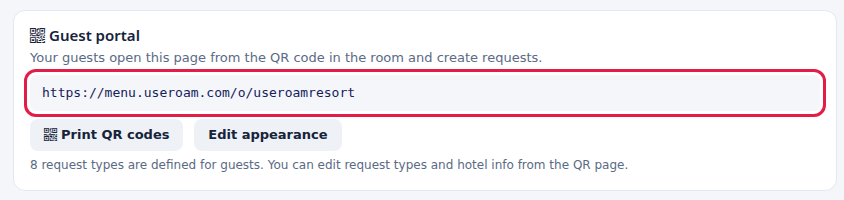
- Verify the setup and the final card work as in restaurant mode; here the test record goes to a room called TEST, in closed state. When done click Go to hotel panel.
Every field and button
| Field / Button | What it does | Example |
|---|---|---|
| Restaurant Portal / Hotel Portal | Switches wizard mode when the venue has both modules. | - |
| Business name + Create | Creates the profile in step 1 (only while there is none). | Sea Cafe |
| Department name + Add | Adds one department. | Bar |
| Add restaurant departments | Creates Cleaning, Technical, Waiter, Kitchen. | - |
| Add hotel departments | Creates Housekeeping, Technical, Restaurant, Front Desk. | - |
| Request type row: department box + Save | Changes the type's department. With No department the request reaches nobody. | Waiter |
| e.g. Take order + department + Add | Adds a new request type. | Refill water |
Name, Last Name, phone (5xxxxxxxxx) | New staff details. The phone number is the app sign-in name. | Zeynep, Demir, 5321234567 |
| Role box | Manager (manages staff + assignments) or Staff (handles requests/orders). | Staff |
| Department(s): boxes | The departments the person works in; they decide which jobs the person sees in the app. | Waiter |
| SLA: department / type, stage, Time (min), Also send SMS, Add | Adds a delay rule. Not picked up: nobody takes the job; Not completed: the job is not finished. | All departments, Not picked up, 15 |
| Room range + Create rooms | Creates numbered rooms in bulk (max 300). | 101 - 120 |
| Room list box + Add list | Adds room names with letters line by line (max 500). | A101 |
| Assignment rule: type → department + Add | Sets the department for a hotel request type. | Malfunction → Technical |
| All settings / Edit / Edit tasks | Opens the full screen for the step. | - |
| Edit menu / Create digital menu | Opens the QR menu editor or the Online Menu list. | - |
| Print QR codes / Edit appearance | Hotel: opens Guest Portal settings / hotel Studio. | - |
| Create test request | Writes a closed sample request; triggers no notification. | - |
| Delete test record (1) | Deletes the wizard's test records (other requests are untouched). | - |
| Go to restaurant panel / Go to hotel panel | Opens the module's main screen. | - |
Messages you may see
| Message | Meaning and what to do |
|---|---|
| 3 of 4 required steps completed. | Finish the step with the green frame. |
| Test request created. You can see it under Requests in the panel and in the mobile app. | The test worked. Use the Closed filter on Requests. |
| 1 test record(s) deleted. | Test records were removed. |
| ... of them have no department: those requests cannot be routed | In step 3 choose a department for those types and click Save. |
| ... of them are not connected to automatic assignment (hotel) | Click Add hotel departments. |
| The menu is currently closed: guests cannot see it. | In the menu editor, turn on Menu Settings → Menu published. |
| The hotel module is currently off: guests cannot see this page. | Turn on Hotel Portal in Settings → Module Permissions. |
| You can view this page, but changes require an account administrator or a venue manager. | Ask your account administrator for access, or let them fill in the forms. |
| 12 records already created in this venue. | For information: the number of requests and task records in the venue (test records excluded). |
| An error from a form (for example "Request type name cannot be empty.") | Shown in a red box at the top. Fill in the missing field and try again. |
Other on-screen texts
The hints, counters, waiting and status texts below appear on screen as written (numbers and names are examples; "..." is replaced with your data).
- Your hotel name and guest portal code are created here.
- Requests are distributed to these departments. Use the hotel set: automatic assignment works with these built-in departments.
- Add department
- ... rooms / points
- ... staff · ... managers
- ... active rules
- Add rule
- Your venue name and guest portal code are created here.
- What a guest can request from the portal (Call waiter, Ask for bill, Cleaning, Fault).
- ... active types
- Add type
- Restaurant module setup
- ... of ... required steps completed.
- Creates Housekeeping, Technical, Restaurant and Front Desk departments at once; existing ones are left untouched.
- Example: 101 to 120 creates 20 rooms (max 300 at once).
- A101, A102, Suite-3, Lobby... (one per line)
- Names with letters go here. You can copy and paste the room column from Excel (max 500 at once).
- Each request type is linked to a department; new requests go to that department's staff.
- Your guests open this page from the QR code in the room and create requests.
- ... request types are defined for guests. You can edit request types and hotel info from the QR page.
- Your guests reach your menu at this address. The QR code on the tables points here.
- If you want a digital menu with a QR code, you can create one here. It is optional.
- Creates a sample request so you can confirm it appears in the panel and the mobile app.
- You can reopen this page at any time; the status is recalculated from your data every time.
Frequently asked questions
I finished the wizard. Will opening it again reset anything?
No. The wizard never resets anything; it only looks at your data and shows what is missing. If you later delete something, that step shows as missing again.
I added a staff member but no password arrived.
Make sure you typed the number as 10 digits without the leading 0 (for example 5321234567). The password goes by SMS if your panel is in Turkish and by WhatsApp if in English. To give a new password, edit the person on the Staff screen.
Why is the test request not among waiting requests?
It is created closed on purpose so nobody gets notified. It shows under the Closed or All filter.
Where is the guest request page for my restaurant?
For restaurants the guest surface is the QR menu: the table QR opens the menu, and from there guests can call a waiter, request the bill and (if enabled) order. That is why the wizard shows the QR menu at the end.
I have a hotel and a restaurant. Do I run the wizard twice?
Yes, each mode has its own steps; switch with the buttons at the top. Departments and staff are shared by both modes, so add them once.